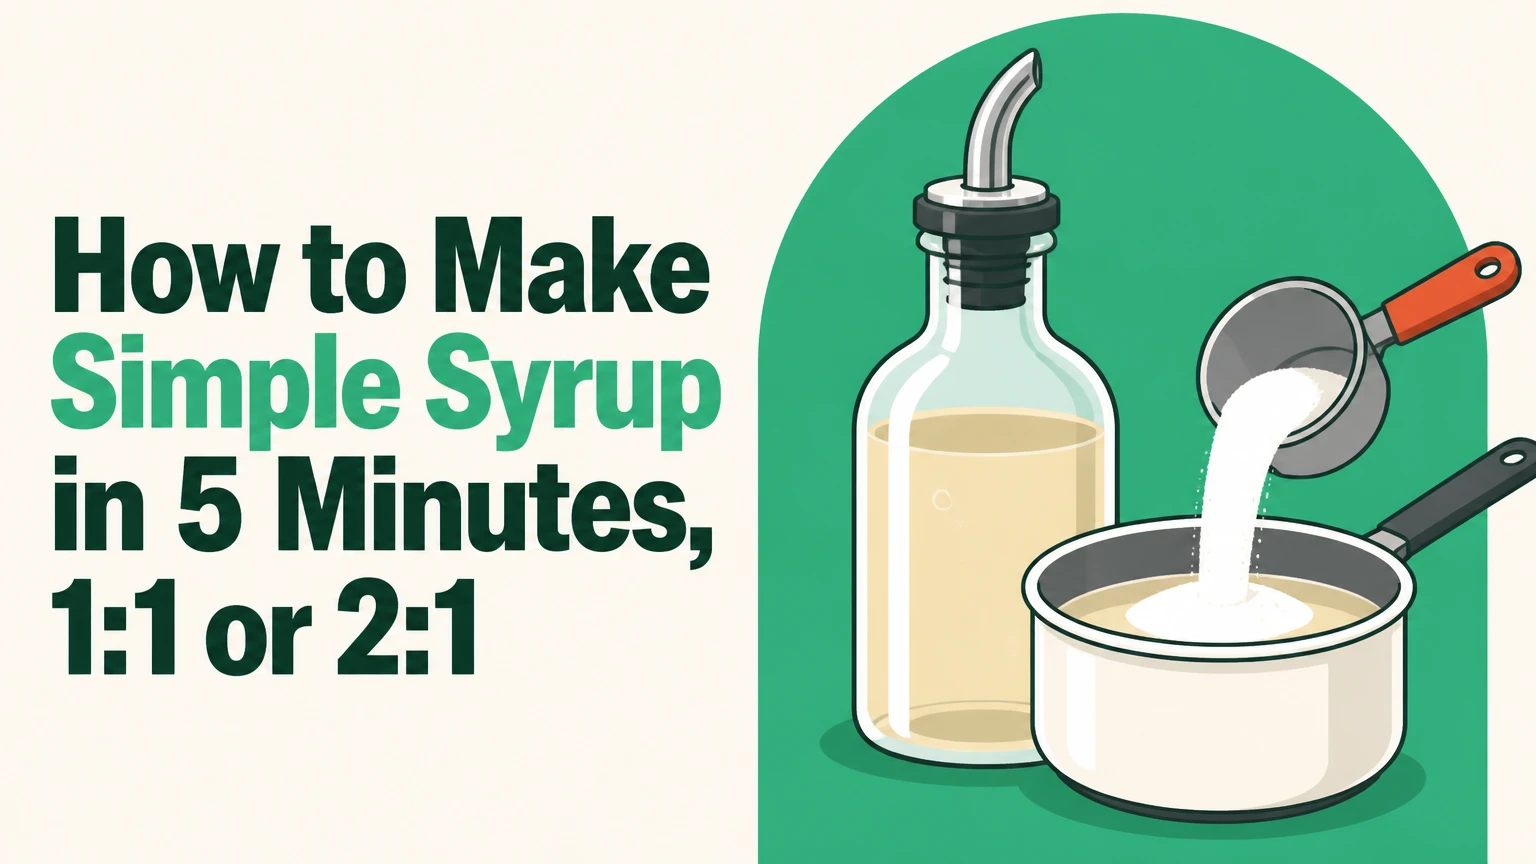
Simple syrup is made by dissolving sugar in water until the crystals disappear, then cooling and refrigerating the clear liquid. Use equal parts sugar and water for a versatile 1:1 syrup, or two parts sugar to one part water for a sweeter, thicker 2:1 syrup. The hot method is the most reliable.
Key Facts
A standard simple syrup uses a 1:1 ratio, such as 200 g sugar and 200 g water.
A rich syrup uses a 2:1 sugar-to-water ratio and contains less water per spoonful.
The hot method usually takes 2-5 minutes of heating and 20-30 minutes of cooling.
Refrigerated homemade syrup typically lasts 2-4 weeks when strained and stored in a clean, sealed container.
Simple syrup costs typically less than $0.50 per small batch when made with granulated sugar and tap water.
Never keep fresh herbs, fruit pieces, or citrus pulp in the storage bottle because organic solids shorten shelf life.
What Is Simple Syrup?
Simple syrup is a liquid sweetener made from sucrose and water. Bartenders use it in cocktails because dissolved sugar distributes evenly through cold liquids, while coffee makers, bakers, and tea drinkers use it to sweeten drinks or moisten cakes without undissolved crystals.
Granulated sugar can dissolve in cold water, but the process is slower and less complete in a finished drink. A prepared syrup lets you control sweetness before serving. The syrup also changes texture: a 2:1 mixture contributes more body than a 1:1 mixture because each spoonful contains more dissolved sugar and less water.
Why Does Heat Help Sugar Dissolve?
Heat speeds dissolution by increasing molecular movement in the water and helping sucrose separate from its crystal structure. Sugar does not need to boil, however. Gentle heating is enough to produce a clear syrup while limiting water loss and reducing the risk of an unintentionally concentrated batch.
A covered or lightly heated saucepan also reduces evaporation. Boiling simple syrup changes the planned ratio because water leaves as vapor while sugar remains behind. That matters in cocktails, where an extra teaspoon of water can alter balance, dilution, and final volume.
What Do You Need Before You Start?
A small saucepan, heat-safe spoon, kitchen scale or measuring cups, fine-mesh strainer, and clean jar are sufficient for a basic batch. A kitchen scale gives more repeatable results because equal volumes of sugar and water do not have equal mass.
| Item | Practical amount | Purpose |
|---|---|---|
| White granulated sugar | 200 g, about 1 cup | Sweetener |
| Water | 200 g, about 200 ml | Solvent |
| Small saucepan | 1 saucepan, 1-2 qt capacity | Gentle heating |
| Storage jar | 12-16 fl oz, clean and lidded | Refrigerated storage |
| Fine-mesh strainer | 1, 2-4 inch sieve | Removing infusion solids |
The batch above produces approximately 250-300 ml of 1:1 syrup after minor transfer loss. A rich syrup made with 400 g sugar and 200 g water produces approximately 350-400 ml, depending on sugar density and handling.
How to Make Simple Syrup
The hot method takes about 1 minute to measure, 2-5 minutes to dissolve, and 20-30 minutes to cool. Combine equal weights of sugar and water, heat gently until clear, cool completely, and refrigerate in a clean sealed container.
Step 1: Measure the Sugar and Water
Measure 200 g sugar and 200 g water for a standard 1:1 batch. If you are using cups, use 1 cup granulated sugar and 1 cup water, but weigh both ingredients when consistency matters.
Place both ingredients in a small saucepan before turning on the heat. Starting with the ingredients together prevents dry sugar from scorching against a hot pan.
You will know this step worked when: the sugar is fully measured and no dry crystals remain on the pan’s sides.
Common mistake: treating “equal parts” as equal volume for every sugar type. Packed brown sugar, loose granulated sugar, and coarse demerara do not occupy cups identically, so weight is the better standard.
Step 2: Heat Gently
Set the saucepan over low to medium-low heat. Warm the mixture for 2-5 minutes, stirring every 20-30 seconds, until the liquid becomes clear and no crystals remain.
Do not bring standard syrup to a vigorous boil. A brief simmer will not automatically ruin the batch, but prolonged boiling evaporates water and increases sugar concentration beyond the intended ratio.
You will know this step worked when: the spoon moves through a clear liquid without gritty resistance, and no sugar crystals cling to the pan wall.
Common mistake: using high heat to save seconds. High heat can create hot spots, promote browning in unrefined sugars, and make the final syrup thicker than planned.
Step 3: Remove the Syrup From Heat
Take the saucepan off the burner as soon as the sugar dissolves. Add vanilla, cinnamon, ginger, or citrus peel at this stage if you want a controlled infusion without prolonged cooking.
Fresh mint and basil benefit from steeping in hot syrup rather than boiling. Keep delicate herbs in the warm liquid for 10-15 minutes, then strain them out.
You will know this step worked when: the syrup is clear or evenly colored, with no active bubbling across the surface.
Common mistake: leaving infusion ingredients in the pan while the syrup continues to heat. Long exposure can make mint taste dull, citrus pith bitter, and ginger excessively hot.
Step 4: Cool the Syrup Completely
Cool the syrup in the saucepan for 20-30 minutes, or place the pan in a shallow cold-water bath to shorten the cooling period. Avoid sealing a very hot syrup in a jar because trapped steam condenses and adds water to the mixture.
Do not place a boiling-hot glass jar into cold water. Thermal shock can crack ordinary glass. Transfer warm syrup only to a heat-safe container, or wait until it reaches room temperature.
You will know this step worked when: the syrup feels room temperature, not warm, and condensation is absent from the inside of the storage container.
Common mistake: judging thickness before cooling. Simple syrup becomes slightly more viscous in the refrigerator, so a warm batch will seem thinner than the finished product.
Step 5: Strain, Bottle, and Refrigerate
Strain flavored syrup through a fine-mesh sieve before transferring it to a clean, sealable glass bottle or jar. Label the container with the syrup type and preparation date, then refrigerate it at 40°F or below.
The U.S. Department of Agriculture advises keeping a refrigerator at “40°F or below” for safe cold storage. Refrigeration slows microbial growth, but it does not make contaminated syrup safe or preserve fresh fruit indefinitely.
You will know this step worked when: the bottle is sealed, dated, free of solids, and stored on a refrigerator shelf rather than at room temperature.
Common mistake: pouring syrup into a container that still contains soap residue, food debris, or an old sticky film. Wash the container thoroughly, rinse it, and allow it to drain before filling.
Which Ratio Should You Use?
Use 1:1 syrup for iced tea, lemonade, coffee, cakes, and cocktails that already contain substantial water or ice dilution. Use 2:1 rich syrup for spirit-forward drinks when you want sweetness and body with less added water.
| Syrup type | Sugar and water by weight | Approximate yield | Best applications |
|---|---|---|---|
| Standard 1:1 | 200 g sugar + 200 g water | 250-300 ml | Iced tea, sours, coffee, cake |
| Rich 2:1 | 400 g sugar + 200 g water | 350-400 ml | Old Fashioned, stirred drinks |
| Small 1:1 | 100 g sugar + 100 g water | 125-150 ml | One or two home batches |
| Small 2:1 | 200 g sugar + 100 g water | 175-200 ml | Occasional bar use |
The ratio describes the starting ingredients, not a promise that the final syrup contains exactly the same volume. Sugar dissolves into the water and changes the total volume, while heating can remove some water through evaporation.
Standard 1:1 Syrup
Standard syrup has a light texture and moderate sweetness. A typical cocktail recipe uses 5-15 ml, while iced coffee may need 15-30 ml depending on the drink volume and added milk.
The 1:1 ratio is the most forgiving choice for first batches. It pours easily through a narrow bottle, mixes quickly with cold liquids, and contributes less concentrated sweetness than rich syrup.
Rich 2:1 Syrup
Rich syrup contains twice as much sugar as water by weight. It is thicker and sweeter per milliliter, so recipes usually require a smaller dose, often 5-10 ml rather than 15-20 ml.
Rich syrup can crystallize if sugar crystals remain on the pan wall or if evaporation raises the concentration too far. Warm it gently with 1-2 tablespoons of water if crystals develop, then cool and refrigerate it again.
Is the Hot Method Better Than the Cold Method?
The hot method is better for routine batches because heat dissolves sugar quickly and reduces the initial microbial load on the liquid and container. The cold method is useful when you need a stove-free process or want to avoid heating delicate fresh herbs, but it demands more agitation and usually has a shorter storage life.
| Method | Active time | Typical shelf life | Best feature | Main limitation |
|---|---|---|---|---|
| Hot saucepan | 2-5 minutes | 2-4 weeks for 1:1 | Fast, consistent dissolution | Can damage delicate aromatics |
| Cold jar shake | 5-10 minutes | 1-3 weeks | No stove required | More effort, less heat sanitation |
| Cold blender | About 60 seconds | 1-3 weeks | Rapid agitation | Adds air and may foam syrup |
| Warm infusion | 10-15 minute steep | 1-2 weeks with fresh solids | Strong aromatic extraction | Requires careful straining |
For the cold method, combine equal weights of sugar and water in a clean jar, seal it, and shake until no crystals remain. A blender can dissolve the mixture in about 60 seconds, but the syrup should rest until foam settles before bottling.
Cold processing is not automatically safer because no heating step reduces contamination on the ingredients or equipment. Make only the amount you can use promptly, keep it refrigerated, and discard it at the first sign of mold, fermentation, or an unusual odor.
Which Sugar or Sweetener Works Best?
White granulated sugar is the best default when you want a clear syrup with neutral flavor. Demerara, turbinado, and brown sugar add molasses and caramel notes, while honey, maple syrup, and agave are usually diluted rather than treated as direct substitutes for sucrose syrup.
| Base sweetener | Typical ratio | Color and flavor | Best pairing |
|---|---|---|---|
| White granulated sugar | 1:1 or 2:1 | Clear, neutral | Gin, vodka, tea, lemonade |
| Light brown sugar | 1:1 | Light amber, molasses | Cold brew, oatmeal, autumn drinks |
| Dark brown sugar | 1:1 | Dark amber, strong molasses | Rum, coffee, baked fruit |
| Demerara or turbinado | 1:1 or 2:1 | Amber, caramel, toffee | Old Fashioned, tiki drinks |
| Honey | 2:1 honey to water | Gold, floral | Tea, whiskey, lemon drinks |
| Maple syrup | 2:1 maple to water | Brown, woody | Pancakes, coffee, bourbon |
| Agave nectar | 3:1 agave to water | Pale, mild | Margaritas, iced tea |
Honey, maple, and agave already contain water, so their dilution ratios are approximate rather than equivalent to a sucrose 1:1 formula. Begin with two parts sweetener and one part water, taste the result, and add water in 5 ml increments if the pour remains too thick.
Colored sugars can overpower delicate drinks. Demerara syrup works well in rum and whiskey cocktails, but white syrup is a safer choice for clear gin drinks, green tea, and pale lemonade.
How to Make Infused Syrup
Infused syrup is made by steeping herbs, spices, citrus peel, or fruit in warm finished syrup, then removing all solids before storage. Steep fresh herbs for 10-15 minutes, simmer hard spices briefly, and strain fruit preparations through a fine sieve.
Use the following starting quantities for a 250-300 ml batch:
- Mint or basil: 10-15 g fresh leaves, steeped 10 minutes.
- Rosemary: one 10 cm sprig, steeped 10-15 minutes.
- Cinnamon: one 7-8 cm stick, steeped 15-30 minutes.
- Fresh ginger: 15-25 g thinly sliced, steeped 15-20 minutes.
- Vanilla: half a split bean, steeped 30-60 minutes.
- Citrus peel: strips from one lemon or orange, steeped 10-20 minutes.
- Berries: 75-100 g crushed fruit, steeped 20 minutes and strained.
Avoid squeezing herb leaves or citrus pith aggressively through the strainer. Pressure extracts bitter plant compounds and increases sediment, which can shorten storage life.
Fresh fruit syrup is more perishable than plain syrup because fruit introduces water, nutrients, and microorganisms. Refrigerate it immediately and use it within about 7-14 days for best quality.
How Long Does Simple Syrup Last?
Plain 1:1 syrup typically lasts 2-4 weeks in a clean, sealed container at 40°F or below. Plain 2:1 syrup often lasts 1-3 months under the same conditions, but a six-month shelf life is not guaranteed in a home kitchen because sanitation, evaporation, and contamination vary.
| Batch condition | Typical refrigerated life | Storage requirement | Discard trigger |
|---|---|---|---|
| Plain 1:1, hot-made | 2-4 weeks | Clean sealed jar, 40°F or below | Mold, odor, bubbles |
| Plain 2:1, hot-made | 1-3 months | Clean sealed jar, minimal contamination | Crystals with spoilage signs |
| Cold-process 1:1 | 1-3 weeks | Immediate refrigeration | Cloudiness, fermentation |
| Herb or spice infusion | 1-3 weeks | Solids strained out | Sediment, mold, sour odor |
| Fresh fruit infusion | 7-14 days | Fine-strained and chilled | Surface growth, gas, off odor |
USDA refrigerator guidance supports cold storage at 40°F or below, but temperature alone cannot correct poor sanitation. Do not taste a syrup to test whether moldy or fermented syrup is safe. Discard the entire batch if you see mold, feel pressure when opening the container, detect alcoholic or sour aromas, or notice unexplained cloudiness.
Do not add vodka as a guaranteed preservative. A small amount of high-proof alcohol may affect flavor, but it does not replace refrigeration, clean equipment, or a validated preservation process.
Why Did Simple Syrup Turn Cloudy or Crystallize?
Cloudiness usually indicates undissolved sugar, mineral residue, contamination, or particles from an infusion. Crystallization usually results from excess concentration, evaporation, pan-wall crystals, or cooling a rich syrup around a seed crystal.
For cloudy plain syrup, warm it gently and inspect the bottom of the jar for sediment. If the syrup smells normal and the issue is clearly undissolved sugar, a fine strain can help. If cloudiness appears with bubbles, sourness, mold, or pressure, discard the batch.
For crystallized syrup, return it to a saucepan with 1-2 tablespoons of water per cup of syrup. Warm it over low heat until clear, rinse sugar from the pan sides with a wet pastry brush, and avoid vigorous boiling.
Expert Rules That Prevent Most Failures
- Measure by weight when repeating a recipe. Equal masses produce a more reproducible ratio than equal cups, especially with coarse or packed sugars.
- Stop heating at clarity, not at a target boil. Dissolution is the goal; evaporation is an uncontrolled ratio change.
- Strain before storage, not before serving. A mint leaf left in the bottle can spoil the whole batch even when the syrup itself was properly made.
- Make smaller batches for flavored syrup. A 125 ml batch used within a week is safer and fresher than a 750 ml bottle stored for a month.
How Should You Use Simple Syrup?
Simple syrup works best when a recipe needs evenly distributed sweetness in a cold or already-mixed preparation. The correct quantity depends on the drink’s acidity, dilution, base spirit, and existing sugar.
| Use case | Starting amount | Syrup type | Adjustment |
|---|---|---|---|
| Iced coffee, 350 ml | 15-30 ml | 1:1 | Add 5 ml for bitter dark roast |
| Iced tea, 350 ml | 15-25 ml | 1:1 | Increase for unsweetened black tea |
| Whiskey Old Fashioned | 5-10 ml | 2:1 | Use less with sweet vermouth |
| Lemon sour, 120 ml | 15-20 ml | 1:1 | Balance against lemon acidity |
| Cake layer, 23 cm | 30-60 ml | 1:1 | Brush lightly between layers |
| Fresh lemonade, 1 liter | 120-180 ml | 1:1 | Taste after adding ice |
Simple syrup is not always the best sweetener. Granulated sugar works well in hot tea, powdered sugar can suit quick frostings, honey adds aroma to tea, and maple syrup is better when its flavor is part of the intended recipe.
Simple syrup also is not a substitute for a sugar syrup formulated for candy making. Confectionery recipes depend on exact temperature and concentration, so a casually boiled kitchen syrup will not reliably produce caramel, fondant, or hard candy.
How Much Time, Syrup, and Money Does It Take?
A small homemade batch typically costs $0.15-$0.50, takes 2-5 minutes of active heating, and yields enough syrup for roughly 15-30 cocktail servings depending on dosage. Cooling is the longest passive stage, usually 20-30 minutes.
| Batch | Ingredient cost, typical | Active preparation | Approximate yield |
|---|---|---|---|
| 100 g 1:1 | $0.08-$0.20 | 2-3 minutes | 125-150 ml |
| 200 g 1:1 | $0.15-$0.35 | 3-5 minutes | 250-300 ml |
| 400 g 2:1 | $0.30-$0.60 | 4-6 minutes | 350-400 ml |
| 250 ml infused | $0.40-$2.00 | 15-30 minutes | 200-275 ml |
The wide infused-syrup range comes from the flavoring. A cinnamon stick costs less than fresh berries, vanilla beans, or specialty demerara sugar.
Frequently Asked Questions
Can I Make Simple Syrup Without Heat?
Yes. Combine equal weights of sugar and water in a clean, sealable jar and shake for 5-10 minutes, or blend for about 60 seconds. Cold-process syrup requires immediate refrigeration and usually lasts 1-3 weeks, which is shorter than a carefully prepared hot-process plain syrup.
Should I Use Equal Parts Sugar and Water by Volume or Weight?
Use equal parts by weight for the most repeatable result: 200 g sugar with 200 g water produces a 1:1 starting ratio. Equal cups are convenient for home use, but sugar and water have different densities, so volume measurements do not represent equal mass.
Can Simple Syrup Sit at Room Temperature?
Simple syrup should not be stored at room temperature for routine home use. Refrigerate it in a clean, sealed container at 40°F or below, and discard syrup that develops mold, gas, cloudiness with an off odor, or fermentation. Short service periods are different from long-term storage.
Can I Freeze Simple Syrup?
Yes. Freeze plain syrup in a labeled airtight container, leaving expansion space, or portion it into ice-cube trays for drinks. Thaw it in the refrigerator, stir thoroughly, and use it promptly because freezing does not eliminate contamination introduced before storage.
Why Is My Syrup Too Thick?
Syrup becomes too thick when excessive water evaporates or when a 2:1 ratio is used where 1:1 was expected. Warm the syrup gently and stir in water 5-15 ml at a time until the texture matches the intended use, then cool and refrigerate it.
Is Simple Syrup Safe for Babies?
Homemade syrup is added sugar and is not appropriate for infants under 12 months. The Centers for Disease Control and Prevention advises avoiding added sugar for young children, and honey must not be given to babies under 12 months because of infant botulism risk.
The Bottom Line
To make simple syrup, combine 200 g sugar with 200 g water, heat gently for 2-5 minutes until clear, cool for 20-30 minutes, strain if flavored, and refrigerate in a clean sealed jar. Choose 1:1 simple syrup for general cooking and drinks, or 2:1 rich syrup when you need concentrated sweetness and greater body.