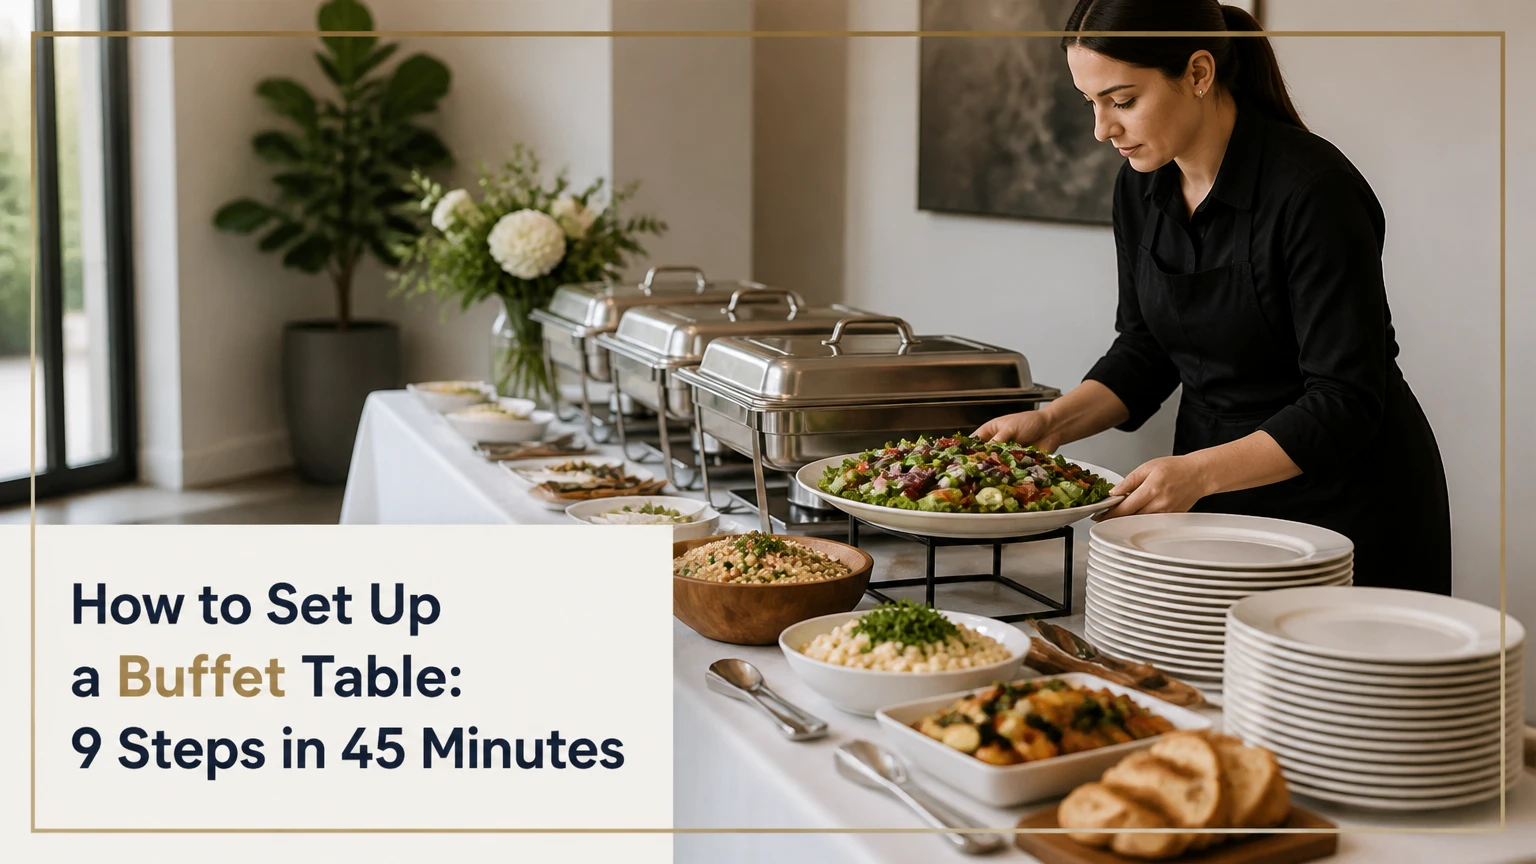
A buffet table works best when guests move in one direction from plates to food, then to cutlery, napkins, drinks, and seating. Set up the table near the kitchen or replenishment area, place lighter foods before heavier entrées, keep hot and cold foods at safe temperatures, and separate slow-serving items that create queues.
Key Facts at a Glance
Put dinner plates at the start of a one-way buffet line, and place cutlery and napkins near the exit.
Allow 36-48 inches of guest clearance around a freestanding buffet table.
A typical 6-foot table holds about 3-4 full-size chafing dishes, while an 8-foot table holds about 4-5.
Keep hot food at 140°F or above and cold food at 41°F or below during service.
Plan one dinner plate per guest plus 10-20% extra replacements.
Put beverages, desserts, and condiments on separate tables when they could slow the meal line.
What Makes a Buffet Table Work?
A buffet table is a planned self-service station that combines food, dinnerware, serving utensils, labels, decorations, and temperature-control equipment. The setup succeeds when the physical order matches the guest’s decisions: pick up a plate, choose food, add condiments, collect utensils, and leave without reversing direction.
The most important design principle is separation of actions. Guests should not choose drinks while holding a full dinner plate, and they should not reach across a hot chafing dish for a label or serving spoon. A practical buffet is therefore a small service system, not simply food placed on a long table.
Before You Start
Use the following planning box for a typical home or small catered buffet. Adjust quantities upward when guests may return for seconds or when the event lasts more than two hours.
| Planning item | Typical requirement | Planning note |
|---|---|---|
| Setup time | 35-60 minutes | Add 20 minutes for stations or live carving |
| Difficulty | Moderate | Temperature control and traffic flow require attention |
| Table length | 6-8 feet per line | Use a second line above 50-60 guests |
| Dinner plates | 1.1-1.2 per guest | Reserve 10-20% for replacements |
| Napkins | 1.5-2 per guest | Use 2 for saucy or outdoor meals |
| Serving utensils | 1 per dish, plus 2 spares | Match tongs to solids and ladles to liquids |
| Typical DIY cost | $50-$150 | Linens, labels, risers, disposable utensils |
| Rental-heavy cost | $300-$800 | Chafers, serving pieces, linens, and fuel |
Measure the room before selecting the table. A 30-inch-wide banquet table with 42 inches of guest clearance requires approximately 9 feet of total width when guests need access from both sides. Keep doorways, fire exits, refrigerator doors, and accessible routes unobstructed.
Step 1: Plan the Traffic Flow
Place the buffet entrance nearest the dining area or room entry, and point the exit toward seating so guests do not cross back through the queue. For more than 50-60 guests, use two parallel lines or a double-sided table when the room provides at least 48 inches of clearance on every active side.
Test the route with an empty plate before setting food. Walk from the entrance to the seating area while carrying it at waist height, then identify where guests will pause, turn, or reach across one another. Put the buffet near the kitchen or catering staging area, but do not place it directly in a doorway or beside a restroom entrance.
Which Layout Fits the Guest Count?
| Buffet layout | Typical capacity | Space requirement | Best use |
|---|---|---|---|
| Single-sided linear | 10-50 guests | 36-48 inches in front | Home lunches and formal dinners |
| Double-sided central | 50-150 guests | 48 inches on each long side | Large banquets with one menu |
| Station-based | 75-300 guests | 3-5 food zones | Mixed menus and dietary separation |
| Cocktail buffet | 15-100 guests | 30-36 inches around each table | Finger foods and standing receptions |
A single line moves about 3-4 guests per minute under typical conditions, while two active sides may process roughly 6-8 guests per minute. These are practitioner planning estimates, not universal performance guarantees. Serving utensils, menu complexity, and carving stations can reduce those rates sharply.
Step 2: Place Dinnerware at the Start
Put dinner plates at the first point in the line, with the plate surface facing upward and the stack stable on a flat table section. Keep a working stack around 10-15 plates high, and store the remaining plates on a nearby side table so the line does not become crowded.
Small plates work better for appetizers, desserts, or a cocktail reception. Use larger 10-12-inch dinner plates for meals with multiple sides because guests naturally fill the available surface area. If guests must carry a plate more than 20 feet before reaching a table, add a second plate stack near the seating zone.
Place cutlery and napkins after the final food item. The arrangement prevents guests from balancing forks and knives while serving salad, gravy, or a heavy entrée. For a formal dinner, napkins may already sit at place settings, which removes them from the buffet line entirely.
Step 3: Sequence the Menu by Guest Decisions
Arrange food from light and cold to heavy and hot: salads and appetizers first, vegetables and starches next, main entrées afterward, then sauces or garnishes that belong with the final dishes. Put bread where it will not compete with the main meal, and place dessert on a separate table whenever possible.
The sequence should also reflect plate stability. Watery salad, soup, or delicate appetizers near the beginning can make plates difficult to carry, so use shallow serving bowls and controlled portions. Put expensive proteins later in the line, where guests have less room to overfill a plate before reaching them.
A typical dinner sequence looks like this:
- Plates and optional small appetizer plates.
- Green salad, cold vegetables, and chilled appetizers.
- Bread, rolls, rice, potatoes, pasta, or other starches.
- Cooked vegetables and substantial side dishes.
- Main proteins, such as chicken, roast beef, fish, or lasagna.
- Matching gravy, dressing, salsa, or sauce.
- Cutlery, napkins, and a hand-sanitizing option.
Avoid placing all sauces in one container cluster at the end. Ranch dressing belongs beside salad, gravy belongs beside meat and potatoes, and taco toppings belong at the taco station. A nearby secondary toppings table is preferable when several guests need the same condiments.
Step 4: Divide Slow and Fast-Serving Foods
Keep foods that require simple scooping or tong service on the main line, and move foods that require explanation, carving, spreading, or customization to separate stations. A carving roast, omelet pan, waffle maker, or elaborate dessert display can delay every guest behind it.
Use identical menu items on both sides of a double-sided buffet. Mirroring only the plates while leaving one popular entrée on one side creates an uneven queue. For a station-based arrangement, duplicate high-demand basics such as rice, salad, or bread instead of duplicating every dish.
Linear Versus Station-Based Service
| Decision factor | Linear buffet | Station-based buffet |
|---|---|---|
| Typical footprint | One 6-8-foot table | 3-6 tables or zones |
| Staffing need | 0-2 attendants | 1 attendant per active station |
| Guest movement | 3-4 guests per minute | 6-10 guests can distribute across zones |
| Menu suitability | One consistent meal | Tacos, desserts, dietary or carving zones |
| Main failure | One bottleneck blocks the line | Guests miss a station or circulate backward |
| Typical setup cost | $50-$800 | $300-$5,000 or more |
A linear buffet is usually the better choice for a home host because it uses less floor space and is easier to explain. Station-based service is better for a large event when the menu contains independent categories and the room can support clear signs.
Step 5: Add Height Without Creating Risk
Raise selected dishes 2-6 inches with sturdy risers, tiered platters, or covered boxes placed beneath the tablecloth. Put elevated items toward the back of the table, keeping heavy chafing dishes and liquid-filled bowls on the lowest, most stable surface.
Height improves visibility and creates room beneath smaller platters, but it does not make an unstable stand safe. Test every riser by pressing lightly against its front edge, then check that a guest can remove the serving utensil without pulling the dish forward.
Keep hot equipment away from the front edge and from children’s eye level. Leave at least 12 inches between an open flame or hot lid and flammable paper decorations. For wheelchair users, place at least one serving route with food surfaces approximately 28-34 inches high and keep utensils within comfortable reach.
Practitioner Insight: Do Not Elevate Everything
A buffet looks more organized when only two or three visual anchors are raised. Elevating every dish increases spill risk, makes labels harder to read, and can force shorter guests to reach over hot pans. Put the tallest items at the rear, not in front of the most frequently selected food.
Step 6: Label Every Dish Clearly
Place a typed or neatly printed label directly in front of each dish, using the common food name rather than a decorative title alone. Add dietary information such as vegetarian, vegan, contains peanuts, gluten-free, or contains dairy when the claim has been verified from ingredients and preparation.
Use tent cards or small clips that remain outside the food area. Labels should be readable from 2-3 feet away and should not rest on a hot lid. For a formal buffet, match the label paper to the menu card, but prioritize contrast and legibility over decoration.
Separate allergen-sensitive food from ordinary dishes when cross-contact is possible. A gluten-free salad placed beside wheat rolls is not automatically safe if guests use the same serving spoon. Provide dedicated utensils and place the allergen-sensitive station before the general line or on a clearly marked side table.
Step 7: Control Hot and Cold Food Temperatures
Hold hot buffet food at 140°F or above and cold food at 41°F or below, using chafing dishes, insulated carriers, ice beds, or refrigerated equipment. The U.S. Department of Agriculture Food Safety and Inspection Service states, “Keep hot foods hot and cold foods cold,” because bacterial growth accelerates in the temperature danger zone.
Use a food thermometer rather than judging safety by steam or touch. The FDA Food Code uses 135°F as a hot-holding benchmark for food service operations, while many household food-safety instructions use 140°F; follow the stricter applicable venue, caterer, or local health requirement.
For a water-filled chafing dish, keep approximately 1 inch of hot water in the lower pan and check the water level during service. Sterno fuel must sit beneath the water pan, remain away from tablecloth edges, and be extinguished according to the fuel manufacturer’s instructions.
| Food category | Holding target | Practical equipment | Service control |
|---|---|---|---|
| Roast, chicken, pasta | 140°F or above | Chafing dish or hot box | Replace shallow pans frequently |
| Soup or gravy | 140°F or above | Soup kettle or chafer | Stir and check thickness |
| Green salad | 41°F or below | Ice bowl or chilled tray | Refill in small batches |
| Cut fruit | 41°F or below | Ice tray or refrigerated bowl | Keep covered between refills |
| Cream dessert | 41°F or below | Refrigerated display | Return perishables promptly |
The USDA recommends discarding perishable food left at room temperature for more than two hours, or more than one hour when ambient temperature exceeds 90°F. Outdoor buffets need smaller pans, shade, ice replenishment, and more frequent temperature checks.
Step 8: Replenish With Small, Clean Pans
Prepare backup food before guests arrive, then replace nearly empty pans instead of repeatedly scraping new food into an old pan. A runner should check levels every 10-15 minutes during the busiest period and notify the kitchen when a pan reaches roughly 20% capacity.
Small replacement pans improve temperature control and presentation. They also reduce the amount of food exposed to guests, utensils, air movement, and accidental contamination. Keep backup food covered and at the correct holding temperature until needed.
Write the dish name and any dietary warning on backup containers. The replacement person should be able to identify the pan without asking the cook, especially during weddings, corporate lunches, or events with multiple dietary menus.
Practitioner Insight: A Full Table Can Still Fail
The most common operational mistake is planning the display but not the refill path. Store backup food, clean utensils, fuel, gloves, and towels within a short route of the buffet, while keeping the route outside the guest queue. A beautiful table that requires staff to cross the line will create collisions.
Step 9: Move Drinks, Dessert, and Extras Away
Place beverages on a separate table near seating but outside the food queue, because guests spend more time choosing drinks, adding ice, and opening containers than they spend picking up a roll. Put dessert and coffee on a second table when the meal line has more than 20-30 guests.
Keep water available at the seating area or at both ends of a large room. Beverage placement should not force guests to carry full plates across the path of people still serving food. Use a dedicated trash and recycling point near drinks, but not directly beside fresh food.
For a casual gathering, a sideboard can hold cups, ice, beverages, and stirrers. For a formal banquet, place glassware and wine service at the tables or use attendants, which reduces congestion and prevents spills around hot dishes.
How Much Food and Equipment Should You Plan?
Plan one dinner plate per guest, 1.5-2 napkins per guest, and 1.2 sets of cutlery per guest for a standard meal. Add 10-20% reserve plates and utensils when children, outdoor conditions, seconds, or delayed cleanup could increase replacement needs.
Food quantities depend on the menu, serving style, and whether the buffet is the only meal. A practical starting point is 6-8 ounces of cooked protein per adult, 4-6 ounces of starch, 4-6 ounces of vegetables, and 2-3 ounces of salad, then adjust for appetizers and dessert.
| Guest count | Linear table length | Dinner plates | Napkins | Chafing dishes |
|---|---|---|---|---|
| 12 guests | 6 feet | 14-15 | 24 | 2-3 |
| 25 guests | 8 feet or 2 x 6 feet | 28-30 | 40-50 | 3-5 |
| 50 guests | 2 x 8 feet or stations | 55-60 | 75-100 | 6-8 |
| 100 guests | 2 double-sided lines | 110-120 | 150-200 | 10-14 |
These quantities are typical planning estimates, not fixed catering standards. A buffet centered on roast meat needs different portions from a pasta-and-salad lunch, and a reception with many hors d’oeuvres may require fewer full dinner settings.
What Does a Buffet Setup Cost?
A basic do-it-yourself buffet typically costs $50-$150, a rental-heavy arrangement commonly costs $300-$800, and a premium staffed production can exceed $1,500. The largest cost changes usually come from equipment rental, staffing, linen quality, live cooking, floral design, and temperature-control requirements.
| Setup level | Typical cost | Typical timeframe | Included components |
|---|---|---|---|
| DIY home buffet | $50-$150 | 35-60 minutes | Tablecloth, labels, risers, utensils |
| Rental buffet | $300-$800 | 60-120 minutes | Chafers, linens, platters, fuel |
| Catered banquet | $1,500-$5,000+ | 2-4 hours | Staff, stations, equipment, service |
| Live-action service | $2,000-$7,500+ | 3-5 hours | Carving, omelet, grill, or dessert station |
A host can reduce cost by using one menu line, borrowing serving platters, and placing drinks on a household sideboard. Do not economize on food thermometers, stable hot-holding equipment, or clean replacement utensils.
Common Buffet Mistakes and How to Fix Them
Silverware creates a line blockage
Problem: Guests pick up forks and knives before serving food, then struggle to hold utensils while using tongs.
Fix: Move cutlery and napkins to the end of the line or set them at individual places. Keep a small backup supply at the exit.
One entrée stops everyone
Problem: A carving station, thick stew, or single serving spoon slows the whole table.
Fix: Move the station away from the main line, add an attendant, provide two serving utensils, or divide the food into two pans.
Hot food cools too quickly
Problem: A shallow pan, empty water bath, open draft, or exhausted fuel lowers the temperature.
Fix: Check the center of the food with a thermometer, replace the pan, restore the water bath, block drafts, and record checks during service.
Condiments cause a second queue
Problem: Guests pause at dressing, gravy, taco toppings, or sandwich spreads while the main line continues behind them.
Fix: Place matching sauces beside the relevant dish, or create a clearly signed toppings island 3-6 feet away.
Decorations reduce usable space
Problem: Tall flowers, loose confetti, and candles interfere with labels, serving utensils, and guest reach.
Fix: Use low, stable centerpieces on a separate accent table and keep all combustible decoration away from heat sources.
The exit sends guests backward
Problem: Guests leave the buffet toward the entrance, colliding with people still waiting.
Fix: Rotate the table, move seating, or establish a visible exit path with a sign and at least 36 inches of clearance.
Which Variations Work for Different Events?
A small home gathering usually needs one 6- or 8-foot linear table, a separate beverage surface, and food that holds well, such as baked pasta, roasted vegetables, braised dishes, and chilled salads. Keep the layout compact, but preserve a clear plate-to-seat route.
A formal wedding or corporate banquet benefits from two lines when more than 50-60 guests arrive within a short period. Mirror the menu on both sides, assign a runner to replenishment, and put beverages, dessert, and coffee in separate zones.
An outdoor buffet requires shade, wind protection, weighted tablecloths, covered food, ice or insulated carriers, and shorter exposure periods. Avoid placing paper labels where wind can blow them into food, and keep fuel flames away from dry grass, plastic serving pieces, and loose napkins.
A menu with major dietary restrictions should use separate utensils and visible signs. Place vegetarian, vegan, gluten-free, or allergen-controlled dishes in a defined zone rather than scattering them through the general menu, provided the food-preparation controls support the label.
FAQ
Should a buffet table be against a wall?
A buffet table may sit against a wall when fewer than 30-40 guests use one serving line and the room has a clear entrance and exit. A freestanding table is faster for large groups because guests can serve from both sides, but it requires approximately 48 inches of clearance on each long side.
How many tables do I need for 50 guests?
Plan two 6- or 8-foot tables for 50 guests, or use one double-sided 8-foot table with duplicated food on both sides. One single-sided 8-foot line can work when guests arrive gradually, but it will bottleneck when most guests serve themselves within 15-20 minutes.
Can drinks go on the same buffet table?
Drinks can share a buffet table for a small group of about 10-15 guests, especially when beverages occupy the final section. For larger groups, move drinks to a separate table because ice, cups, lids, refills, and drink customization create longer pauses than ordinary food service.
How do you set up a buffet for children?
Place child-friendly foods on a lower, stable surface and keep hot pans, carving knives, candles, and glassware away from the front edge. Provide smaller plates, short-handled serving utensils, and adult assistance for foods above approximately 34 inches.
How long can food remain on a buffet?
Perishable food should not remain at room temperature for more than two hours, or more than one hour when the surrounding temperature exceeds 90°F, according to USDA guidance. Maintain hot food at 140°F or above and cold food at 41°F or below, checking with a thermometer.
What should go at the end of a buffet?
Put sauces beside the foods they accompany, then place cutlery and napkins at the end of the main line. Drinks, dessert, coffee, and trash belong on separate tables when they could make guests stop in the path of people still serving dinner.
The Bottom Line
To set up a buffet table, create one clear direction, begin with plates, arrange food from lighter items to heavier entrées, keep matching sauces beside their dishes, and finish with cutlery and napkins. Use 36-48 inches of clearance, separate drinks and dessert for larger groups, and verify hot and cold holding temperatures throughout service.