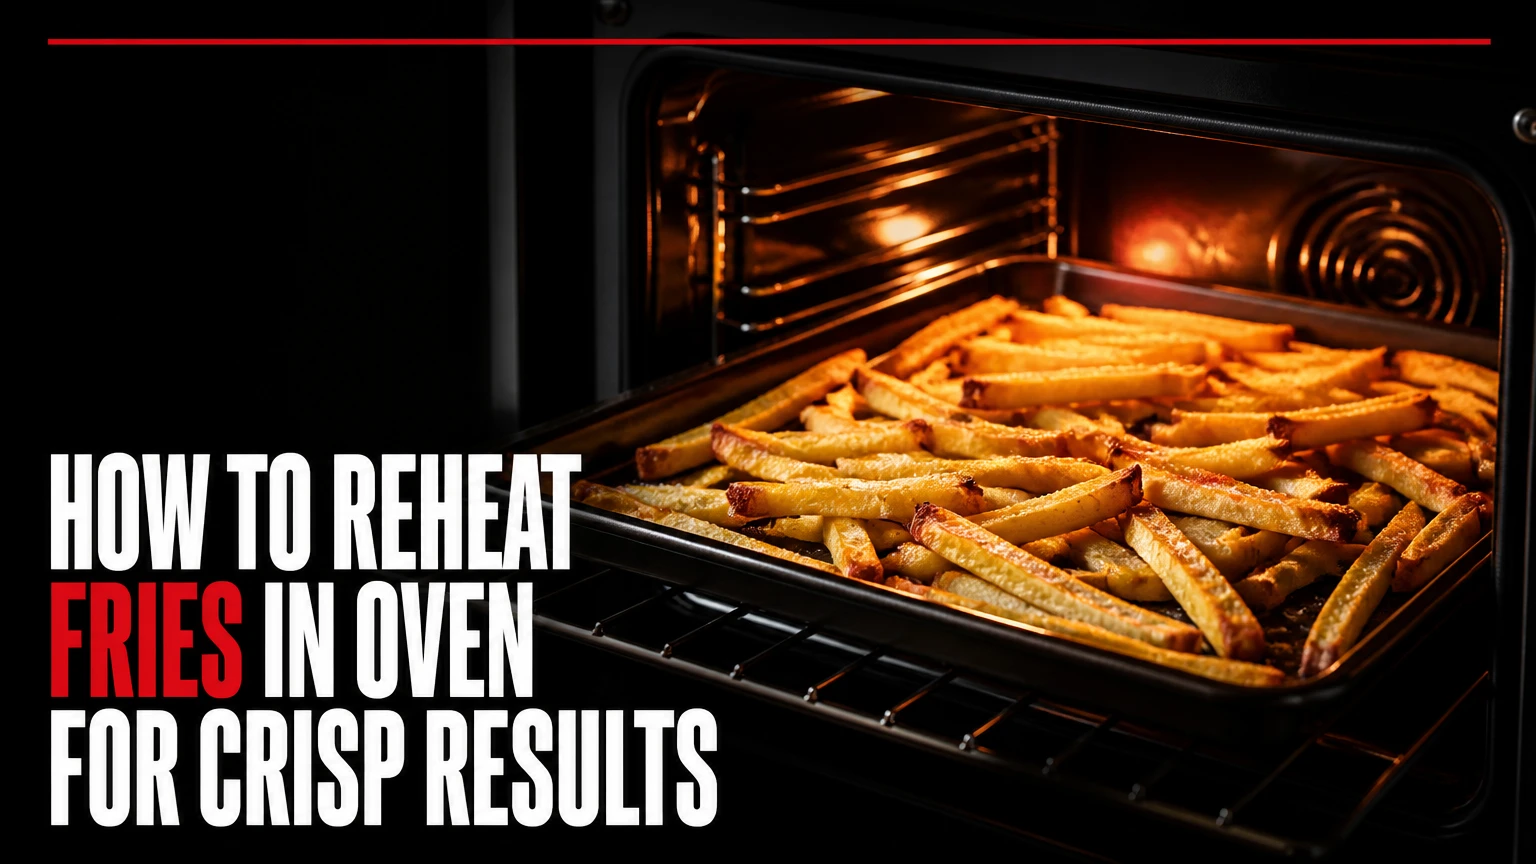
To reheat fries in the oven, heat a metal sheet pan at 425°F (220°C), spread refrigerated fries in one layer, and bake for 8-15 minutes, turning once. Use 400°F (205°C) for convection, sweet potato fries, or highly browned fries. The decisive factor is airflow: crowded fries steam instead of crisp.
Key Facts at a Glance
- A conventional oven reheats refrigerated fries best at 425°F (220°C) for approximately 8-15 minutes.
- A convection oven usually needs 400°F (205°C) and 6-12 minutes because moving air removes moisture faster.
- Fries crisp more reliably in one layer with gaps between pieces than on a crowded, foil-covered tray.
- A light coating of 1-2 teaspoons of oil per 1 pound of fries helps dry leftovers, but extra oil cannot repair soggy fries.
- The USDA recommends reheating leftovers to 165°F (74°C), measured at the thickest pieces, and refrigerating them within two hours.
- A microwave heats fries quickly but usually leaves the potato exterior soft because trapped steam cannot escape.
Why Does the Oven Make Leftover Fries Crisp?
The oven makes leftover fries crisp by combining dry heat with evaporation. Refrigerated fries lose their original crunch because moisture moves through the cooked potato and condenses near the surface; oven heat drives that moisture away while reheating the starch-rich center.
Frying first gelatinizes potato starch, and cooling changes its texture through starch retrogradation. Reheating improves the texture, but it does not perfectly reverse every change. A fry that spent two days uncovered in a refrigerator may become crisp outside yet remain dense inside because it has already lost water.
The oven also reheats residual frying oil on the surface. That oil conducts heat efficiently and helps brown the exterior, especially when fries sit against a hot metal pan. Dry circulating air matters more than simply raising the temperature, which is why a 425°F oven usually outperforms a 350°F oven for this task.
A useful practitioner rule is simple: heat the surface quickly, remove moisture, and stop before the potato dries. Fries need enough heat to crisp, but thin pieces can turn hard within two minutes after their ideal point.
What Should You Prepare Before Reheating Fries?
Before reheating fries, prepare a metal sheet pan, a spatula or tongs, and 1-2 teaspoons of neutral oil for each pound of dry fries. Plan for 15-25 minutes in a conventional oven, including preheating, and 8-15 minutes in a toaster oven after its short preheat.
Before You Start
| Requirement | Typical specification | Why it matters |
|---|---|---|
| Oven temperature | 425°F conventional, 400°F convection | Promotes browning instead of slow steaming |
| Sheet pan | 13 x 18-inch metal pan for 1-1.5 pounds | Provides contact area without crowding |
| Oil | 1-2 teaspoons per pound | Replaces some lost surface fat |
| Batch size | 1 pound per large pan | Preserves gaps and airflow |
| Total time | 15-25 minutes conventional | Includes 10-15 minutes of preheating |
| Food-safety target | 165°F (74°C) | USDA reheating recommendation for leftovers |
Use a dark metal pan when you want stronger browning and a lighter aluminum pan when fries already have dark edges. Avoid deep glass casserole dishes for crisping, because tall sides limit airflow and glass heats more slowly than thin metal.
A wire rack can improve airflow under thick fries, but it is not automatically better. Very thin shoestring fries can fall through the grid, dry out on all sides, or remain pale because they have less direct contact with the hot pan. For most leftovers, a preheated metal sheet pan is the more forgiving setup.
How to Reheat Fries in Oven
Reheat fries in oven by preheating the pan, removing excess surface moisture, arranging the pieces in one layer, baking at the correct temperature, and turning once. The method takes 8-15 minutes for refrigerated fries, with thin pieces checked early and thick pieces checked later.
Step 1: Refrigerate and Inspect the Leftovers
Use fries that were refrigerated promptly and stored in a sealed container. Discard fries that remained at room temperature for more than two hours, or more than one hour when the surrounding temperature exceeded 90°F (32°C), because reheating may not eliminate every food-safety risk.
Separate clumps with your fingers or tongs. Blot visible condensation with a paper towel, but do not rinse the fries. Surface water becomes steam and delays browning.
You will know this step worked when individual fries separate without breaking and no droplets remain on their surfaces. The common mistake is trying to crisp fries that are wet from a sealed container without first removing condensation.
Step 2: Preheat the Oven and Pan
Set a conventional oven to 425°F (220°C), or set a convection oven to 400°F (205°C). Place the empty metal sheet pan on the middle rack while the oven heats for 10-15 minutes.
Preheating the pan gives the fries immediate contact heat. A cold pan warms the fries slowly, allowing more time for moisture to migrate outward and making the final texture greasier. Do not preheat a glass dish at this temperature unless its manufacturer specifically permits it.
You will know the pan is ready when the oven reaches temperature and the metal has had several additional minutes to heat. The common mistake is placing fries on a cold tray because the oven display says it has reached 425°F.
Step 3: Oil the Fries Lightly
Toss 1 pound of refrigerated fries with 1-2 teaspoons of canola, vegetable, avocado, or another neutral high-smoke-point oil. Skip added oil when the fries look glossy or greasy, and use a spray only in a thin, even layer.
Oil cannot make a wet fry crisp by itself. Too much oil coats the surface, transfers heat unevenly, and can leave the crust heavy rather than crunchy. Dry, homemade fries benefit more from a small amount than oily fast-food fries do.
You will know the amount is right when the fries look lightly sheened rather than wet. The common mistake is pouring oil directly over one spot, which produces greasy pieces and bare pieces in the same batch.
Step 4: Arrange Fries in One Layer
Carefully spread the fries across the hot pan, leaving roughly 0.25-0.5 inch between larger pieces when space permits. Keep cut sides exposed and do not stack, mound, or overlap them.
One large sheet pan generally handles 1-1.5 pounds of fries. For 2 pounds or more, use two pans rather than compressing the batch. Overcrowding raises local humidity, so the fries steam before the exterior can dry.
You will know the arrangement is suitable when most fries touch the pan or have open air around them. The common mistake is judging capacity by weight alone; thick wedges need substantially more surface area than shoestring fries.
Step 5: Bake Until the Edges Crisp
Bake the fries on the middle rack. Start checking thin fries after 5 minutes, standard fries after 7 minutes, and thick-cut fries after 10 minutes.
The correct endpoint is hot centers, crisp edges, and no leathery darkening. If you use an instant-read thermometer, check the thickest fries and aim for 165°F (74°C) for refrigerated leftovers, following USDA food-safety guidance.
You will know the batch is ready when the exterior resists gentle pressure and the interior remains tender. The common mistake is waiting for every fry to look deeply golden; reheated fries can become dry before they develop the color of freshly fried potatoes.
Step 6: Turn the Fries Once
Turn the fries with tongs or a wide spatula halfway through cooking, usually after 4-6 minutes. Return the pan to the oven for the remaining time, then check the smallest pieces first.
Turning exposes the second side to the hot pan and corrects uneven browning from oven hot spots. A wire rack reduces the need for turning, but rotating a rack-equipped tray can still improve color in a conventional oven.
You will know the turn helped when both sides show dry, browned contact marks. The common mistake is shaking thin fries aggressively, which can break softened coatings and scatter seasoning onto the pan.
Step 7: Rest and Season After Baking
Transfer the fries to a plate or wire rack and rest them for 1-2 minutes. Add salt, spice blends, grated cheese, or sauces after reheating rather than before it.
The brief rest lets surface oil stabilize and steam finish escaping. It does not continue cooking enough to rescue underheated fries. Salt can be added before baking without preventing crisping, but late seasoning gives better control because salt draws moisture toward the surface over time.
You will know the rest is complete when the exterior feels firmer and the center remains warm. The common mistake is covering the fries immediately, because trapped steam softens the crust you just created.
How Long Should Fries Bake?
Refrigerated fries typically need 5-15 minutes at 400-425°F, depending on thickness, moisture, coating, and quantity. Thin fast-food fries finish fastest, while steak fries and potato wedges need more time because their centers hold more water.
| Fry type | Conventional oven | Convection oven | Checkpoint |
|---|---|---|---|
| Shoestring or fast-food | 5-8 minutes at 425°F | 4-7 minutes at 400°F | Check at 5 minutes |
| Standard straight-cut | 8-12 minutes at 425°F | 6-10 minutes at 400°F | Turn halfway |
| Crinkle-cut | 8-12 minutes at 425°F | 7-10 minutes at 400°F | Watch raised ridges |
| Waffle fries | 7-10 minutes at 425°F | 6-9 minutes at 400°F | Turn carefully |
| Steak fries | 10-15 minutes at 425°F | 9-13 minutes at 400°F | Check the center |
| Potato wedges | 12-16 minutes at 425°F | 10-14 minutes at 400°F | Use a thermometer |
| Sweet potato fries | 7-10 minutes at 400°F | 6-9 minutes at 375-400°F | Sugar browns quickly |
The table assumes a single layer and a moderate serving of refrigerated fries. Add approximately 2-4 minutes for a crowded but still workable pan, and expect inconsistent results if fries overlap heavily.
Can Frozen Fries Go Straight Into the Oven?
Frozen cooked fries can usually go directly into a preheated oven without thawing. Bake them according to the package instructions, commonly at 425°F for 15-25 minutes, because frozen fries contain more surface ice and require more time than refrigerated restaurant leftovers.
Do not combine frozen fries with cold leftovers on one crowded pan. Frozen pieces release moisture as they heat, and the resulting steam can soften already-cooked fries. Use separate pans or add the refrigerated fries during the final 8-10 minutes.
Frozen fries vary widely. Par-fried coated fries often crisp better than homemade frozen fries because their starch and oil systems were engineered for oven cooking. Follow the package temperature when it conflicts with a generic recommendation, then use color and internal heat as the final checks.
Which Pan Setup Works Best?
A preheated metal sheet pan is the best general setup for reheating fries because it supplies strong contact heat and enough area for a single layer. A wire rack is useful for thick fries or large gaps, while foil mainly simplifies cleanup and does not inherently make fries crispier.
| Setup | Best quantity | Typical result | Main limitation |
|---|---|---|---|
| Bare dark metal pan | 1-1.5 pounds | Strong bottom browning | Can overbrown thin fries |
| Bare aluminum pan | 1-1.5 pounds | Moderate, even browning | Needs several preheat minutes |
| Foil-lined metal pan | 1 pound | Easy cleanup, moderate crisping | Foil can reduce direct pan contact |
| Wire rack over pan | 0.5-1 pound | Airflow on all sides | Small fries can dry or fall through |
| Two sheet pans | 2-3 pounds | Larger total capacity | Requires tray rotation |
| Cast-iron skillet | 0.5-1 pound | Strong contact heat | Small surface area, careful handling |
If using two oven racks, rotate the pans top to bottom and front to back halfway through. Most home ovens have hotter zones, and fixed tray positions can leave one batch pale while the other burns.
Is an Oven Better Than a Microwave, Skillet, or Air Fryer?
An oven is best for large quantities and balanced texture, while an air fryer is usually fastest for one or two servings. A skillet can produce excellent contact browning with close attention, and a microwave is suitable only when speed matters more than crispness.
| Method | Typical portion | Typical time | Texture and trade-off |
|---|---|---|---|
| Conventional oven | 1-3 pounds | 15-25 minutes total | Even batch, slower preheat |
| Convection oven | 1-2 pounds | 12-20 minutes total | Faster drying, can dry thin fries |
| Toaster oven | 0.25-0.75 pound | 8-15 minutes total | Efficient for small portions |
| Air fryer | 0.25-1 pound | 3-8 minutes | Crispest quickly, limited capacity |
| Skillet | 0.25-0.75 pound | 5-8 minutes | Strong browning, active attention |
| Microwave | 0.25-0.75 pound | 30-90 seconds | Fastest, softest exterior |
The air fryer wins for one serving because its small chamber moves hot air close to the food. The oven wins for a family-sized batch because a large air-fryer basket often requires multiple rounds, and overloaded baskets also steam.
The microwave is not a failed oven method. It solves a different problem: rapid warming. Microwave fries on a paper towel in short intervals, then accept a soft exterior or finish them in a hot skillet.
What Changes for Fast-Food and Homemade Fries?
Fast-food fries usually need less oil and less time than homemade fries because they are thin, heavily salted, and already contain surface frying oil. Homemade fries may be thicker, less uniformly cooked, or drier after refrigeration, so sorting by size and adding a small amount of oil improves consistency.
Reheating Restaurant Fries
Spread fast-food fries on a preheated pan and begin checking at 5 minutes. Turn them once, then remove the thinnest pieces as soon as they crisp so they do not become brittle while thicker pieces finish.
Highly salted fries can taste saltier after moisture leaves the surface. Do not add more seasoning until tasting the finished batch. Fries with cheese, gravy, or sauce should be separated from the potato when possible, because wet toppings prevent direct crisping.
Reheating Homemade Fries
Homemade fries with a thick crust benefit from 425°F heat and a 10-15 minute window. If the potatoes were stored uncovered and look leathery, toss them with 1-2 teaspoons of oil per pound, but do not add water.
The frequently repeated advice to sprinkle water over dry fries is counterproductive for crispness. Water may protect the interior briefly, but it creates steam and softens the exterior; a light oil coating and shorter cooking time preserve texture more reliably.
Reheating Sweet Potato Fries
Use 400°F rather than 425°F for sweet potato fries and inspect them after 6-7 minutes. Natural sugars brown faster than potato starch, so dark edges are a warning that the fries may be close to burning rather than evidence of better crispness.
Coated sweet potato fries can tolerate slightly longer cooking than uncoated pieces because the coating creates a barrier. Remove them when the coating firms and the center is hot, even if the color remains lighter than expected.
How Do You Fix Limp, Greasy, or Dry Fries?
Limp fries need more dry heat and space, greasy fries need less added oil, and dry fries need shorter cooking rather than added water. Correct the cause first, because increasing temperature cannot repair fries that have already lost too much internal moisture.
| Problem | Likely cause | Recovery action | Prevention |
|---|---|---|---|
| Hot but limp | Crowded or cold pan | Spread out and bake 2-4 minutes more | Preheat pan |
| Greasy surface | Added too much oil | Blot lightly, then use 400°F heat | Limit oil to 1-2 teaspoons per pound |
| Hard and woody | Overbaked or very thin fries | No complete recovery; sauce can improve eating quality | Check 2 minutes earlier |
| Burned edges, cold centers | Temperature too high for thick fries | Lower to 375-400°F and finish gently | Use 425°F only with monitoring |
| Pale and soft | Low heat or wet surface | Increase to 425°F and bake uncovered | Blot condensation |
| Uneven browning | Crowded pan or hot spot | Turn, rotate pan, separate pieces | Keep one layer |
If fries are hot but limp, move them apart and return them to a 450°F oven for 1-2 minutes, watching continuously. Broiling can work for 30-60 seconds, but the heating element can burn oil and sugar before the center improves, so broiling is a finishing tool rather than the main method.
If fries are already woody, reheating cannot restore their lost water. Serve them with a moist accompaniment such as ketchup, aioli, chili, or gravy, and shorten the next reheating cycle.
What Does Oven Reheating Cost?
A typical electric oven uses approximately 2-4 kilowatt-hours while heating and operating for a 15-25 minute reheating session, depending on wattage and how long the oven cycles. At an electricity rate of $0.15 per kilowatt-hour, the estimated appliance cost is roughly $0.30-$0.60, excluding the original cooking energy.
| Appliance | Typical power | Typical active session | Estimated energy |
|---|---|---|---|
| Large electric oven | 2,000-3,500 watts | 15-25 minutes | 0.5-1.5 kWh |
| Toaster oven | 1,200-1,800 watts | 8-15 minutes | 0.2-0.45 kWh |
| Air fryer | 1,400-1,800 watts | 3-8 minutes | 0.07-0.24 kWh |
| Gas oven | 10,000-18,000 BTU/hour | 15-25 minutes | Varies by gas rate |
These are typical planning ranges, not utility-bill measurements. Oven insulation, ambient temperature, preheat duration, thermostat cycling, and local electricity prices change the result.
For less than one pound of fries, a toaster oven or air fryer usually wastes less energy than heating a full-size oven. For several pounds, one conventional-oven batch can be more efficient than running several small appliance batches.
Is Reheating Leftover Fries Safe?
Reheated fries are safest when refrigerated within two hours, stored cold, and reheated until the thickest pieces reach 165°F (74°C). The USDA applies this reheating target to leftovers because surface browning does not prove that the center has reached a safe temperature.
Store fries in a shallow container so they cool faster, then use them within three to four days under standard USDA leftover guidance. Do not rely on smell alone to judge safety, and do not repeatedly cool and reheat the same batch.
Food safety and texture are separate tests. Fries can reach 165°F and still be limp, while thin fries can become crisp before a thick wedge reaches the target. Check a thick piece when serving vulnerable groups, including young children, older adults, pregnant people, and anyone with a weakened immune system.
FAQ
Can I Reheat Fries Without Oil?
Yes, you can reheat fries without oil if they still look glossy or greasy. Use a preheated metal pan, keep the fries separated, and bake at 425°F for 5-12 minutes. Add oil only when the surface looks dry, because extra oil can make previously greasy fries heavy.
Should I Cover Fries in the Oven?
No, do not cover fries when crispness is the goal. A cover traps steam and softens the crust, while uncovered dry heat removes surface moisture. Use foil under the fries for cleanup if desired, but leave the top exposed and avoid deep foil packets.
Can I Reheat Fries on Parchment Paper?
Yes, parchment paper can simplify cleanup, but it may reduce direct browning compared with bare metal. Use parchment within its temperature rating, commonly 425°F, and never place it under a broiler unless the manufacturer explicitly permits that use.
Why Do My Fries Get Hard in the Oven?
Fries become hard when thin pieces remain in high heat after their moisture has already evaporated. Check shoestring fries after 5 minutes, remove finished pieces early, and use 400°F convection or sweet potato settings when the batch browns rapidly.
Can I Reheat Loaded Fries?
Separate wet toppings from the potatoes whenever possible and reheat the fries alone. Cheese, gravy, salsa, and ranch dressing add moisture that prevents crisping; add them after the potatoes reach the desired texture, then warm the assembled dish briefly if necessary.
Should I Use the Broiler to Reheat Fries?
Use the broiler only for a 30-60 second final crisping step when fries are already hot. Keep the tray several inches from the element, watch continuously, and avoid broiling sweet potato fries or heavily oiled pieces because sugars and oil can scorch quickly.
The Bottom Line
The most reliable way to reheat fries in oven is a preheated metal pan, a single uncrowded layer, 425°F conventional heat, and one turn halfway through cooking. Use 400°F for convection or sweet potato fries, check thin pieces early, and stop as soon as the centers are hot and the edges are crisp.