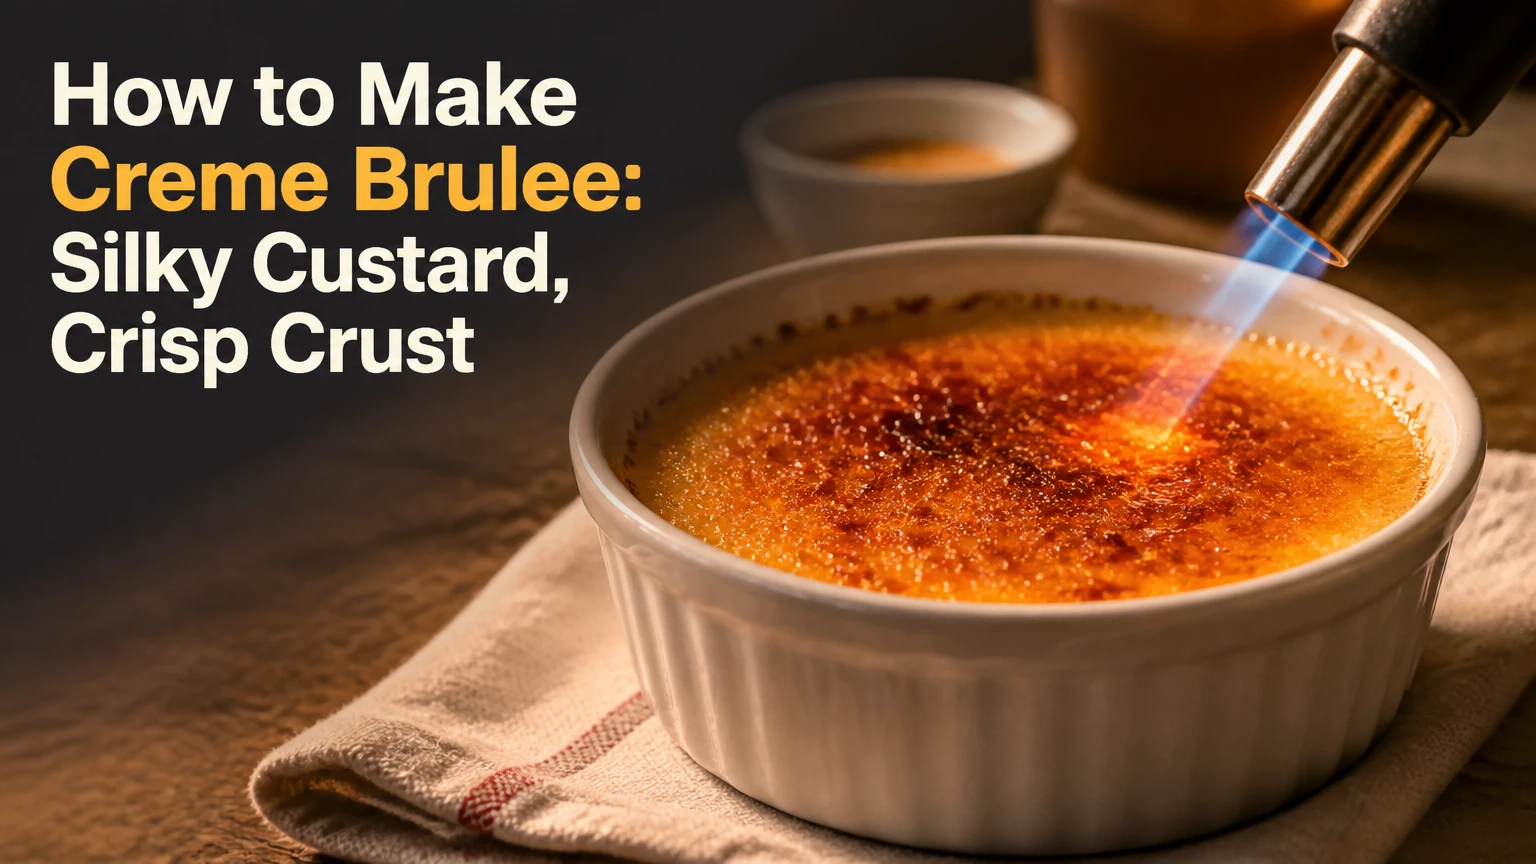
To make crème brûlée, gently bake a vanilla egg-yolk custard in a hot-water bath at 300°F (150°C), chill it for at least 4 hours, and torch a thin layer of sugar until crisp. Four servings take about 20 minutes of active work, 35-45 minutes to bake, and overnight chilling gives the cleanest texture.
Key Facts at a Glance
Crème brûlée uses heavy cream, egg yolks, sugar, vanilla, and salt.
A water bath keeps the custard edges from overheating before the center sets.
Four 4-6-ounce shallow ramekins usually bake in 35-45 minutes at 300°F.
The finished custard should jiggle slightly in the center and reach roughly 175-180°F.
Granulated white sugar forms a thinner, cleaner crust than brown sugar.
Torch the sugar immediately before serving because moisture softens the caramel shell.
What Makes Crème Brûlée Different?
Crème brûlée is a baked custard topped with a brittle sheet of caramelized sugar. The dessert depends on a temperature and texture contrast: the custard should be cold, smooth, and spoonable, while the freshly torched topping should be warm, glassy, and crisp.
The custard contains no flour or gelatin. Egg-yolk proteins create its structure as they coagulate, and the fat in heavy cream gives the finished dessert a soft mouthfeel. Harold McGee describes the relevant egg behavior in On Food and Cooking: “Eggs begin to thicken at 144°F (62°C) and set at 158°F (70°C).” A crème brûlée mixture sets more gently because cream, sugar, and water dilute the yolk proteins.
The sugar topping follows a different process. Heat first melts the crystals, then browns and decomposes some of the sugar molecules at the surface. A thin layer cools into a hard caramel glass; a thick layer stays uneven and can taste bitter before the custard underneath warms.
Ingredients and Equipment for Four Servings
The most dependable formula is five large egg yolks, 475 milliliters of heavy cream, and 100 grams of sugar divided between the custard and topping. Heavy cream with approximately 36% milk fat produces a fuller, more stable custard than milk or half-and-half.
| Ingredient | Quantity | Function | Practical substitute |
|---|---|---|---|
| Heavy cream | 475 ml, 2 cups | Fat, moisture, and body | 400 ml cream plus 75 ml whole milk |
| Large egg yolks | 5, about 90 g | Custard structure and emulsification | 4 yolks for a softer, looser set |
| White granulated sugar | 100 g, 1/2 cup | 50 g custard, 50 g crust | Caster sugar in the same weight |
| Vanilla | 1 bean or 2 teaspoons paste | Primary aroma | 2 teaspoons pure vanilla extract |
| Kosher salt | 1/8 teaspoon | Balances sweetness | A small pinch of fine salt |
Use four shallow ceramic ramekins holding 4-6 ounces each, a saucepan, whisk, fine-mesh strainer, pitcher, roasting pan, and culinary torch. A digital thermometer helps diagnose doneness, but a thermometer reading is less useful if the probe touches the hot ramekin or reaches too close to the surface.
Which Ramekins Work Best?
Shallow ramekins produce the most balanced crème brûlée because their custard layer cooks evenly and leaves more surface for caramelized sugar. A 1-inch to 1 1/4-inch custard depth is a useful target; deep 6-ounce dishes may need 50-65 minutes rather than the usual 35-45 minutes.
| Ramekin style | Typical capacity | Custard depth | Typical bake time |
|---|---|---|---|
| Shallow round | 4 ounces | 7/8-1 inch | 30-38 minutes |
| Standard round | 6 ounces | 1 1/4-1 1/2 inches | 38-50 minutes |
| Deep ceramic | 6 ounces | 1 3/4 inches | 50-65 minutes |
| Wide gratin dish | 5 ounces | 3/4-1 inch | 25-35 minutes |
Grease is unnecessary. Crème brûlée releases with a spoon, and butter can leave a greasy film on the custard surface.
How to Make Creme Brulee
Follow these five steps for four vanilla crème brûlées. The key control point is gentle heat: warm the cream without boiling it, bake in a water bath, and stop cooking when the center still moves slightly.
Before You Start
| Requirement | Typical specification |
|---|---|
| Active preparation | 20 minutes |
| Oven time | 35-45 minutes for shallow ramekins |
| Chilling | Minimum 4 hours, preferably overnight |
| Total elapsed time | Approximately 5-14 hours |
| Difficulty | Moderate, with temperature control required |
| Ingredient cost | Typically $5-$8 for four servings |
| Equipment cost | Approximately $15-$30 for a culinary torch |
Set the eggs out for 15-20 minutes if convenient, although refrigerated yolks also work. Arrange the ramekins in the roasting pan before adding custard, because moving filled dishes creates spills and bubbles.
Step 1: Infuse the Cream
Combine the heavy cream, 50 grams of sugar, salt, vanilla seeds, and vanilla pod in a saucepan. Heat over medium until small bubbles form around the edges and the cream reaches roughly 175°F to 180°F, then remove the pan before the liquid boils.
Cover the saucepan and steep the mixture for 10-15 minutes. The covered rest extracts vanilla aroma without reducing the cream. If using vanilla extract rather than a bean or paste, add it after heating because prolonged boiling drives off some volatile flavor compounds.
You will know this step worked when the sugar has dissolved and the cream smells strongly of vanilla without a skin or rolling boil. The common mistake is boiling the cream, which can create a cooked dairy flavor and make tempering less forgiving.
Step 2: Temper the Yolks
Whisk the five yolks in a bowl until smooth, then slowly drizzle in about 120 milliliters of warm cream while whisking continuously. Add the remaining cream in a thin stream, maintaining constant movement so the yolks warm gradually instead of forming cooked strands.
Tempering equalizes temperatures. Pouring all the hot cream into stationary yolks can produce small scrambled pieces, even when the final mixture appears liquid. Whisking aggressively is unnecessary and introduces air, so use controlled strokes rather than creating foam.
You will know the mixture is tempered when it is uniform, fluid, and free of visible yellow curds. If a few cooked flecks appear, strain the liquid immediately; the strainer can remove small particles, but it cannot restore a fully curdled emulsion.
Step 3: Strain and Fill the Ramekins
Heat the oven to 300°F (150°C), or 285°F to 290°F (140°C to 145°C) for a fan-assisted oven. Pass the custard through a fine-mesh strainer into a pitcher, then divide it among the ramekins, filling each to approximately 1/4 inch below the rim.
Place the roasting pan on the counter before pouring hot water into it. If bubbles sit on the custard, skim them with a spoon or pass a flame briefly above the surface without touching the liquid. Surface foam becomes a pitted top after baking.
You will know the filling step worked when all ramekins contain equal depths and the surfaces look mostly clear. Unequal portions finish at different times, so a kitchen scale can improve consistency when serving guests.
Step 4: Bake in a Water Bath
Put the filled roasting pan on the oven rack, then pour hot water into the pan until it reaches halfway up the ramekin sides. Bake for 35-45 minutes in shallow dishes, checking the movement of the custard near the shorter end of that range.
The water bath moderates heat transfer. Ceramic edges exposed to dry oven heat can become firm or rubbery while the middle remains liquid; water limits that temperature gradient and protects the egg proteins from rapid coagulation.
You will know the custard is ready when the edges look set and the center trembles as one soft mass when the pan is nudged. A center that ripples like liquid needs more time, while a surface that puffs, cracks, or looks dry has gone too far.
A probe thermometer should read approximately 175°F to 180°F (80°C to 82°C) in the center. Treat that number as a guide rather than an absolute rule, because probe placement, ramekin thickness, and carryover cooking change the result. Custard temperatures above about 185°F (85°C) greatly increase the risk of curdling.
Step 5: Cool and Chill
Remove the ramekins from the water bath and cool them on a rack for about 30 minutes. Cover each dish and refrigerate for at least 4 hours, preferably overnight, before adding sugar.
Chilling completes the set and firms the fat in the cream. Do not torch warm custards, because heat makes the base soft and creates more condensation beneath the caramel. The coldest, firmest custard gives the best contrast.
You will know the chilling step worked when the center feels cold and the custard supports a spoon without flowing. Covering prevents refrigerator odors and limits moisture loss from the surface.
Step 6: Caramelize the Sugar
Blot condensation from the custard if necessary. Sprinkle approximately 1 to 2 teaspoons of white granulated or caster sugar over each surface, tilt the ramekin to distribute it, and tip out excess sugar so the layer remains thin and even.
Hold a culinary torch 2-3 inches from the sugar and move the flame continuously in small circles. Melt the sugar gradually, then darken it to an even golden amber color. Allow the crust to harden for 2-3 minutes before serving.
You will know the caramel is ready when the surface is glassy, amber, and free of dry white patches. Black spots taste acrid. Brown sugar is a poor default because its molasses and moisture encourage uneven browning and burning.
Why the Water Bath Matters
A bain-marie slows the transfer of oven heat into the custard and keeps the ramekin sides close to the temperature of the surrounding water. That buffer gives the center time to set before the edge proteins tighten into a grainy ring.
The bath water should be hot, but it does not need to be boiling. Water near 180°F to 200°F shortens the time needed for the custard to warm, while cold water extends baking and can make the surface overcook before the center reaches its endpoint.
Do not let water splash into the ramekins. Water on the surface dilutes the custard and prevents even browning later. For easier handling, pull the oven rack out partway, add the water with a spouted jug, and push the rack in slowly.
Torch, Broiler, or Heated Spoon?
A culinary torch is the best method for crème brûlée because it caramelizes the topping quickly while leaving the chilled custard relatively cold. A broiler works when several servings must be finished at once, but the custard warms more noticeably and the sugar browns less evenly.
| Method | Typical heating time | Crust control | Custard warming | Main limitation |
|---|---|---|---|---|
| Butane torch | 30-60 seconds | High | Low | Requires fuel and flame control |
| Oven broiler | 1-3 minutes | Moderate | High | Uneven spots and softer base |
| Salamander | 30-90 seconds | High | Moderate | Commercial equipment cost |
| Heated spoon | 1-2 minutes | Low | Moderate | Burn risk and inconsistent contact |
For a broiler, place chilled ramekins on a cold sheet pan 2-3 inches below the heat source and watch continuously. Refrigerate them again for 10-15 minutes if the custard becomes noticeably soft, although the crust will never match the control of a torch.
A heated metal spoon is a historical technique, not a practical home recommendation. It risks burns, damages unsuitable utensils, and applies heat in patches rather than across the entire sugar layer.
Can You Change the Cream?
Heavy cream gives the richest and most forgiving result, but a measured blend of cream and whole milk can work. Replacing all the cream with milk reduces fat and body, producing a lighter custard that sets more firmly and may taste eggier.
| Dairy choice | Quantity for this recipe | Texture result | Adjustment |
|---|---|---|---|
| 36% heavy cream | 475 ml | Rich and silky | Use the base formula |
| Cream plus whole milk | 400 ml plus 75 ml | Slightly lighter | Keep five yolks |
| Half-and-half | 475 ml | Leaner and firmer | Bake 3-5 minutes less initially |
| Whole milk | 475 ml | Thin and egg-forward | Use four yolks and watch closely |
| Full-fat coconut milk | 475 ml | Dense with coconut aroma | Chill overnight and strain well |
Low-fat milk, water, and plant milks with low fat or high added water are poor direct substitutes. They change the protein-to-liquid ratio and can leave the custard weak, watery, or unusually firm.
Reliable Flavor Variations
Flavor additions should enter the cream during infusion or dissolve into the warm liquid before tempering. Wet fruit, alcohol, or strong acidic ingredients can interfere with setting, so keep additions measured and strain the mixture carefully.
- Earl Grey: Steep 2 tea bags in the hot cream for 5 minutes, then remove them.
- Cardamom: Add 6 lightly crushed green cardamom pods during the 10-15 minute infusion.
- Espresso: Dissolve 1 tablespoon instant espresso powder in the warm cream.
- Chocolate: Melt 60 grams of 70% dark chocolate into the hot cream, then reduce custard sugar by 15 grams.
- Citrus: Add the finely grated zest of 1 orange or 1 lemon during infusion, then strain.
- Fruit: Place no more than 1 tablespoon of thick, seedless coulis beneath each custard to avoid excess water.
Vanilla paste is the best economical choice for the classic version because it provides concentrated flavor and visible seeds without the cost of a premium bean. Fresh berries placed on top after caramelizing are safer than raw fruit beneath the custard because they do not release water into the set.
Common Problems and How to Fix Them
Why Is the Custard Grainy?
Grainy crème brûlée usually results from excessive heat, boiling cream, or baking without a water bath. The yolk proteins tighten and expel moisture when they pass from a delicate gel into a curdled mass.
A fully baked, grainy custard cannot be restored to silkiness. Next time, lower the oven temperature, use hot bath water, strain before pouring, and remove the ramekins when the center still jiggles.
Why Is the Center Still Liquid?
A liquid center means the custard has not reached its setting point, usually because the ramekins are deep, the water bath started cold, or the oven runs below its displayed temperature. Return the dishes to the water bath and bake in 5-minute increments.
The repair works only before chilling and caramelizing. Check one ramekin first rather than extending every dish automatically, since shallow portions may already be set.
Why Is the Sugar Black or Bitter?
Black sugar indicates concentrated torch heat or a flame held too close for too long. Keep the torch moving, use a thin layer of white sugar, and stop at a medium amber color rather than waiting for a dark mahogany surface.
Scrape off a badly burned crust and replace it with fresh sugar if the custard remains cold and intact. Burnt sugar cannot be neutralized with extra cream.
Why Does the Crust Turn Soft?
Caramel absorbs moisture from the custard and surrounding air, so a crust may soften within an hour, especially in a humid kitchen. Torch the ramekins immediately before serving and keep uncovered finished portions away from steam.
A soft crust cannot be fully recrisped without warming the custard. Remove it carefully, add a new thin sugar layer, and torch again only if the base is still firm.
Why Are There Bubbles or Pits?
Whisking too vigorously, pouring from too high, or failing to skim foam creates trapped air. Air rises during baking and leaves small holes across the surface.
Strain the liquid, pour close to the ramekin surface, rest the filled dishes for 2 minutes, and skim visible bubbles. A brief pass of a torch above the surface also breaks foam, but the flame must never linger.
Chill, Store, and Schedule the Dessert
Uncaramelized crème brûlée keeps covered in the refrigerator for up to 3 days at 40°F (4°C) or below. Caramelize each portion shortly before serving, because the sugar shell deteriorates faster than the custard.
| Task | Earliest practical timing | Best practice |
|---|---|---|
| Prepare custard | 1-3 days before | Cover after cooling |
| Bake custard | 1-3 days before | Chill completely |
| Remove from refrigerator | 5-10 minutes before torching | Blot condensation |
| Torch sugar | 2-10 minutes before service | Use a thin, even layer |
| Serve caramelized dessert | Immediately | Avoid humid holding areas |
Do not freeze crème brûlée. Freezing damages the custard’s emulsion and creates a watery or grainy texture after thawing. Keep raw eggs refrigerated during preparation, and allow the torch to cool before storing it.
How to Scale the Recipe
For reliable scaling, use one large yolk per approximately 95 milliliters of cream and 20 grams of total sugar. A batch for eight servings therefore uses 10 yolks, 950 milliliters of cream, and 200 grams of sugar, divided evenly between custard and topping.
Bake multiple ramekins only when air can circulate around the dishes. A crowded roasting pan slows cooking and makes the water bath harder to fill evenly, so add approximately 5-10 minutes to the expected bake time and test the center of a middle ramekin.
For a dinner party, prepare the custards the day before, refrigerate them covered, and torch them in small groups immediately before serving. This schedule protects the crust and removes last-minute baking from the meal service.
Yield, Timing, and Cost
A four-serving batch typically costs $5-$8 at home, or roughly $1.25-$2 per portion, depending mainly on vanilla prices and cream brand. Active work takes about 20 minutes, while total elapsed time ranges from 5 hours for same-day chilling to 14 hours for an overnight set.
| Cost component | Typical quantity | Typical cost | Cost driver |
|---|---|---|---|
| Heavy cream | 475 ml | $2-$4 | Brand and package size |
| Eggs | 5 large | $1-$2 | Grade and local pricing |
| Vanilla | 1 bean or paste | $1-$5 | Fresh bean price varies most |
| Sugar and salt | 100 g plus pinch | Under $0.50 | Minimal batch impact |
| Butane fuel | 30-60 seconds per serving | Under $0.50 | Torch model and refill size |
A torch is a worthwhile purchase if you make caramelized desserts regularly, but it is unnecessary for a single trial batch. The broiler can complete the task with existing equipment, provided you accept a warmer custard and monitor the sugar continuously.
Frequently Asked Questions
Can I make crème brûlée without a torch?
Yes. Use the oven broiler with thoroughly chilled ramekins, a thin sugar layer, and a rack positioned 2-3 inches below the heat. Broil for 1-3 minutes while watching continuously. The broiler browns several servings at once, but it warms the custard more than a torch and can create uneven dark spots.
Should crème brûlée be served cold or warm?
The custard should remain cold or cool, while the sugar crust can be warm from torching. Serve crème brûlée 2-10 minutes after caramelizing, when the topping has hardened but the base has not had time to soften significantly.
Can I use brown sugar for the topping?
White granulated or caster sugar is the safer choice. Brown sugar contains molasses and additional moisture, so it melts and darkens unevenly, burns sooner, and can produce a sticky rather than glassy crust. If using it experimentally, apply an exceptionally thin layer and stop at light amber.
Why did my crème brûlée crack?
Cracks usually indicate overbaking, rapid cooling, or a custard layer that was too deep. Remove the ramekins when the center trembles as a single mass, cool them away from drafts, and use shallow dishes. Small surface cracks do not make the dessert unsafe, but they signal a firmer texture.
Can I use whole eggs instead of egg yolks?
Whole eggs can set a custard, but their whites create a firmer, more elastic texture and may produce bubbles. Egg yolks supply the richer fat content and smoother structure expected from classic crème brûlée, so replacing yolks with whole eggs changes the dessert rather than preserving the original formula.
The Bottom Line
How to make creme brulee successfully comes down to three controls: use a rich cream and yolk formula, bake gently in a water bath until the center still jiggles, and caramelize a thin sugar layer immediately before serving. Chill the custard overnight when possible, choose shallow ramekins, and let visual texture guide the final bake more than the clock alone.