To keep fried food crispy, control moisture before frying, maintain 350-375°F oil, avoid overcrowding, and drain each piece on a wire rack. Hold fried food uncovered or in a vented container, never sealed while hot. The most important factor is preventing steam from condensing inside the crust after cooking.
Key Facts at a Glance
- A wire rack preserves fried-food crispness better than a flat layer of paper towels because steam can escape beneath the food.
- Oil at 350-375°F usually produces a crisper crust than oil below 325°F, provided the food is not crowded.
- Cornstarch, potato starch, rice flour, and panko generally create drier, more brittle coatings than all-purpose flour alone.
- Hot fried food becomes soft when escaping steam condenses inside the crust or against a solid container.
- A 200°F oven setting can help hold food, but the food itself should remain at least 135°F for hot service under the FDA Food Code.
- Water-based sauce should touch fried food immediately before eating, because prolonged contact dissolves and hydrates the crisp coating.
Why Does Fried Food Lose Crispness?
Fried food loses crispness when steam leaving the interior condenses inside the crust, turning a dry starch-protein structure into a flexible, hydrated layer. The crust remains crisp only while its pores stay relatively dry and its temperature is high enough to prevent rapid condensation.
Frying creates simultaneous heat and mass transfer. Hot oil heats the surface, surface water becomes steam, and that steam escapes through microscopic channels. Flour, starch, egg proteins, and breadcrumbs then form a porous shell around the food.
Crispness is therefore a moisture-management problem, not simply a high-temperature problem. A perfectly fried chicken wing can soften in two minutes inside a sealed plastic tub, while a slightly cooler wing can remain acceptable on an elevated rack with open airflow.
What changes inside the crust?
Starch gelatinization helps a batter or breading set, while protein coagulation strengthens the shell. As water leaves, the coating becomes rigid and brittle. When water returns, the matrix becomes less glassy and more flexible.
Oil does not simply replace every molecule of escaping water. Some oil enters pores and contributes to richness, but the amount depends on coating thickness, frying time, pressure changes during cooling, and the food’s structure. A crisp crust is not automatically a low-oil crust.
Before You Start
The following setup suits fried chicken, fish, onion rings, croquettes, and similar coated foods. Fries require a separate potato-specific method because their surface starch and internal water behave differently.
| Requirement | Typical specification | Why it matters |
|---|---|---|
| Total active time | 35-75 minutes | Includes coating, frying, and holding |
| Difficulty | Moderate | Temperature and moisture control determine results |
| Oil quantity | 2-3 quarts for a 5-7 quart pot | Maintains thermal stability around each batch |
| Frying thermometer | Clip-on digital or probe thermometer | Measures oil recovery between batches |
| Draining setup | Wire rack over rimmed sheet pan | Prevents bottom-side steam condensation |
| Holding setup | 200°F oven with rack, or vented carton | Preserves texture while managing heat |
Use an oil with a smoke point above 400°F, such as refined canola, peanut, corn, or sunflower oil. Choose a pot with at least 3 inches of headspace because bubbling oil can rise sharply when moisture leaves the food.
For food safety, the FDA Food Code 2022 specifies, “hot holding at 135°F (57°C) or above.” That is a safety floor, not a crispness guarantee. A rack in a 200°F oven may keep food hot, but a crowded pan can still trap steam and soften the coating.
How to Keep Fried Food Crispy for Longer
The most reliable method uses seven controls: dry the food, build an adherent coating, rest the coating, fry at a stable temperature, drain with airflow, hold with ventilation, and sauce at the last moment. The process usually takes 35-75 minutes and requires a thermometer, rack, sheet pan, and enough oil for temperature recovery.
The seven steps below apply to most battered or breaded foods. The exact temperature and timing change with thickness, bone content, sugar, and moisture, so use internal doneness as well as crust color.
Step 1: Remove Surface Moisture
Pat meat, seafood, vegetables, or tofu dry immediately before coating. Use paper towels and press rather than rub, especially on fish fillets or delicate tofu. Surface water cools the oil locally, increases splattering, and weakens the bond between the food and coating.
Salt timing needs more nuance than a single universal rule. Salt immediately before dredging, or dry-brine meat for several hours and then pat it dry again. Avoid salting 10-30 minutes before frying if the food will sit wet, because dissolved salt draws liquid to the surface during that interval.
Dry brining chicken for 4-24 hours can improve seasoning and help the surface dry in the refrigerator. The coating will still adhere if the chicken is thoroughly patted dry before flouring.
You’ll know it worked when: the surface looks matte rather than glossy, and a flour dusting clings in a thin even layer.
Common mistake: coating damp food. The first flour layer turns pasty, and the finished crust detaches in sheets.
Step 2: Choose and Apply the Coating
Build a thin, continuous coating rather than a thick loose shell. For breaded food, use flour, egg, and breadcrumbs in that order, shaking off excess flour before the egg and pressing breadcrumbs onto the surface.
| Coating | Typical crisp window | Best applications | Main trade-off |
|---|---|---|---|
| All-purpose flour | 10-20 minutes | Fried chicken, country-fried steak | More gluten and chew |
| Cornstarch or potato starch | 25-45 minutes | Wings, karaage, Korean chicken | Can become brittle or patchy |
| Rice flour | 20-40 minutes | Tempura, seafood, gluten-free batter | Delicate shell breaks easily |
| Panko breadcrumbs | 25-45 minutes | Fish, tonkatsu, croquettes | Large flakes need firm adhesion |
| Beer or carbonated batter | 15-25 minutes | Fish, onion rings, vegetables | Aerated crust softens quickly |
| Flour-starch blend | 20-40 minutes | Chicken, shrimp, tofu | Requires a consistent ratio |
These are typical home-kitchen holding ranges, not fixed guarantees. Humidity, coating thickness, food size, sauce contact, and rack airflow can change them substantially.
A practical starting blend for chicken or shrimp is 75% all-purpose flour and 25% cornstarch by weight. For a lighter shell, use equal parts flour and rice flour. Do not assume more starch always improves the result: excessive starch can produce a powdery coating that cracks and sheds.
You’ll know it worked when: no bare wet patches remain, and the coating stays attached when the piece is lifted by one edge.
Common mistake: leaving loose flour or breadcrumbs on the food. Detached particles burn in the oil and create dark specks on later batches.
Step 3: Rest the Coating Before Frying
Rest breaded food on a wire rack for 10-15 minutes before frying. The rest hydrates dry starch at the interface and gives the coating time to bond, reducing sloughing when the food enters hot oil.
Battered food needs a shorter rest, usually 3-5 minutes, because liquid batter can run or absorb moisture from the food. Tempura is often fried soon after dipping to preserve its thin, irregular structure.
Keep coated food in a single layer. A plate can press the underside and create a damp contact zone, while a rack permits air movement around the entire piece.
You’ll know it worked when: the coating looks slightly tacky rather than dusty, and a light fingertip touch does not remove flour.
Common mistake: resting coated pieces in a stack. Pressure and trapped moisture create weak spots before frying begins.
Step 4: Fry at a Stable Temperature
Heat oil to 350-375°F before adding food, then fry in small batches that occupy no more than one-half to two-thirds of the oil’s surface area. The temperature will fall after loading, but it should recover toward the target range within roughly 1-3 minutes.
Use 325-350°F for a first fry when cooking thick foods, then 375-400°F for a brief second fry. Keep the oil below its smoke point, and remove burnt crumbs between batches because they darken the oil and transfer bitter flavors.
| Food | Oil temperature | Typical frying time | Doneness checkpoint |
|---|---|---|---|
| French fries, first fry | 300-325°F | 5-8 minutes | Pale and tender, not browned |
| French fries, second fry | 375-400°F | 2-4 minutes | Golden exterior and rigid edges |
| Chicken wings | 350-375°F | 8-12 minutes | 165°F internal temperature |
| Breaded fish fillet | 350-365°F | 3-6 minutes | Opaque center, 145°F for finfish |
| Onion rings | 350-375°F | 2-4 minutes | Even golden shell |
| Doughnuts | 350-375°F | 1-2 minutes per side | Even color and cooked center |
The times are typical ranges for medium-sized pieces. Thickness matters more than clock time for chicken, fish, and filled foods. A thermometer reading from the center is the reliable doneness test.
You’ll know it worked when: bubbling becomes less violent near the end, the crust is evenly colored, and the oil temperature recovers without prolonged greasy frying.
Common mistake: adding a full basket at once. If oil remains below about 325°F for several minutes, the food absorbs more oil before the crust firms.
Step 5: Drain on a Rack Immediately
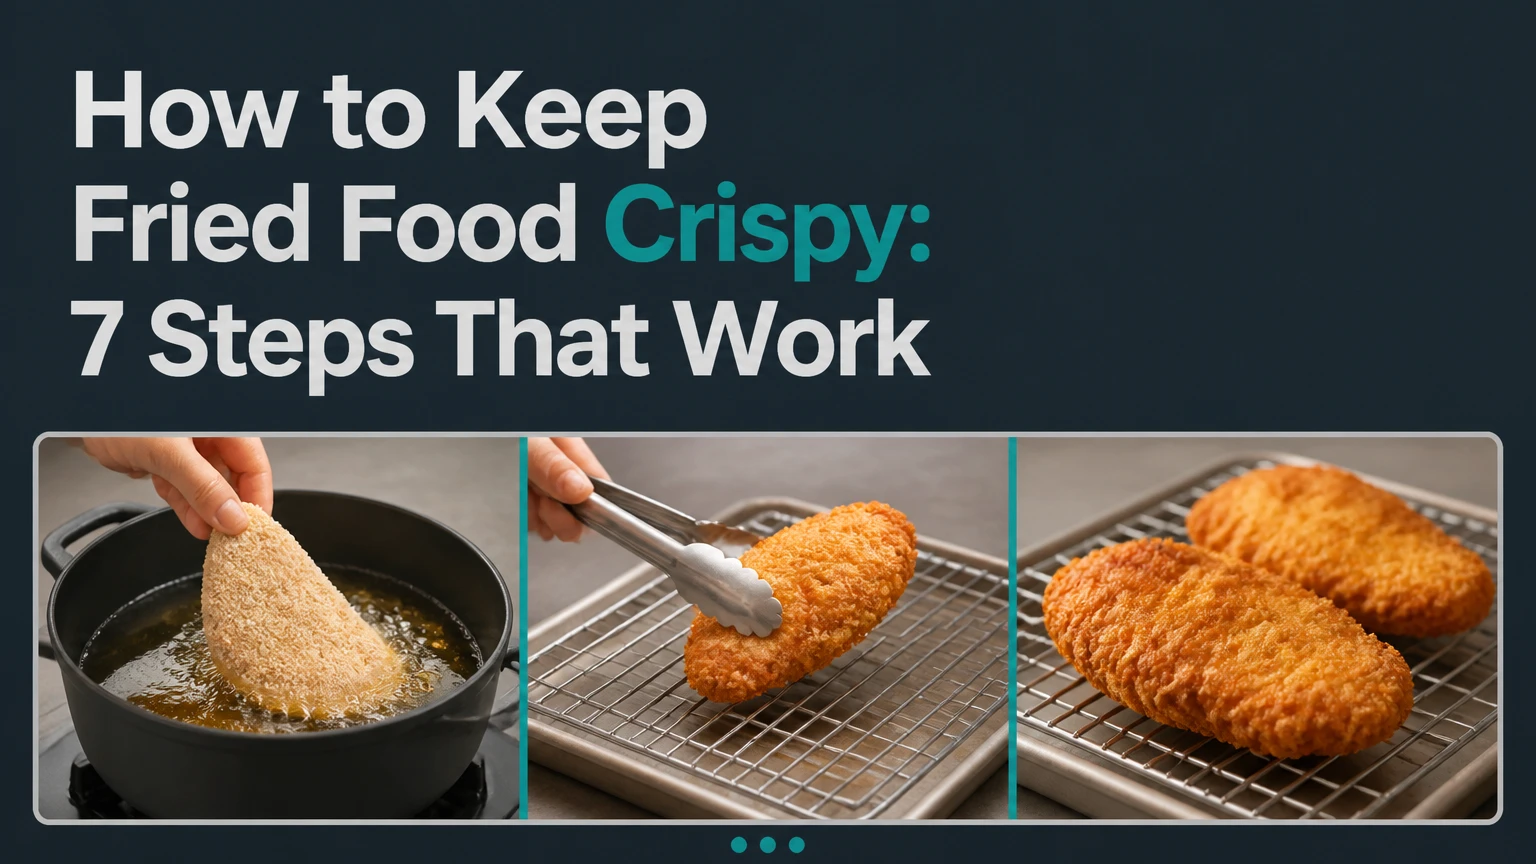
Transfer fried food directly to a wire rack set over a rimmed baking sheet. Leave space between pieces, and position heavily coated foods so their broadest surfaces are exposed to air.
Paper towels can remove surface oil, but they are poor as the only draining surface. The underside rests against a flat, absorbent layer, and steam escaping from that side can condense against the food instead of dispersing.
Do not shake fried food aggressively in a bowl. Mechanical handling can fracture a newly set crust, especially on beer batter, tempura, and thin potato coatings.
You’ll know it worked when: oil drips away without pooling, and the underside remains dry when lifted after 2-3 minutes.
Common mistake: draining in a deep bowl. The food at the bottom sits in its own humid air and softens first.
Step 6: Hold Food With Heat and Ventilation
For a short service window, keep fried food on a rack in a single layer. For a 15-60 minute hold, place that rack in an oven set to 200-225°F, leaving the door closed except when adding batches.
A low oven balances two competing needs: the food must stay warm, yet moisture must escape. Oven settings are not the same as food temperature, so check the thickest pieces with a thermometer when holding for a group.
| Holding method | Typical quality window | Typical temperature or cost | Best use |
|---|---|---|---|
| Open rack at room temperature | 10-20 minutes | 65-75°F ambient, $0 | Immediate serving |
| Rack in low oven | 30-60 minutes | 200-225°F setting, $0 appliance cost | Family meal or party |
| Perforated commercial warmer | 45-90 minutes | 140-180°F food hold, $100-$450 | Fries and high-volume service |
| Vented paper carton | 15-30 minutes | $0.20-$0.80 each, typical | Short takeout transport |
| Solid plastic container | Under 5 minutes | $1-$5 reusable container | Poor choice for hot crisp food |
A commercial warmer can hold food longer than a home oven because perforated trays, dump stations, and airflow reduce contact moisture. No holding method preserves the texture of freshly fried food indefinitely, particularly for thin batters.
You’ll know it worked when: the food remains hot without visible condensation on the crust or container lid.
Common mistake: piling finished pieces into a pan. The lower layers become soft even when the oven temperature is correct.
Step 7: Sauce and Serve at the Last Moment
Toss fried food with sauce immediately before eating, or serve sauce separately. Buffalo sauce, sweet-and-sour sauce, teriyaki glaze, and many barbecue sauces contain enough water to hydrate the coating quickly.
Thickening a sauce can slow softening, but it cannot stop it. A reduction, syrup-based glaze, or concentrated sauce generally preserves texture longer than a thin watery sauce, although sugar can burn if added during frying.
For maximum crispness, keep sauce in a small cup or drizzle only the portion being eaten within the next few minutes. This rule matters most for wings, fried fish, cauliflower, and anything with a porous batter.
You’ll know it worked when: the crust still snaps or fractures lightly after saucing, rather than bending immediately.
Common mistake: saucing an entire batch 20 minutes before service. The first pieces may remain acceptable, but the center of the pile will become steamed and soft.
Which Coating Keeps Fried Food Crispy Longest?
Cornstarch, potato starch, and panko usually retain a dry crunch longer than all-purpose flour, while rice flour gives a lighter but more fragile crust. The best choice depends on whether the food needs a thin shell, a rugged breading, or a batter that clings to an irregular surface.
| Desired result | Recommended coating | Typical ratio or amount | Avoid when |
|---|---|---|---|
| Thin brittle shell | Potato starch | 100% dry dusting | Pieces have very wet surfaces |
| Light gluten-free crunch | Rice flour | 100% flour base | Long transport is required |
| Strong chicken breading | Flour plus cornstarch | 75:25 by weight | A soft biscuit-like crust is wanted |
| Large crunchy flakes | Panko | 1-1.5 cups per pound food | Coating cannot be pressed firmly |
| Airy fish batter | Beer batter | 1 cup flour per 1 cup beer, typical | Food must hold over 30 minutes |
Cornstarch does not automatically make food crisp. A wet coating, low oil temperature, or sealed container can overwhelm its structural advantage. Coating selection helps, but moisture control after frying determines the final holding life.
How Do You Keep Fries, Chicken, and Fish Crispy?
Food-specific crispness depends on internal moisture, thickness, and coating structure. Fries benefit most from a double fry, chicken needs a reliable center temperature, and fish needs rapid service because its thin crust absorbs moisture from the flesh quickly.
Fries
Cut potatoes into uniform 1/4- to 3/8-inch sticks, rinse away excess surface starch, and dry them thoroughly. Fry at 300-325°F until tender and pale, rest for at least 10 minutes, then fry at 375-400°F until golden.
Salt fries after the final fry, not before the first fry. Pre-salting draws surface moisture and can increase splattering. Keep fries in a shallow, ventilated layer rather than a deep bowl.
Chicken and wings
Use a dry surface, rest the breading, and fry wings at 350-375°F until the thickest section reaches at least 165°F. For larger bone-in chicken pieces, use a lower first-fry temperature or finish in an oven so the crust does not burn before the center cooks.
Wings tolerate a double fry well: cook through at 325-350°F, rest 5-10 minutes, then refry at 375°F for 1-2 minutes. Sauce only the serving portion.
Fish and seafood
Keep fish cold before frying, but remove surface water with paper towels. Use a thin flour, rice-flour, or beer batter and fry small batches at 350-365°F.
Fish crust softens faster than chicken crust because the flesh releases steam and the fillet is often thin. Serve within 5-15 minutes when possible, and keep tartar sauce or other wet accompaniments separate.
What Is the Best Way to Transport Fried Food?
Vented packaging is the best transport option because it releases steam while protecting the food. Use a shallow corrugated carton with ventilation holes, a raised base, or a perforated liner, and leave headspace above the food.
| Packaging choice | Ventilation | Typical crispness result | Best practice |
|---|---|---|---|
| Vented corrugated carton | Side and top vents | 15-30 minutes | Keep lid above the crust |
| Paper bag | Limited, variable | 5-15 minutes | Use only for very short trips |
| Solid plastic box | None | Under 5 minutes | Cool food before sealing |
| Foil wrap | Very limited | 5-10 minutes | Leave one end open |
| Perforated clamshell | Moderate | 15-30 minutes | Avoid overfilling |
Do not seal steaming food in plastic or foam. If transport exceeds 30 minutes, prioritize food safety and accept some texture loss rather than holding food in the temperature danger zone.
For leftovers, cool fried food uncovered until it stops releasing visible steam, refrigerate it promptly in a shallow container, and reheat it later on a rack. Do not leave cooked food at room temperature for extended periods; USDA guidance uses a two-hour limit, reduced to one hour above 90°F.
Can You Make Fried Food Crispy Again?
An oven, toaster oven, or air fryer can restore much of the crispness by evaporating absorbed surface moisture. Reheat in a single layer at 375-425°F, with the exact temperature chosen according to food thickness and sugar content.
Use 375°F for breaded fish or sauced foods that could scorch, and 400-425°F for fries, wings, and dense breaded pieces. Air-fry small portions for 3-8 minutes; use a conventional oven for 8-15 minutes. Avoid the microwave as the primary method because it heats water inside the food and produces steam.
A rack improves airflow, but a preheated sheet pan also works when a rack is unavailable. Reheating cannot recreate the original crust if sauce has deeply penetrated it or if the coating detached during storage.
Common Mistakes and How to Fix Them
| Symptom | Likely cause | Immediate fix | Prevention |
|---|---|---|---|
| Crispy outside, greasy interior | Oil below 325°F or excessive fry time | Drain on rack and refry briefly at 375°F | Fry smaller batches |
| Breading falls off | Wet surface or insufficient rest | Remove loose pieces and refry carefully | Dry food and rest 10-15 minutes |
| Dark crust, raw center | Oil too hot or pieces too thick | Finish in a 350°F oven | Lower first-fry temperature |
| Limp fries | Potato moisture or single fry | Refry at 375-400°F for 2-4 minutes | Use a double fry |
| Crisp food turns soft in minutes | Steam trapped by bowl or lid | Spread on a rack immediately | Use single-layer ventilation |
| Burnt crumbs on coating | Loose breading left in oil | Skim crumbs between batches | Shake off excess coating |
Greasy food cannot always be fixed by longer frying. Extended frying may darken the crust while forcing more oil into a cracked coating, so a short high-temperature refry is usually better after the food has already cooked through.
Detached breading also has a limited recovery path. If the interior is done, remove loose fragments, return the pieces briefly to hot oil, and serve immediately; if the coating is wet and patchy throughout, changing the oil temperature alone will not rebuild adhesion.
How Long Does Fried Food Stay Crispy?
Most fried food stays distinctly crisp for 10-30 minutes in open air and 30-60 minutes on a ventilated rack in a low oven. Thin batters, wet sauces, humid rooms, and stacked portions shorten those ranges, while double-fried starch coatings extend them.
Commercial equipment can improve the holding window, but it does not eliminate quality decline. Food that remains above 135°F may be safe yet noticeably less crisp, because food safety and sensory quality use different thresholds.
Expert rules that prevent recurring failures
- Measure recovery, not only pre-fry temperature. Oil at 375°F before loading says little if the pan stays at 315°F for the next five minutes.
- Treat steam as the enemy after frying. Many “greasy” results are actually condensation failures caused by bowls, lids, or stacked pieces.
- Separate quality timing from safety timing. A rack may preserve texture for 20 minutes, but hot food still needs temperature control when service extends longer.
- Refry starches, not fragile batters. Fries and wings respond well to a second fry; delicate tempura often becomes hard or breaks apart.
- Sauce per portion. A sealed sauced batch loses more crispness than two smaller portions sauced at different serving times.
Frequently Asked Questions
Does adding cornstarch make fried food crispier?
Cornstarch often creates a thinner, more brittle crust than wheat flour because it contains no gluten-forming proteins. Replace 20-30% of all-purpose flour with cornstarch for chicken or shrimp, then test the coating thickness. A damp surface, crowded pan, or sealed container can still make the finished food soft.
Should fried food cool before going into a container?
Fried food should release visible steam before storage, but it should not remain at room temperature for unsafe periods. Place pieces in a single layer on a rack, refrigerate them promptly in a shallow container once steam subsides, and reheat at 375-425°F before serving.
Why does my fried chicken get soggy under the crust?
Chicken becomes soggy under the crust when steam condenses during cooling or when the breading absorbs liquid from the meat, sauce, or container. Drain chicken on a rack, avoid stacking it, fry at 350-375°F, and sauce only immediately before eating.
Can paper towels keep fried food crispy?
Paper towels remove excess surface oil but cannot provide the airflow of a wire rack. Direct contact traps steam against the underside, so fried food often softens faster. Use paper towels briefly for blotting, then transfer the food to an elevated rack.
Is double frying better for every fried food?
Double frying works best for fries, wings, and dense starch-coated foods because the first fry cooks the interior and the second fry rapidly dries and firms the exterior. It is less suitable for delicate tempura, thin fish, doughnuts, or foods that would overcook during the second fry.
How do restaurants keep fried food crispy?
Restaurants combine stable oil temperature, small batches, elevated draining, short holding times, and ventilated packaging. Commercial warmers may maintain food above 135°F while moving air around perforated trays, but restaurants still limit holding because texture declines even when the food remains safe.
The Bottom Line
To keep fried food crispy, dry the surface, use a coating suited to the holding time, rest breaded pieces, and maintain 350-375°F oil without crowding. Drain immediately on a wire rack, hold food in a single ventilated layer, and delay sauce until serving. For leftovers, refrigerate safely and reheat at 375-425°F rather than using a microwave. These controls address the real cause of sogginess: moisture trapped in or around the crust.