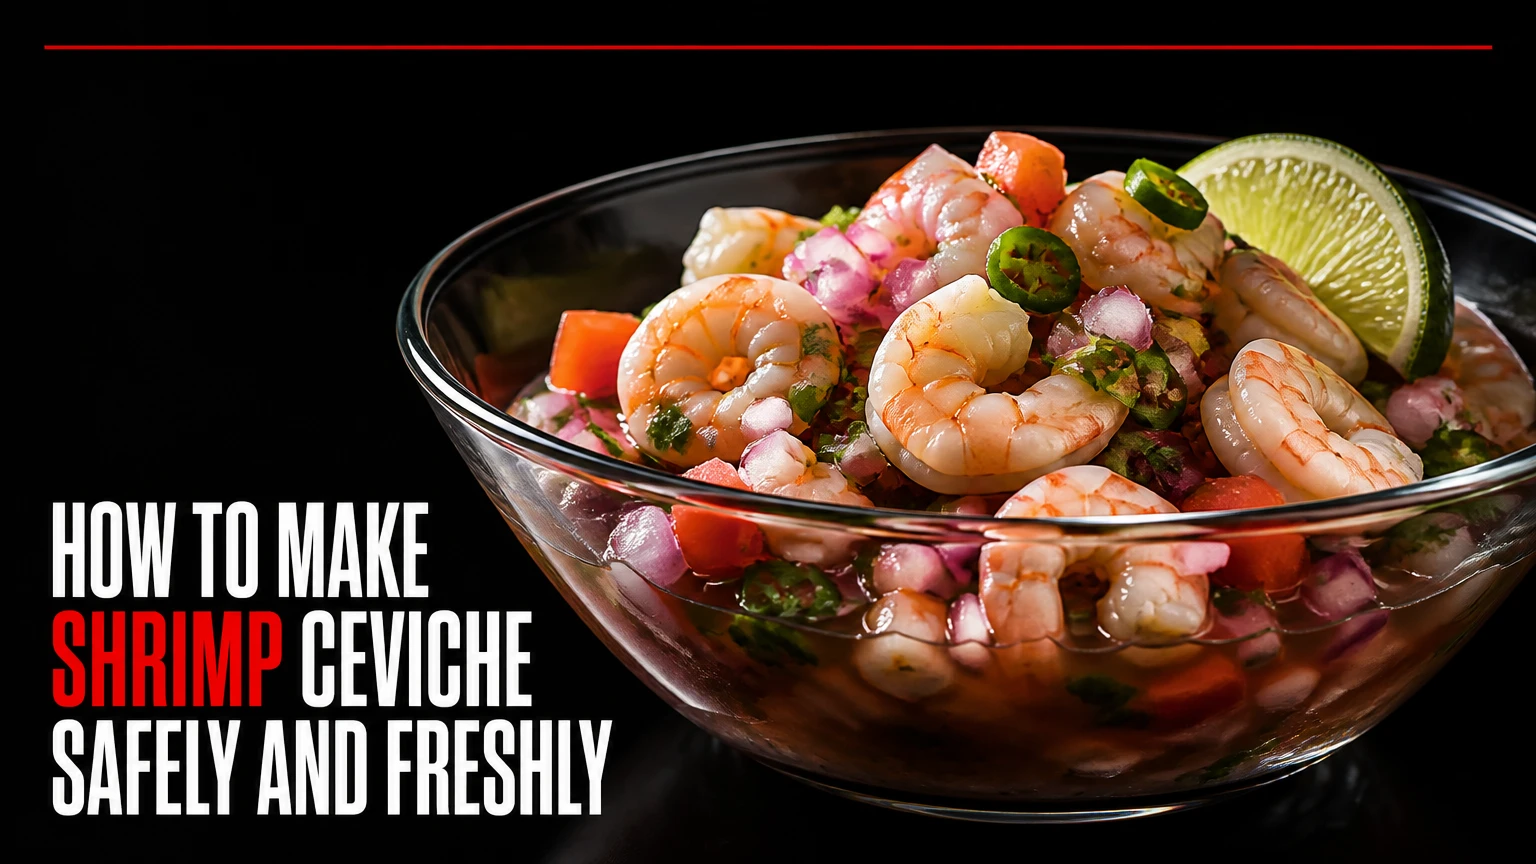
Shrimp ceviche combines bite-size shrimp, fresh citrus juice, onion, chile, herbs, and vegetables in a cold preparation that firms the shrimp through acid denaturation. For the most predictable result, blanch 1 pound of shrimp for 60 seconds, chill it immediately, then marinate it with 3/4 cup lime juice for 10-15 minutes before mixing and serving.
Key Facts at a Glance
A 1-pound batch makes approximately 4 appetizer servings or 2-3 generous main-course servings.
Raw shrimp typically needs 15-30 minutes in lime juice; blanched shrimp needs 10-15 minutes.
Lime juice changes shrimp texture but does not reliably destroy bacteria, viruses, or parasites.
Keep shrimp and ceviche at or below 40°F (4°C), using a refrigerator and an ice bath when needed.
Use glass, ceramic, or stainless steel; aluminum can react with acidic citrus juice.
Freshly squeezed lime juice, dry shrimp, and late-added avocado produce the cleanest texture.
What Is Shrimp Ceviche?
Shrimp ceviche is a chilled seafood preparation in which citrus juice firms shrimp proteins while onion, chile, herbs, and vegetables provide contrast. Traditional versions vary across Latin America, so “authentic” ceviche does not describe one universal ingredient list or one mandatory preparation method.
Citrus contains citric acid, which lowers the mixture’s pH and alters the shape of proteins at the shrimp’s surface. The flesh changes from translucent and soft to opaque and firmer, resembling cooked shrimp. The chemical change affects texture, not food safety in the same way that heat does.
The U.S. Food and Drug Administration states, “The safest way to enjoy seafood is to cook it thoroughly.” That distinction matters because a raw-cured ceviche can look fully cooked while still carrying hazards associated with uncooked seafood.
Can lime juice cook shrimp?
Lime juice can chemically denature shrimp proteins, but lime juice cannot be treated as an equivalent replacement for heat cooking. Acid exposure produces an opaque surface and firmer bite, while a validated heat treatment reaches the internal temperature needed to reduce many foodborne hazards.
For a safety-first method, briefly blanch the shrimp before adding lime juice. The National Oceanic and Atmospheric Administration identifies 145°F (63°C) as the general seafood cooking benchmark used in consumer guidance, while a 60-second blanch is a practical home method that partially cooks small shrimp and limits carryover cooking.
Is Shrimp Ceviche Safe to Eat?
Blanched shrimp ceviche is the safer home option because heat reduces surface contamination before the citrus marinade begins. Raw shrimp ceviche carries more risk, especially for pregnant people, young children, older adults, and anyone with a weakened immune system.
No preparation method makes raw seafood risk-free. Buy shrimp from a reputable seller, keep it cold, prevent cross-contamination, and serve the finished dish immediately. Do not leave the bowl on a warm buffet or transport it without a properly chilled container.
| Situation | Safer choice | Temperature or time rule | Reason |
|---|---|---|---|
| Healthy adult seeking traditional texture | Raw or blanched shrimp | Keep at 40°F (4°C) or below | Raw preparation has higher hazard exposure |
| Pregnant diner | Fully heat-cooked shrimp | Reach 145°F (63°C) | Avoid raw or undercooked seafood |
| Child under 5 years | Fully heat-cooked shrimp | Reach 145°F (63°C) | Young children face higher foodborne-illness risk |
| Warm outdoor service | Blanched shrimp on ice | Discard after 2 hours, or 1 hour above 90°F (32°C) | Bacterial growth accelerates in warm conditions |
| Immunocompromised diner | Fully heat-cooked shrimp | Reach 145°F (63°C) | Citrus curing is not sterilization |
The U.S. Department of Agriculture’s two-hour rule applies to perishable food held between 40°F and 140°F, with only one hour allowed above 90°F. Keep the serving bowl nested in ice when serving outdoors, and return leftovers to the refrigerator promptly.
What Ingredients and Tools Do You Need?
For four appetizer servings, use 1 pound of peeled, deveined shrimp, 3/4 cup fresh lime juice, 1/2 cup finely diced red onion, 1 cup diced Roma tomato, 1/2 cup diced cucumber, 1 jalapeño, 1/2 cup cilantro, and 1 small avocado. Add salt gradually because tortilla chips, tostadas, and crackers contribute additional sodium.
Use a sharp knife, cutting board, citrus reamer, measuring cup, glass or ceramic bowl, fine-mesh strainer, and instant-read thermometer if blanching. A stainless-steel bowl also works, but aluminum, copper, and cast iron can react with acidic citrus and create metallic flavors.
| Ingredient or tool | Quantity for 4 servings | Function | Practical specification |
|---|---|---|---|
| Shrimp | 1 lb, 454 g | Main protein | 21-30 count, peeled and deveined |
| Fresh lime juice | 3/4 cup, 180 ml | Acid marinade | Approximately 4-6 medium limes |
| Red onion | 1/2 cup, 75 g | Sharp aromatic | Dice 3-4 mm or slice paper-thin |
| Roma tomato | 1 cup, 160 g | Sweet acidity | Remove watery seed pulp if desired |
| Cucumber | 1/2 cup, 65 g | Fresh crunch | English or Persian cucumber |
| Jalapeño | 1, 15-20 g | Heat | Remove seeds for milder flavor |
| Cilantro | 1/2 cup, loosely packed | Herbaceous finish | Add after curing |
| Avocado | 1 small, 150 g | Fat and creaminess | Fold in during the last 5 minutes |
Choose shrimp with a clean, mild ocean smell and firm flesh. Ammonia, sourness, sliminess, blackened edges, or soft meat indicate poor quality. “Fresh” seafood is not automatically superior: frozen-at-sea shrimp can preserve quality better than shrimp that has spent several days thawed in a display case.
Should you use fresh or frozen shrimp?
Flash-frozen individually quick frozen shrimp is often the most practical choice inland because freezing pauses quality loss and simplifies portioning. Thaw shrimp overnight in the refrigerator, or place the sealed package in cold water for faster thawing; never thaw it on the counter.
Pat thawed shrimp completely dry with paper towels. Excess water dilutes the lime juice, slows the surface cure, and creates a watery mixture that tastes flat. Never refreeze thawed shrimp for ceviche unless it has first been thoroughly cooked.
How to Make Shrimp Ceviche
The recipe takes about 35-45 minutes from preparation to serving, including a 10-15 minute cure for blanched shrimp. Raw shrimp can take 15-30 minutes, but the decisive factors are shrimp size, cold temperature, acid coverage, and the point at which the citrus is drained.
Step 1: Prepare the Shrimp
Peel and devein 1 pound of shrimp, rinse briefly under cold running water, and pat it dry. Remove the tail shells, then cut each shrimp into pieces approximately 1/2 inch (1.25 cm) thick; 21-30 count shrimp usually divide into two or three pieces.
For raw ceviche, transfer the cut shrimp directly to a chilled glass bowl. For the safer method, prepare the ice bath before heating water so the shrimp can cool without delay.
You will know the shrimp is ready when the pieces are evenly sized and dry, with no shell fragments or visible intestinal vein. The common mistake is leaving large pieces intact, which gives the outside a firm texture before the center receives enough acid exposure.
Step 2: Blanch and Chill the Shrimp
Bring enough water to cover the shrimp to a full boil. Add the cut shrimp, stir once, and blanch for 60 seconds, then drain and transfer the pieces immediately to an ice bath for 2 minutes.
Drain the shrimp thoroughly and pat it dry again. An instant-read thermometer can confirm that the thickest pieces approach the 145°F (63°C) seafood benchmark when fully cooked, although a one-minute blanch is designed as a brief par-cook rather than a guaranteed uniform heat treatment for every shrimp size.
You will know the step worked when the shrimp is pink and opaque at the edges but still firm and cool after the ice bath. The common mistake is boiling for several minutes, which produces rubbery shrimp before the lime is added.
Step 3: Add the Lime Juice
Place the shrimp in a non-reactive bowl and pour in 3/4 cup freshly squeezed lime juice. Stir so every piece is coated, cover the bowl, and refrigerate it at or below 40°F (4°C).
Blanched shrimp generally needs 10-15 minutes. Raw shrimp typically needs 15-30 minutes. Stir once halfway through so pieces on the top and bottom receive similar exposure.
You will know the cure is ready when the shrimp is opaque throughout, firm but springy, and no longer glassy in the center. The common mistake is treating the clock as the only test; shrimp size, juice acidity, and starting temperature can change the pace.
Step 4: Prepare the Vegetables
While the shrimp chills, dice the red onion, Roma tomato, cucumber, and jalapeño into pieces close to the shrimp’s size. Chop the cilantro and keep the avocado separate until the final toss.
Rinse sliced red onion in cold water for 30 seconds if you prefer less bite, then drain it thoroughly. Thin Peruvian-style onion slices need less rinsing when the sharpness is part of the intended flavor.
You will know the vegetables are ready when they are dry, evenly cut, and held separately from the acid-cured shrimp. The common mistake is adding tomato seeds and avocado early, because their moisture and delicate structure can make the ceviche watery or mushy.
Step 5: Drain and Season the Shrimp
Drain about half of the lime juice after the curing period, retaining enough liquid to coat the shrimp. Add 1/2 teaspoon kosher salt, taste, and adjust in 1/4-teaspoon increments; add black pepper only if it suits the chosen regional style.
Draining is especially important for blanched shrimp, which already has a firm texture and can become chalky in excessive acid. If you plan to serve the ceviche later, drain nearly all the lime juice and add 1-2 tablespoons just before serving.
You will know the balance is right when the shrimp tastes bright rather than sharply sour, with enough liquid to moisten each bite. The common mistake is salting before draining, which can make the final mixture taste more concentrated than expected.
Step 6: Fold in the Vegetables and Serve
Gently fold in the onion, tomato, cucumber, jalapeño, and cilantro. Add the diced avocado during the last 5 minutes, then serve the shrimp ceviche cold with tostadas, tortilla chips, saltine crackers, or cucumber rounds.
Taste once more for salt, chile heat, and citrus balance. A tablespoon of fresh orange juice can soften excessive sharpness, while 1 teaspoon of olive oil adds roundness without turning the dish greasy.
You will know the ceviche is finished when the vegetables remain crisp, the avocado holds its shape, and the shrimp is opaque but not chalky. The common mistake is vigorous stirring, which breaks avocado and releases excess tomato water.
Which Regional Shrimp Ceviche Style Should You Make?
Mexican shrimp ceviche is the most accessible starting point because its tomato, cucumber, cilantro, jalapeño, and avocado pair naturally with chips or tostadas. Peruvian ceviche is sharper and more onion-forward, while Ecuadorian ceviche is usually juicier, sweeter, and more tomato-based.
Regional names describe flavor systems rather than rigid legal formulas. Seafood, citrus, chile, onion, and local accompaniments change from household to household.
| Style | Liquid base | Defining additions | Typical accompaniments |
|---|---|---|---|
| Mexican | 3/4 cup lime juice, optional 1/4 cup Clamato | Roma tomato, cucumber, jalapeño, cilantro, avocado | Tostadas, tortilla chips, saltine crackers |
| Peruvian | Lime juice or leche de tigre | Red onion, rocoto or ají amarillo, cilantro | Sweet potato and choclo corn |
| Ecuadorian | Lime juice plus 1/4 cup orange juice | Tomato, green bell pepper, ketchup, mustard | Chifles or plantain chips |
| Caribbean-inspired | Lime juice plus a small orange component | Mango, red onion, Scotch bonnet, cilantro | Plantain chips or lettuce cups |
Leche de tigre means “tiger’s milk,” a seasoned citrus liquid often blended with fish trimmings, onion, cilantro, chile, and sometimes celery or ginger. It gives Peruvian-style ceviche a fuller, savory liquid, but a simple lime marinade is easier to control for a first batch.
Raw or Blanched Shrimp: Which Is Better?
Raw shrimp gives the most delicate, traditional acid-cured texture, while blanched shrimp gives greater safety control and more predictable firmness. Choose raw only when the shrimp is exceptionally fresh, the cold chain is reliable, and every diner accepts the additional risk.
| Decision factor | Raw shrimp | 60-second blanched shrimp |
|---|---|---|
| Curing time | 15-30 minutes | 10-15 minutes |
| Texture | Tender, soft-firm, translucent center may persist | Firmer, more consistently opaque |
| Safety profile | Higher raw-seafood exposure | Lower surface contamination risk |
| Best use | Traditional preparation for healthy adults | Beginners, mixed groups, outdoor service |
| Main failure | Undercured center or unsafe handling | Overcooked edges or dry pieces |
| Refrigerated hold | Serve immediately | Best within 24 hours, still serve promptly |
Blanching does not transform ceviche into a fully heat-cooked seafood dish unless the shrimp reaches the appropriate internal temperature throughout. Treat the blanch as a risk-reduction technique, not as permission to ignore seafood handling.
How Long Does Shrimp Ceviche Last?
Shrimp ceviche is best served immediately and should generally be refrigerated for no more than 24 hours. Raw-cured ceviche loses texture quickly because the acid continues denaturing proteins, while tomato, cucumber, and avocado release water as they sit.
For the best make-ahead workflow, blanch and chill the shrimp, prepare the vegetables separately, and combine the components 10-15 minutes before eating. Store the shrimp and vegetables in covered containers at or below 40°F (4°C).
Do not taste leftovers repeatedly or return a serving bowl that has sat at room temperature to the refrigerator. Discard ceviche with sour odors unrelated to lime, slimy shrimp, gas bubbles, or a warm holding history.
What Are the Common Ceviche Problems?
Most shrimp ceviche failures come from excess acid exposure, wet ingredients, uneven cuts, or weak temperature control. Each problem has a specific correction, but some textures cannot be restored after the shrimp becomes chalky or rubbery.
| Problem | Likely cause | Immediate fix | Prevention |
|---|---|---|---|
| Rubber-textured shrimp | Cured for several hours | Drain all lime and add fresh vegetables | Use a 10-30 minute timer |
| Chalky shrimp | Excess acid and prolonged storage | Fold in avocado and orange juice | Drain after the target cure |
| Watery ceviche | Wet thawed shrimp or seeded tomatoes | Strain some liquid and reseason | Pat shrimp dry, remove tomato pulp |
| Too sour | Too much retained lime | Add orange juice or 1 teaspoon oil | Drain half the marinade |
| Bland flavor | Low salt or diluted juice | Add salt in 1/4-teaspoon increments | Use fresh lime and dry ingredients |
| Mushy vegetables | Avocado or tomato added too early | Add fresh cucumber and onion for contrast | Add fragile ingredients at the end |
Bottled lime juice works in an emergency, but freshly squeezed lime usually tastes brighter because it contains more volatile citrus aromas and no need for the preservatives found in some commercial products. Bottled juice also varies in acidity and can make timing less predictable.
A practitioner rule is to cure for texture, not for a darker color. Shrimp does not become safer because it turns fully opaque in lime juice, and waiting for a visual endpoint can encourage overexposure to acid.
How Much Does Shrimp Ceviche Cost and What Can You Substitute?
A typical United States home batch costs $15-$25 for four servings, with shrimp accounting for roughly $10-$18 per pound depending on size, origin, season, and whether it is wild-caught or farmed. Lime prices can change sharply, so the citrus portion may cost $3-$7 when several medium fruit are required.
Use lemon when limes are unavailable, but expect a less floral, more direct acidity. A lime-orange blend works well for Ecuadorian-style ceviche, while vinegar should not replace the entire citrus base because its flavor is harsher and its acidity behaves differently.
| Ingredient choice | Typical cost | Flavor result | Best adjustment |
|---|---|---|---|
| Frozen peeled shrimp | $10-$16 per lb | Clean, mild, consistent | Thaw and dry completely |
| Wild never-frozen shrimp | $14-$25 per lb | Sweet, delicate | Use raw only with excellent handling |
| Farmed shrimp | $8-$14 per lb | Mild, sometimes softer | Blanch for predictable texture |
| Fresh lime juice | $3-$7 per batch | Aromatic and bright | Use 4-6 medium limes |
| Lemon juice | $2-$5 per batch | Sharper, less floral | Add orange juice to soften |
| Lime-orange blend | $3-$7 per batch | Sweeter and rounder | Keep lime as the main acid |
Shrimp ceviche is not a good dish for using seafood with questionable freshness, pre-cut vegetables that have been warm, or a package with a damaged seal. Citrus can mask some unpleasant flavors, which makes poor-quality seafood harder to detect rather than safer to eat.
How Should You Serve Shrimp Ceviche?
Serve shrimp ceviche cold in shallow bowls so the marinade, shrimp, and vegetables remain evenly distributed. Tostadas provide a crisp base, tortilla chips make casual dipping easy, and saltine crackers suit soupy Ecuadorian-style preparations.
For a lower-carbohydrate serving, use cucumber rounds or endive leaves instead of chips. For a more substantial Peruvian plate, add boiled sweet potato and choclo corn, whose sweetness and starch moderate the sharp lime profile.
A typical appetizer portion is 4 ounces of shrimp per person when served with chips and other food. Increase the shrimp to 6-8 ounces per person for a main course, and add a starch or beans to make the meal more filling.
Frequently Asked Questions
Can you make shrimp ceviche without lime juice?
Yes, lemon juice can replace lime juice at a one-to-one volume ratio, although the result tastes sharper and less aromatic. A practical alternative is 1/2 cup lemon juice plus 1/4 cup orange juice for each 3/4 cup lime juice, followed by a small salt adjustment after curing.
Should you rinse shrimp before making ceviche?
Rinse peeled shrimp briefly under cold running water, then pat it thoroughly dry. A long soak removes flavor and adds water to the flesh, while a short rinse removes loose shell fragments and surface residue without diluting the marinade.
Why is my shrimp ceviche bitter?
Bitterness usually comes from lime zest, crushed lime seeds, old juice, excessive pith, or prolonged acid exposure. Strain the marinade, add fresh diced vegetables, and balance the mixture with 1-2 tablespoons orange juice; do not add large amounts of sugar, which makes the seafood taste flat.
Can you use pre-cooked shrimp for ceviche?
You can use pre-cooked shrimp, but lime juice should be treated as a seasoning rather than a cooking step. Reduce the cure to 5-10 minutes, use less juice, and add the vegetables immediately because already-cooked shrimp becomes firm and dry faster.
Can pregnant people eat shrimp ceviche?
Pregnant people should choose fully heat-cooked shrimp instead of raw or only citrus-cured shrimp. Cook the shrimp to 145°F (63°C) throughout, cool it promptly, and then add lime, onion, chile, and vegetables after cooking for a ceviche-style salad.
Can you make shrimp ceviche ahead of time?
Prepare the shrimp and vegetables separately several hours ahead, but combine them shortly before serving. Blanched shrimp can be refrigerated for up to 24 hours in a covered container, while the finished mixture is best eaten immediately because acid progressively changes the texture.
The Bottom Line
How to make shrimp ceviche successfully comes down to four controls: use clean, cold shrimp; choose raw or blanched preparation deliberately; cure for 10-30 minutes rather than for hours; and add fragile vegetables at the end. For the safest practical result, blanch 1 pound of shrimp for 60 seconds, chill it in ice water, marinate it in 3/4 cup fresh lime juice for 10-15 minutes, drain part of the liquid, and serve the finished ceviche cold.