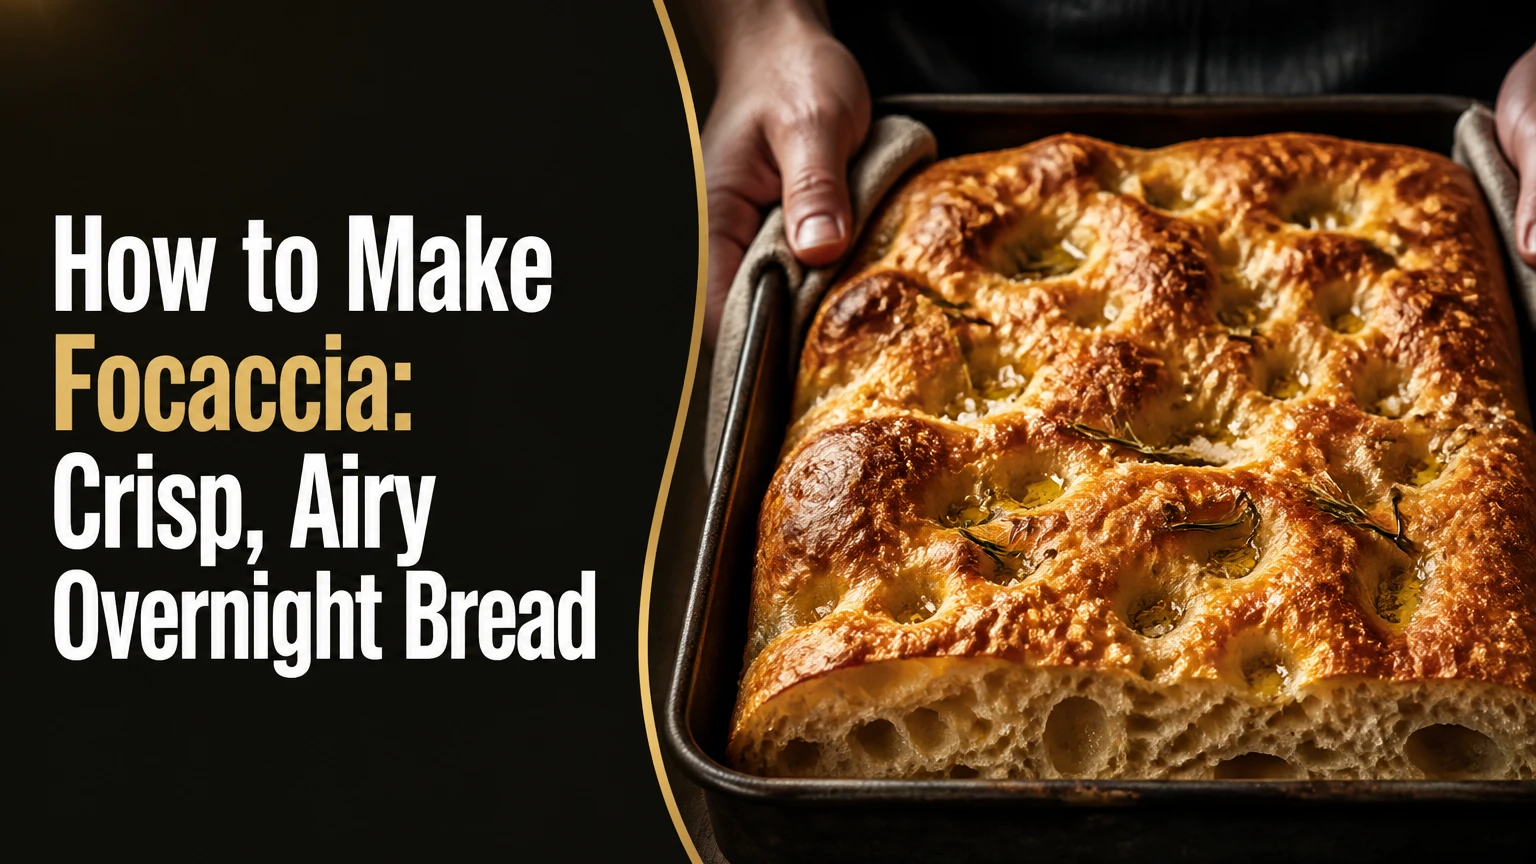
To make focaccia, mix a high-hydration dough with flour, water, yeast, salt, and olive oil, strengthen it with several stretch-and-folds, then cold-ferment it for 12-24 hours. Proof the dough in a generously oiled metal pan, dimple it with wet fingers, add brine and toppings, and bake at 425°F-450°F until deeply golden.
Key Facts at a Glance
- Focaccia dough typically uses 75%-85% hydration, calculated as water weight divided by flour weight.
- An overnight cold fermentation of 12-24 hours gives focaccia more flavor and a lighter, more extensible crumb.
- A dark metal pan conducts heat better than glass or ceramic for a crisp, browned bottom.
- Focaccia is ready when the center reaches approximately 200°F-210°F and the top and underside are well browned.
- The most important handling rule is to preserve fermentation gas during pan proofing and final dimpling.
- A 9-by-13-inch pan usually needs 500 grams of flour for a substantial, sandwich-height focaccia.
What Makes Focaccia Different?
Focaccia is an Italian, oven-baked flatbread with a high-hydration crumb, an oil-fried crust, and a dimpled surface. Pizza dough is often stretched thin and baked quickly on a hot stone, while focaccia proofs inside an oiled pan, where olive oil crisps the base and supports a thicker, airier interior.
The dough is wet by design. Water hydrates flour proteins and starches, while fermentation produces carbon dioxide that expands into pockets. Olive oil coats the dough and pan, limiting sticking and transferring intense heat to the underside.
Dimpling performs two jobs. Finger pressure redistributes oversized gas pockets so the bread does not inflate into a single hollow dome, and the indentations hold oil, salt, and small amounts of brine. The finished bread should have a crisp exterior, a tender interior, and irregular holes rather than a uniform sandwich crumb.
Focaccia di Recco should not be treated as a variation of ordinary yeasted focaccia. The Ligurian specialty uses thin, unleavened dough filled with Stracchino or Crescenza cheese, so the recipe and technique differ substantially.
Build the Focaccia Dough Formula
A dependable 9-by-13-inch overnight focaccia uses 500 grams flour, 390 grams water, 10 grams fine salt, 4 grams instant yeast, and 25 grams olive oil. That formula produces 78% hydration, a manageable level for beginners that still creates a moist, open crumb.
Ingredients for One 9-by-13-Inch Pan
| Ingredient | Weight | Practical equivalent | Function |
|---|---|---|---|
| Unbleached bread flour | 500 g | About 4 cups, weighed | Gluten strength and structure |
| Water | 390 g | 390 ml | 78% hydration and steam |
| Fine sea salt | 10 g | About 1 3/4 teaspoons | Flavor and gluten control |
| Instant yeast | 4 g | About 1 1/4 teaspoons | Fermentation |
| Olive oil in dough | 25 g | 2 tablespoons | Tenderness and flavor |
| Pan oil | 35-45 g | 2 1/2-3 tablespoons | Browning and release |
| Topping oil or brine | 15-25 g | 1-2 tablespoons | Surface flavor and color |
Bread flour, usually around 12%-13% protein, tolerates the wetter dough more easily than many all-purpose flours. If using all-purpose flour, start with 375 grams water instead of 390 grams, then add the remaining 15 grams only if the dough absorbs it without becoming soupy.
Before You Start
| Requirement | Typical value | Why it matters |
|---|---|---|
| Active work | 35-45 minutes | Mixing, folds, shaping, and dressing |
| Total overnight time | 14-26 hours | Includes 12-24 hours refrigerated |
| Room-temperature proof | 2-4 hours | Depends on dough and kitchen temperature |
| Difficulty | Moderate | Wet dough requires gentle handling |
| Typical ingredient cost | $3-$8 | United States home-baking estimate |
| Required pan | 9-by-13-inch metal | Promotes even bottom browning |
| Useful tools | Scale, bowl, scraper, thermometer | Improves repeatability |
A digital scale is the most useful tool because a cup of flour can vary by more than 20 grams depending on packing. Use instant yeast directly in the flour; active dry yeast also works, but it may ferment slightly more slowly.
How to Make Focaccia Step by Step
The overnight method takes about 14-26 hours but only 35-45 minutes of active labor. The success factor that matters most is not aggressive kneading; it is giving the wet dough enough time to develop strength while preventing overproofing.
Step 1: Mix the Dough
Combine 500 grams flour, 390 grams cool water, 4 grams instant yeast, 10 grams salt, and 25 grams olive oil in a large bowl. Stir with a dough whisk or sturdy spoon until no dry flour remains, then cover the bowl and rest the mixture for 20-30 minutes.
The dough will look shaggy and feel sticky. Do not add large amounts of flour to make it easy to handle, because reducing hydration produces a tighter, chewier loaf.
You will know mixing worked when no dry patches remain and the dough stretches in thick strands. A common mistake is pouring in all the water at once with cold ingredients from the refrigerator, which can lower fermentation activity; cool water is acceptable, but the finished dough should measure about 72°F-78°F.
Step 2: Strengthen the Dough With Folds
Wet your hand, grasp one side of the dough, stretch it upward without tearing, and fold it over the center. Rotate the bowl 90 degrees and repeat until you have completed four folds. Perform three or four sets at 30-minute intervals.
Stretch-and-folding aligns gluten without the friction and heat produced by prolonged kneading. Keep the bowl covered between sets so the surface does not form a dry skin.
You will know the dough is strengthening when it becomes smoother, holds a rounded shape briefly, and resists tearing during a gentle pull. A common mistake is adding extra flour between folds; use wet or lightly oiled hands instead.
Step 3: Cold-Ferment the Dough
Cover the bowl tightly and refrigerate the dough for 12-24 hours at approximately 37°F-40°F. The dough should expand noticeably, often by 50%-100%, but it does not need to double before refrigeration.
Cold fermentation slows yeast activity while enzymes continue modifying the dough. The result is deeper wheat flavor, better extensibility, and a dough that is easier to spread after chilling.
You will know the bulk fermentation is adequate when the dough contains bubbles along the sides and feels elastic rather than liquid. A common mistake is leaving the dough at room temperature overnight; at 70°F-75°F, the same yeast quantity can overproof in 8-12 hours.
Step 4: Oil and Prepare the Pan
Pour 35-45 grams olive oil into a 9-by-13-inch dark metal pan and spread it across the base and corners. For a thinner, crisper focaccia, use a rimmed half-sheet pan measuring approximately 13 by 18 inches and use 650 grams dough rather than the full 500-gram flour formula.
Avoid glass or ceramic when a crisp bottom is the priority. Metal transfers heat to the dough more quickly, while thick glass and ceramic can leave the underside pale or damp even when the top looks finished.
You will know the pan is ready when the entire bottom has a visible oil film and the corners are coated. A common mistake is oiling only the center, which causes the edges to stick and prevents the perimeter from frying evenly.
Step 5: Transfer and Proof the Dough
Scrape the chilled dough into the oiled pan, turning it once so both sides receive oil. Rest it for 20 minutes, then gently stretch it toward the corners without forcing it; if the dough contracts, wait another 15 minutes and stretch again.
Cover the pan and proof at room temperature for 2-4 hours. A warmer kitchen near 75°F may require only 2 hours, while a 65°F kitchen may need closer to 4 hours.
You will know the dough is ready when it reaches most corners, looks inflated, and jiggles when the pan moves. A common mistake is judging readiness by the clock alone; underproofed dough springs back immediately, while properly proofed dough retains a shallow fingerprint.
Step 6: Make the Brine and Dimple the Dough
Mix 25 grams warm water, 15 grams olive oil, and 2 grams flaky sea salt. Pour the mixture over the proofed dough, oil your fingertips, and press straight down through the dough until your fingers approach the pan without ripping the surface.
The brine settles into the depressions and seasons the interior of the crust. Use a vertical pressing motion rather than dragging your fingers sideways, because lateral pressure can tear the gluten network and expel too much gas.
You will know dimpling worked when the surface has deep, evenly distributed pockets and the dough still looks aerated between them. A common mistake is pressing only shallow marks across the top; deep dimples prevent doming and create the characteristic focaccia texture.
Step 7: Add Toppings Carefully
Scatter rosemary, thin garlic slices, olives, halved cherry tomatoes, or flaky salt across the surface after dimpling. Dry toppings are safest for a first loaf because they add flavor without releasing excessive water.
Fresh tomatoes and vegetables can make the surface wet, especially when packed closely together. Pat tomatoes dry, use small portions, and place moisture-heavy toppings in the dimples rather than covering the entire dough.
You will know the topping load is appropriate when at least 60%-70% of the dough surface remains visible. A common mistake is burying the dough under vegetables, which blocks browning and weighs down the crumb.
Step 8: Bake Until the Bottom Browns
Heat the oven to 450°F, or 425°F if the oven runs hot, and place the pan on the middle or lower-middle rack. Bake for 25-30 minutes, rotating once after 18 minutes if the oven browns unevenly.
Focaccia needs enough heat to set the crumb while olive oil fries the base. The loaf is finished when the top is deep golden brown, the edges are crisp, and the underside has a firm brown crust.
You will know baking worked when the center temperature is approximately 200°F-210°F and the bread releases cleanly from the pan. A common mistake is removing pale focaccia at 20 minutes; an underbaked center collapses as steam escapes.
Transfer the bread to a rack within five minutes of removing it from the oven. Leaving focaccia in the pan traps steam against the bottom and can turn a crisp crust soft.
Which Fermentation Method Should You Use?
Overnight fermentation produces the best balance of flavor, extensibility, and open crumb, while same-day focaccia is faster and sourdough focaccia offers more acidity. Choose the method according to scheduling, starter maintenance, and the texture you prefer.
| Method | Yeast or starter | Total time | Typical result | Best situation |
|---|---|---|---|---|
| Same-day | 7 g instant yeast | 4-6 hours | Mild flavor, moderately open crumb | Dinner planned the same day |
| Overnight | 4 g instant yeast | 14-26 hours | Complex flavor, airy crumb | Bakery-style home baking |
| Sourdough | 100-150 g active starter | 18-36 hours | Tangy flavor, irregular holes | Maintained starter available |
| Focaccia di Recco | No yeast | 1-2 hours | Thin layers, melted cheese | Cheese-filled Ligurian style |
For a same-day version, use 7 grams instant yeast and 380 grams water, rest the mixed dough for 30 minutes, complete three folds, and proof at room temperature for 2-3 hours before panning. The shorter schedule works, but the flavor will be simpler.
Sourdough timing varies with starter strength and temperature. A starter that doubles in four to six hours at 75°F is generally more predictable than one that rises slowly or has been refrigerated for weeks.
Choose Toppings That Do Not Weigh Down the Dough
Rosemary, flaky salt, olive oil, olives, and thinly sliced onions are reliable toppings because they contribute little free water. Tomatoes, grapes, potatoes, and roasted vegetables work well when dried or partially cooked before they reach the dough.
| Topping | Preparation | Amount for 9-by-13-inch pan | Main risk |
|---|---|---|---|
| Rosemary | Fresh leaves, patted dry | 1-2 tablespoons | Burning at exposed tips |
| Cherry tomatoes | Halved and dried | 150-200 g | Wet surface and pale crust |
| Kalamata olives | Pitted and drained | 100-125 g | Excess salt |
| Thin onion | Sliced to 2 mm | 75-100 g | Surface moisture |
| Roasted garlic | Cooled and drained | 30-50 g | Localized oil and softness |
| Red grapes | Whole, seedless | 150 g | Bursting juice |
Add delicate herbs after baking if their aroma disappears in a hot oven. Add garlic in thin slices or use roasted cloves; thick raw garlic can burn before the crumb is fully baked.
Focaccia is not ideal for unlimited wet toppings. A crowded, watery surface can create a soft center even when the crust has browned, so toppings should complement the dough rather than replace it.
What Flour, Pan, and Oil Work Best?
Bread flour and a dark metal pan provide the easiest route to an open crumb and crisp base, but all-purpose flour works when the water is reduced slightly. Extra-virgin olive oil gives the strongest flavor, while a mild refined olive oil tolerates high heat with less bitterness.
| Choice | Recommended specification | Effect | Adjustment |
|---|---|---|---|
| Bread flour | 12%-13% protein | Stronger gluten at 78% hydration | Use full water formula |
| All-purpose flour | 10.5%-12% protein | Softer, less elastic dough | Hold back 15-25 g water |
| Dark aluminum pan | 9 by 13 inches | Fast browning and crisp base | Use standard bake time |
| Cast-iron skillet | 10-12 inches | Thick, deeply browned crust | Preheat carefully; watch edges |
| Glass baking dish | 9 by 13 inches | Slower bottom browning | Bake longer and oil generously |
| Extra-virgin olive oil | 35-70 g total | Fruity flavor and crisp frying | Use a moderately priced oil |
A 10-inch cast-iron skillet makes a thicker, round focaccia with a very crisp edge, but the dense metal can darken the bottom before the center finishes. Lower the oven to 425°F if the underside colors too quickly.
The pan dimensions change dough thickness more than most topping choices. A shallow half-sheet pan produces a thinner, crunchier loaf, while a smaller pan concentrates the dough into a taller, softer piece.
Common Mistakes and How to Fix Them
Why Did the Dough Not Rise?
Focaccia dough fails to rise when yeast is inactive, the dough is too cold, or fermentation ends before the gluten network traps enough gas. If the refrigerated dough shows no bubbles after 16 hours, move it to a 75°F area for 1-2 hours before judging it.
Test questionable yeast by mixing it with warm water and a pinch of flour. Water above approximately 120°F can damage yeast, while water around 95°F-105°F is safer for an activity test.
Why Is the Focaccia Dense?
Dense focaccia usually results from underproofing, excessive flour, or aggressive handling after fermentation. Let the panned dough become visibly jiggly before dimpling, and do not knead it again after the cold rise.
If the dough is already in the pan and feels tight, cover it and wait another 30-60 minutes. A longer proof often repairs density more effectively than adding yeast late.
Why Is the Bottom Soggy?
A soggy base usually comes from insufficient pan oil, a cool oven, a thick glass dish, or steam trapped under the bread after baking. Use 35-45 grams oil, bake on a lower-middle rack, and cool the loaf on a wire rack.
A pale bottom with a fully baked top indicates poor heat transfer rather than inadequate fermentation. A dark metal pan or preheated cast iron offers the clearest correction.
Why Did the Dough Tear During Dimpling?
Tearing occurs when the dough is underproofed, too dry, or pressed with sideways force. Wait 15 minutes, oil your fingers, and press vertically through the dough instead of stretching across its surface.
Do not patch every small tear. Minor openings usually close during baking, while repeated handling removes the gas that creates an open crumb.
Why Is the Crust Tough?
Tough focaccia usually reflects low hydration, overbaking, or too much flour during handling. Keep hydration near 75%-80%, remove the bread once the center reaches 200°F-210°F, and use oil rather than flour on your hands.
Focaccia should be chewy at the crust but tender inside. A dry, cardboard-like crumb indicates that the loaf lost too much moisture during baking.
How Long Does Focaccia Keep and Can You Freeze It?
Focaccia keeps well for two days at room temperature, about one week refrigerated, or up to three months frozen when wrapped airtight. Room-temperature storage preserves texture better than refrigeration, because refrigerator temperatures accelerate starch firming.
| Storage method | Maximum typical quality window | Packaging | Reheating |
|---|---|---|---|
| Counter | 48 hours | Paper plus loose bag | 325°F for 5-8 minutes |
| Refrigerator | 7 days | Airtight container | 350°F for 8-12 minutes |
| Freezer, slices | 3 months | Foil plus freezer bag | 350°F for 12-18 minutes |
| Freezer, whole slab | 6-8 weeks | Double-wrapped | Thaw, then 350°F for 15 minutes |
Cool focaccia completely before wrapping it. Warm bread enclosed in plastic produces condensation, which softens the crust and encourages mold.
Slice the loaf before freezing if you plan to use individual portions. Reheat frozen slices directly in a 350°F oven until the center is warm and the crust has regained firmness.
Adaptations for Other Situations
For a gluten-free version, use a tested gluten-free bread blend with a binder such as psyllium husk, but expect a batter-like dough and a smaller, more uniform crumb. Traditional stretch-and-fold timing does not transfer directly because gluten is absent.
For whole-wheat focaccia, replace 20%-30% of the bread flour with whole-wheat flour and increase water by approximately 15-30 grams. Whole-wheat bran absorbs water and cuts gluten strands, so a full 100% substitution often creates a denser loaf.
For a vegan topping, use olives, tomatoes, herbs, onions, roasted peppers, or mushrooms. The basic dough is already vegan when it contains flour, water, yeast, salt, and olive oil.
For a gluten-free or whole-wheat adaptation, judge readiness by volume, bubbles, and texture rather than copying the standard clock. Flour composition changes absorption and fermentation speed.
Timing, Temperature, and Cost
The overnight schedule requires roughly 14-26 hours from mixing to serving, with only 35-45 minutes of active work. Typical United States ingredient cost is $3-$8 for one 9-by-13-inch pan, depending mainly on olive oil, flour, and toppings.
| Schedule point | Typical duration | Target condition |
|---|---|---|
| Initial rest | 20-30 minutes | Flour fully hydrated |
| Stretch-and-fold period | 90 minutes | Dough smoother and elastic |
| Refrigerated fermentation | 12-24 hours | Bubbles and expanded volume |
| Room-temperature proof | 2-4 hours | Dough fills pan and jiggles |
| Baking | 25-30 minutes | Deep golden top and brown base |
| Cooling | 20-30 minutes | Crumb sets before slicing |
These are typical practitioner ranges, not rigid scientific limits. A 60°F kitchen, weak flour, or sluggish yeast can extend proofing, while a 78°F kitchen can shorten it substantially.
One expert rule matters here: control dough temperature before changing the recipe. If dough ferments too quickly, reduce warmth or yeast; if it moves slowly, warm the dough before adding more yeast.
Frequently Asked Questions
Can I Make Focaccia Without a Stand Mixer?
Yes, focaccia does not require a stand mixer because three or four stretch-and-fold sets develop sufficient gluten. A bowl, wet hand, dough scraper, and digital scale are adequate for the 500-gram flour formula.
Can I Use Active Dry Yeast Instead of Instant Yeast?
Yes, use the same weight, 4 grams, but dissolve active dry yeast in part of the recipe water first if the package recommends activation. Instant yeast can be mixed directly with flour, which simplifies the overnight method.
Should Focaccia Dough Double in Size?
Focaccia dough does not need to double during the refrigerated bulk rise. A 50%-100% increase plus visible bubbles is usually enough, while the decisive rise happens during the 2-4-hour pan proof.
Can I Leave Focaccia Dough in the Refrigerator for Two Days?
Yes, dough can generally remain refrigerated for 36-48 hours, although yeast activity, flour strength, and refrigerator temperature affect the result. Use less yeast, about 2-3 grams, for a full 48-hour fermentation to reduce overproofing risk.
Why Does My Focaccia Taste Too Salty?
Excess salt can come from salted toppings, brine, and a heavily salted dough used together. Keep dough salt near 2% of flour weight, or 10 grams per 500 grams flour, then reduce flaky salt when adding olives or cured ingredients.
Can I Make Focaccia in Advance for a Party?
Yes, bake focaccia several hours ahead, cool it completely, and keep it loosely covered at room temperature. Reheat it at 325°F for 5-8 minutes shortly before serving to restore surface crispness without drying the crumb.
The Bottom Line
How to make focaccia reliably comes down to a 75%-80% hydration dough, gradual gluten development, a 12-24-hour cold fermentation, generous pan oil, a fully proofed dough, deep dimpling, and a 425°F-450°F bake. For the most forgiving result, use bread flour, a dark metal pan, and the overnight formula. Watch the dough’s bubbles and jiggle rather than relying on time alone.