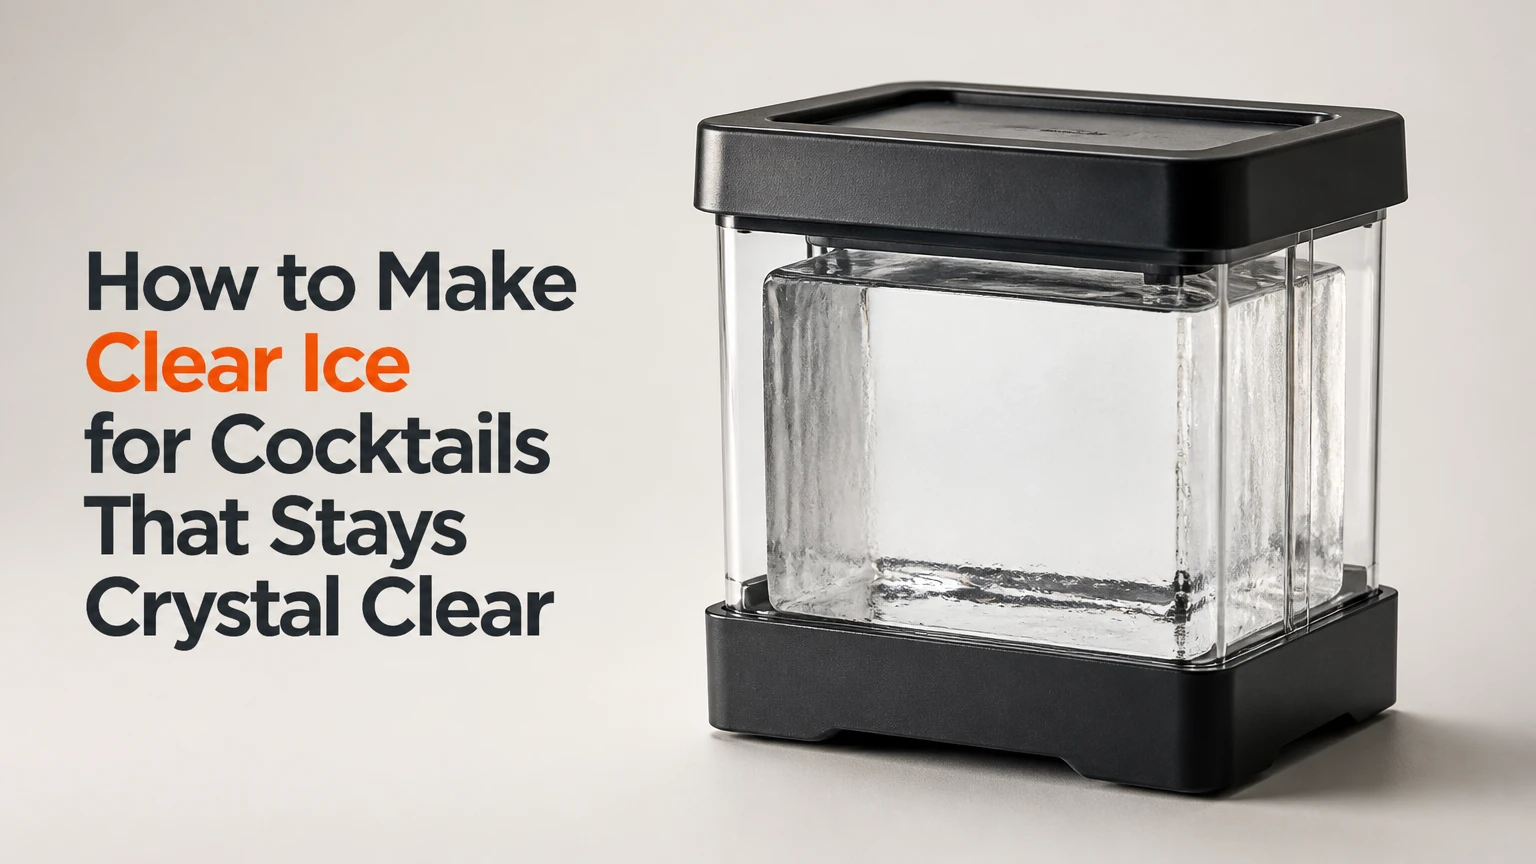
Clear ice for cocktails is made by freezing water directionally, from the exposed top downward, so air and dissolved minerals remain in unfrozen water instead of becoming trapped inside the ice. The most economical home method uses an uncovered insulated cooler, 18-36 hours of freezing, and careful draining, tempering, and cutting.
Key Facts at a Glance
- Directional freezing produces clear ice because the ice front pushes air and dissolved solids toward the last unfrozen water.
- An uncovered 5-quart cooler typically produces a clear slab in 18-30 hours at 0-5°F (-18 to -15°C).
- A 2-inch clear cube weighs more and melts more slowly than several small standard cubes.
- Boiling water or distilled water alone cannot overcome multidirectional freezing in an ordinary ice tray.
- Clear ice must be tempered for about 2-5 minutes before warm liquid touches it.
- The cloudy bottom layer contains concentrated impurities and should be discarded rather than served.
What Is Clear Ice?
Clear ice is transparent cocktail ice with minimal visible bubbles, cracks, and mineral haze. Its clarity comes from crystal growth that excludes most dissolved gases and solids, while its large format reduces surface area relative to volume and therefore slows melting.
Clear ice does not eliminate dilution. Every ice cube eventually adds water to a drink. The practical advantage is control: a dense, large cube chills a spirit-forward cocktail while adding water more gradually than a handful of small, cloudy cubes.
A transparent cube can still contain microscopic imperfections, and cloudy ice can still chill a drink effectively. Clear ice is primarily a visual and dilution-control improvement, not a different chemical form of water. Serious Eats describes directional freezing as the dependable home technique because it controls the direction of crystal growth rather than relying on water purity alone.
Why Does Ordinary Ice Look Cloudy?
Ordinary freezer ice freezes from the tray’s bottom, sides, and top at the same time. The advancing ice crystals reject dissolved air and minerals, forcing them into progressively smaller pockets of liquid. When those pockets freeze, bubbles and concentrated solids scatter light through the center.
The same process explains why a cube may look clear around the perimeter but white in the middle. A household freezer tray has no path for rejected material to leave the freezing zone.
Why Does Directional Freezing Work?
Directional freezing works because an exposed top surface freezes first while insulation slows freezing through the sides and bottom. The advancing ice crystals push dissolved gases and minerals toward the remaining liquid, creating a clear upper section and a concentrated cloudy section at the end of the freeze.
The process is similar to a moving filter. As the ice front travels downward, the crystal lattice incorporates water molecules while excluding many impurities. The rejected material gathers in the last liquid pocket, which can be drained or cut away.
A cooler with its lid removed provides the needed temperature gradient. Cold air contacts the water from above, while the insulated walls and base reduce competing freezing fronts. The container does not need boiling water, laboratory-pure water, or a special freezer.
Which Water Should You Use?
Use clean tap water, filtered water, or bottled water that tastes good to you. Water purity can improve flavor and reduce visible residue, but directional freezing determines clarity more strongly than boiling or distillation.
Distilled water contains fewer minerals, yet it can still become cloudy in a standard tray because trapped air and multidirectional freezing remain. Boiling may remove some dissolved gases, but water reabsorbs gas during cooling and pouring. Use distilled water in a directional system only if its flavor suits the cocktail and the equipment manufacturer permits it.
| Water choice | Practical result | Best use | Limitation |
|---|---|---|---|
| Tap water | Clear slab with normal household flavor | Cooler method | Chlorine or mineral taste |
| Carbon-filtered water | Cleaner flavor and fewer deposits | Most home bars | Filter cartridges require replacement |
| Bottled spring water | Variable mineral content | Flavor testing | Mineral profile differs by brand |
| Distilled water | Very low mineral content | Machines with water guidance | Does not guarantee clear ice |
| Boiled and cooled water | Some gas reduction | Flavor experiment | Cannot replace directional freezing |
How to Make Clear Ice for Cocktails
The cooler method is the best starting point for most home bartenders. You need one uncovered 5-quart hard-sided cooler, approximately 3-4 quarts of water, a freezer, a clean cutting board, a serrated knife, protective gloves, and a rubber mallet.
The full process usually takes 18-36 hours, including freezing and tempering. The most important checkpoint is stopping before the entire block freezes, because the final liquid contains the air and minerals that would otherwise become the cloudy core.
Before You Start
| Requirement | Typical specification |
|---|---|
| Container | 5-quart hard-sided cooler, lid removed |
| Water volume | 3-4 quarts, about 75% full |
| Freezer temperature | 0-5°F, or -18 to -15°C |
| Freezing time | 18-30 hours, freezer dependent |
| Cutting tools | Serrated knife, rubber mallet, cutting board |
| Protective equipment | Cut-resistant gloves and eye protection |
| Finished cube | About 2 x 2 x 2 inches |
| Typical cost | $15-$40 for the cooler and basic tools |
Step 1: Prepare an Open Cooler
Remove the cooler lid and wash the interior with unscented dish soap. Rinse thoroughly so detergent cannot transfer to the ice.
Place the cooler on a level freezer shelf with space above it. Keep the top fully exposed to circulating freezer air. Do not cover the container with its original lid, plastic wrap, or a towel, because covering the top weakens the top-down temperature gradient.
You will know this step worked when the cooler sits flat and the water surface remains directly exposed. A tilted cooler produces uneven slab thickness and can make the cloudy boundary harder to remove.
Step 2: Fill the Cooler
Add clean water until the cooler is roughly three-quarters full. For a 5-quart cooler, 3-4 quarts is a practical range that leaves room for expansion and produces a manageable block.
Pour slowly to limit surface bubbles. Water temperature is less important than the freezing geometry. Warm water can sometimes freeze sooner through the Mpemba effect under particular conditions, but the result is inconsistent in household freezers, so room-temperature water is the reliable default.
The fill checkpoint is simple: the water should sit below the rim, with no floating debris or detergent scent. Overfilling makes extraction difficult and can deform the cooler.
Step 3: Freeze From the Top Down
Put the uncovered cooler into the freezer and leave it undisturbed for 18-30 hours. The exact time depends on water depth, freezer temperature, cooler insulation, and how often the freezer door opens.
Begin checking at 18 hours if the cooler is shallow or the freezer runs cold. Continue toward 30-36 hours for a deeper container or a crowded freezer. You want a solid clear section above a small pool of liquid, not a completely frozen block.
The success checkpoint is visible through the cooler after removal: most of the slab should be transparent, while the bottom may contain liquid or a white, opaque layer. If every part is frozen, the impurity-rich water has frozen in place and the block needs trimming.
Step 4: Remove and Temper the Slab
Take the cooler from the freezer and place it in a clean sink or on a stable cutting board. Let the container sit for 15-30 minutes, then invert it gently. Do not strike or pry aggressively while the slab remains tightly frozen to the walls.
After extraction, allow the slab to temper for 2-5 minutes before cutting. The surface should appear wet and glass-like rather than frosted. Tempering reduces the temperature difference between the ice surface and its interior, lowering the chance of fractures.
You will know the slab is ready when a knife can score the surface without immediately producing a network of cracks. A common mistake is carving directly from a deep freezer. Cold, stressed ice can shatter unpredictably.
Step 5: Drain and Remove the Cloudy Layer
If liquid remains at the bottom, pour it away. If the bottom has frozen cloudy, identify the boundary between transparent and opaque ice and remove the lower section.
Do not serve the rejected water simply because it is frozen. It may taste stronger in minerals, freezer odors, or chlorine than the original water. It also contains the bubbles and concentrated solids that directional freezing moved away from the clear section.
The slab is ready for cutting when the unwanted layer is separated and the clear section has no large internal cracks. A thin cloudy edge can be shaved away later.
Step 6: Cut Cocktail-Size Pieces
Score a shallow line across the slab with a serrated knife. The groove should be only a few millimeters deep. Set the knife into the groove and tap the spine of the knife with a rubber mallet until the ice cleaves along the line.
Wear eye protection and keep fingers away from the blade path. Never swing a kitchen knife like a chisel, and never hold the ice in your hand while striking it.
For a rocks drink, cut approximately 2-inch cubes. For a Collins or other tall drink, cut a spear around 1.25 x 1.25 x 5 inches. The success checkpoint is a clean fracture following the scored line rather than a diagonal split through the block.
How Should Clear Ice Be Sized?
Use large cubes for spirit-forward drinks and long spears for narrow highball glasses. A 2-inch cube fits many double old-fashioned glasses, while a 1.25 x 1.25 x 5-inch spear gives a tall drink a long chilling surface with relatively limited exposed area.
| Format | Typical size | Suitable glass | Suitable cocktail |
|---|---|---|---|
| Rocks cube | 2 x 2 x 2 inches | Double old-fashioned | Old Fashioned |
| Large cube | 2.25 x 2.25 x 2.25 inches | Large rocks glass | Whiskey neat with ice |
| Collins spear | 1.25 x 1.25 x 5 inches | Highball or Collins | Tom Collins |
| Clear slab | 3-5 inches thick | Preparation only | Custom cutting |
| Sphere | 2 inches diameter | Round rocks glass | Spirit-forward serves |
Cube size changes dilution because melting occurs at the ice surface. A large cube has less surface area relative to its volume than several small cubes, but the final result also depends on drink temperature, stirring, glass temperature, and cocktail strength.
Which Method Fits Your Freezer?
The cooler method offers the lowest cost and highest output, while insulated silicone molds offer easier portioning with less cutting. Countertop machines reduce freezer-space demands but cost substantially more and usually produce fewer pieces per cycle.
| Method | Typical cost | Batch time | Typical output | Main labor |
|---|---|---|---|---|
| Open cooler | $15-$40 | 18-36 hours | 20-50 cubes after cutting | Drain and cut |
| Insulated mold | $30-$100 | 16-30 hours | 2-10 shaped pieces | Unmold and trim |
| Countertop machine | $300-$600 | 8-12 hours | 4-12 pieces per cycle | Clean and descale |
| Commercial system | $2,000-$6,000+ | 24-48 hours | Dozens to hundreds | Installation and maintenance |
Choose the cooler when freezer space is available and you want custom dimensions or a large supply. Choose an insulated mold when you want predictable spheres or cubes without handling a heavy slab.
Countertop appliances make sense for frequent hosts who lack freezer space. Their purchase price, water treatment requirements, cleaning routine, and low batch output make them inefficient for someone making two cocktails each week.
Is an Insulated Silicone Mold Easier?
An insulated silicone mold is easier for repeatable shapes because the mold defines the final geometry. Fill the mold according to its instructions, keep the overflow reservoir open, and freeze the assembly flat for roughly 24-30 hours.
The silicone cavity must sit correctly inside the insulating sleeve. If the sleeve is incomplete, tilted, or placed against a freezer wall, competing freezing fronts can create cloudy faces or stress lines.
Molds are less suitable for large batches. Many systems produce only two to ten pieces, and silicone can flex during unmolding, causing thin corners to chip. They are convenient, but they do not remove the physics of directional freezing.
What Are the Common Time and Cost Trade-Offs?
A home cooler batch typically costs $15-$40 in equipment and yields more finished ice per dollar than a specialty mold. The hidden cost is freezer capacity, since a 5-quart container occupies a large shelf for roughly one day.
| Situation | Recommended method | Typical upfront cost | Reason |
|---|---|---|---|
| Two drinks weekly | Insulated mold | $30-$60 | Easy, predictable portions |
| Weekly cocktail night | Open cooler | $15-$40 | Higher yield and low cost |
| Apartment freezer | Small insulated mold | $30-$100 | Reduced footprint |
| Frequent entertaining | Large cooler | $25-$50 | Efficient batch production |
| Minimal manual work | Countertop machine | $300-$600 | Automated freezing and shaping |
These figures are typical retail ranges, not fixed prices. Knife, glove, storage, electricity, and replacement-filter costs can raise the total.
Why Does Clear Ice Crack or Shatter?
Clear ice cracks when thermal stress exceeds the strength of the crystal structure. The most common trigger is placing deeply frozen ice into a warm glass and immediately pouring room-temperature liquid over it.
Temper the piece until its surface looks wet and slightly less frosted, usually 2-5 minutes at room temperature. Chill the glass first if possible, and pour the cocktail gently against the side of the cube rather than dropping liquid directly onto one point.
| Problem | Likely cause | Fix |
|---|---|---|
| Cracks on contact | Thermal shock | Temper 2-5 minutes |
| White center | Freeze completed through | Shorten the next batch |
| Cloudy top | Covered cooler or weak airflow | Remove lid and expose top |
| Slab sticks | Insufficient thawing | Wait 15-30 minutes |
| Diagonal breaks | Uneven scoring or cold ice | Score shallow lines after tempering |
| Freezer taste | Unsealed storage | Use airtight freezer bags |
The ice may also crack during cutting because internal stress accumulated during freezing. A crack does not make the ice unsafe, but a fractured cube melts faster and may break apart in the drink.
How Should Clear Ice Be Stored?
Store finished clear ice in airtight freezer bags or lidded containers immediately after cutting. Remove excess air from bags, separate pieces so they do not fuse together, and keep the ice away from uncovered fish, onions, prepared foods, and strongly scented freezer items.
For best flavor, use stored cocktail ice within several weeks. Frozen ice remains physically usable longer, but packaging gradually absorbs odors and surface sublimation can create a dry, cracked exterior.
Do not store clear ice uncovered in a frost-prone freezer. Freezer burn is a quality problem caused by moisture loss and odor exposure, not a sign that the ice has become poisonous.
Can You Make Clear Spheres at Home?
You can make clear spheres with an insulated directional-freezing mold, but ordinary spherical molds usually produce cloudy results. A sphere mold freezes from multiple exposed directions unless its insulation and overflow design create a controlled freezing path.
Spheres often require more freezer height than cubes and may be difficult to remove without warming the silicone. Use a 2-inch sphere for a large rocks glass, and temper it before adding the drink because curved surfaces can fracture under uneven thermal stress.
What Should You Do With the Cloudy Ice?
Use cloudy ice for chilling a shaker, cooling a water bottle, or making drinks where appearance and slow dilution do not matter. Do not waste effort trying to polish a deeply opaque center into premium serving ice.
A cloudy layer is evidence that the freezing batch ran too long or that the container allowed freezing from several sides. It is useful as a diagnostic signal: shorten the next freeze or improve insulation rather than changing water brands repeatedly.
Expert Rules That Prevent Most Failures
- Optimize the freezing direction before optimizing the water. Filtered water in a standard tray usually remains cloudy, while ordinary good-tasting water in an open cooler can become highly transparent.
- Stop the freeze before perfection looks complete. The remaining liquid is where the unwanted material belongs. A fully frozen block often means the best separation window has passed.
- Cut after the surface relaxes. Ice that looks dry and frosted is colder and more stressed than ice that looks wet. The short tempering period improves control more than harder striking.
- Treat clear ice as a flavor ingredient. A transparent cube can still taste of freezer odors, chlorine, or mineral-heavy water. Clarity and flavor quality require separate checks.
Frequently Asked Questions
Does boiling water make clear ice?
Boiling water alone does not reliably make clear ice in a normal tray. Boiling can remove some dissolved gas, but the water later reabsorbs air, and ordinary trays still freeze from several directions. Use directional freezing first; choose filtered or distilled water only to improve flavor or reduce mineral residue.
How long does clear ice take to freeze?
A typical open-cooler batch takes 18-30 hours in a freezer held around 0-5°F (-18 to -15°C). A deeper cooler, crowded freezer, frequent door opening, or warmer setting can extend the process to 36 hours. Check for a remaining liquid pocket before removing the block.
Is distilled water better for cocktail ice?
Distilled water is not automatically better for clarity. Distilled water has fewer minerals, but trapped air and multidirectional freezing can still create cloudiness. Use distilled water when its neutral taste suits the drink and the ice maker allows it; directional freezing remains the main clarity control.
Can clear ice be made without a cooler?
Yes. An insulated silicone directional-freezing mold can produce shaped cubes or spheres without cutting a slab. The mold must insulate the sides and bottom while leaving a controlled top freezing surface. An ordinary silicone tray does not provide the same directional-freezing effect.
How many cocktails does one cooler batch make?
A 5-quart cooler commonly yields about 20-50 finished 2-inch cubes after the cloudy layer and damaged edges are removed. Actual output depends on water depth, slab thickness, cutting waste, and the dimensions of the cooler. A smaller mold yields fewer pieces but less preparation waste.
Is clear ice worth making for every cocktail?
Clear ice is most useful in slow-sipping drinks served over ice, including an Old Fashioned, Manhattan variation, or spirit-forward highball. It offers less benefit in shaken drinks, frozen cocktails, or beverages consumed quickly, where ordinary fresh ice already provides adequate chilling and dilution.
The Bottom Line
To make clear ice for cocktails, fill an uncovered insulated cooler about three-quarters full, freeze it from the top for 18-30 hours, remove the cloudy base, temper the slab, and cut it into serving-size pieces. Use a 2-inch cube for rocks drinks or a 1.25 x 1.25 x 5-inch spear for tall glasses. Directional freezing matters more than boiling or distilled water.