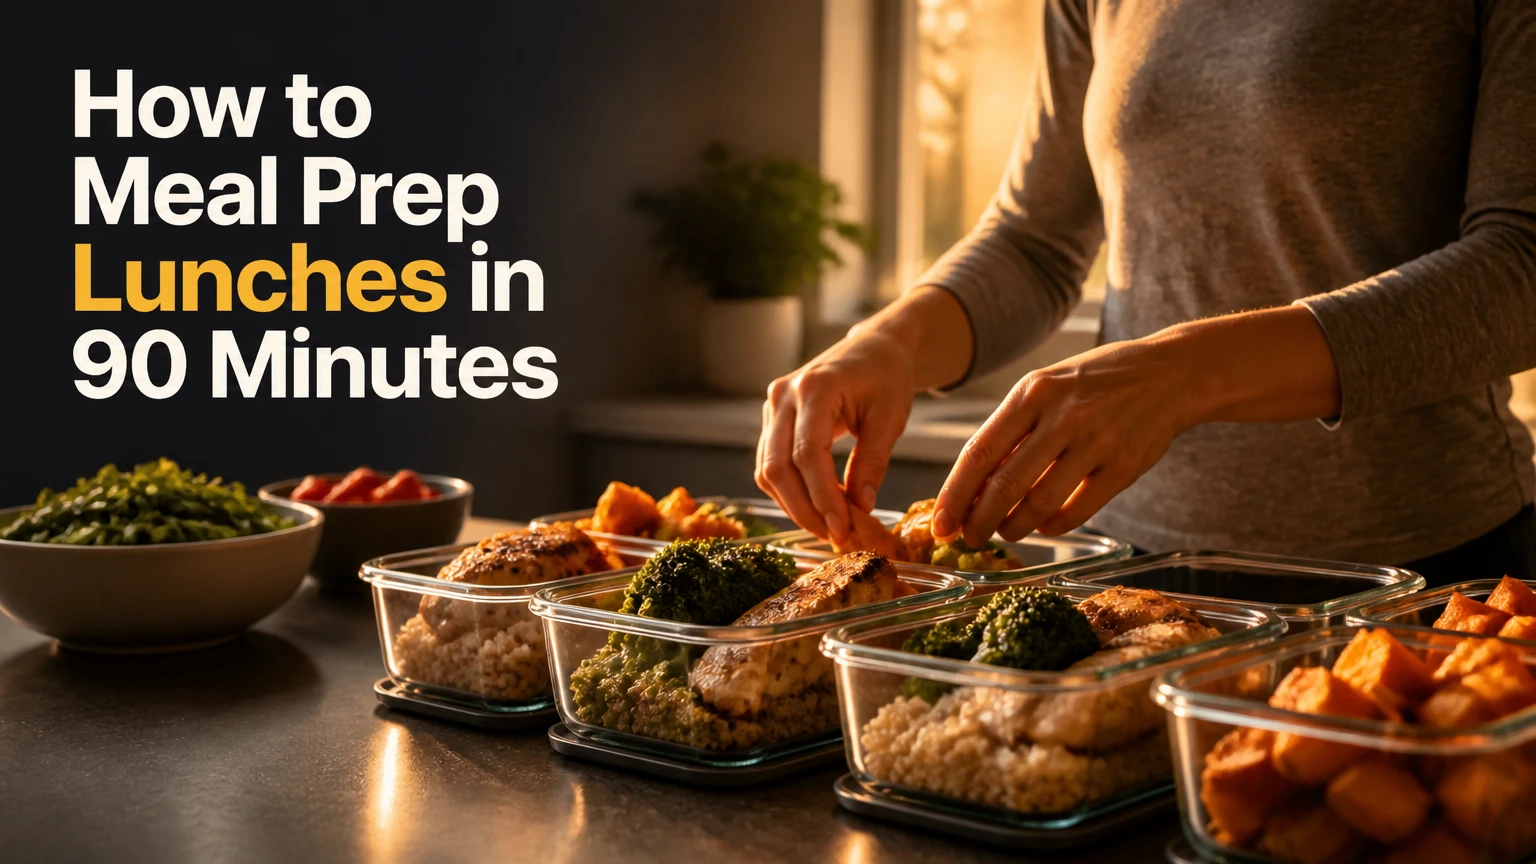
To meal prep lunches, choose one or two recipes, buy ingredients for five portions, batch-cook durable components, divide meals into containers, and refrigerate or freeze them safely. A reliable five-lunch session takes about 75-100 minutes, costs typically $2.50-$5 per serving in the United States, and succeeds when moisture, portions, and storage dates are controlled.
Key Facts at a Glance
- Cooked lunch leftovers generally keep for 3-4 days in a refrigerator at 40°F or below, according to USDA guidance.
- Refrigerate perishable food within 2 hours, or within 1 hour when the surrounding temperature exceeds 90°F.
- Reheat leftovers to 165°F, measuring the thickest or coldest part with a food thermometer.
- Five lunches usually require 25-35 ounces of cooked food per serving, depending on appetite and calorie needs.
- Modular meal prep preserves more variety than eating one fully assembled recipe five days in a row.
- A Sunday-Wednesday split gives better texture and freshness than freezing every meal indiscriminately.
Before You Start
A successful lunch meal-prep session needs a menu, five containers, a refrigerator with available space, and 75-100 minutes of working time. The simplest beginner setup uses one protein, one grain or starchy vegetable, two vegetables, and one sauce packed separately or added after reheating.
Equipment and Typical Quantities
| Item | Practical specification | Quantity for five lunches |
|---|---|---|
| Meal containers | ให้ 24-32-ounce, leak-resistant, microwave-safe | 5 plus 2 spare |
| Protein | Boneless chicken, tofu, turkey, beans, or eggs | 2.5-3.5 pounds raw equivalent |
| Grain or starch | Rice, quinoa, potatoes, pasta, or tortillas | 5-7 cups cooked |
| Vegetables | Fresh, frozen, or roasted vegetables | 8-10 cups prepared |
| Sauce containers | 1-2-ounce leak-resistant cups | 5 |
| Food thermometer | Digital probe accurate to 2°F | 1 |
| Labels | Masking tape or freezer labels | 5-10 |
Glass containers tolerate high heat and resist odors, but they weigh more and can break during commuting. BPA-free plastic is lighter and cheaper; use only containers marked microwave-safe, remove or loosen the lid during reheating, and replace warped containers.
Choose the Meal Architecture
Select fully assembled meals when lunch must require zero decisions. Select modular components when household members have different preferences or when eating the same recipe repeatedly causes fatigue. Cold lunches work best for people without a microwave, while freezer meals help people who cannot cook twice weekly.
How to Meal Prep Lunches: The 6-Step Workflow
The six-step lunch meal-prep workflow is inventory, shopping, setup, batch cooking, portioning, and storage. The highest-leverage decision is not the recipe; it is choosing ingredients that remain safe and appealing for the number of days you need.
Step 1: Plan Five Portions
Plan five lunches around a repeatable formula: 4-6 ounces of cooked protein, 1-1.5 cups of vegetables, ½-1 cup of cooked carbohydrate, and 1-2 tablespoons of sauce or fat per container. Adjust the carbohydrate and fat portions to your energy needs rather than treating those quantities as medical or weight-loss prescriptions.
Start by checking the refrigerator, freezer, and pantry. Use ingredients that need attention first, such as carrots, spinach, cooked grains, or opened yogurt. Choose one main recipe and one flexible component, for example chicken rice bowls plus chickpeas that can become a salad filling.
Write a shopping list by department. For five chicken bowls, a typical list includes 2.5 pounds of chicken thighs, 2 cups dry rice, 2 pounds broccoli, 1 pound carrots, one lemon, yogurt, olive oil, and seasonings.
You will know it worked when: five complete lunches can be named, portioned, and assigned a storage date before shopping.
Common mistake: choosing five unrelated recipes. The approach multiplies chopping, cooking, cleanup, and ingredient waste.
Step 2: Organize the Kitchen
Organize the kitchen before cooking by clearing the counters, emptying the dishwasher, setting out containers, and washing produce. Mise en place reduces task switching because vegetables, proteins, spices, sauces, and storage equipment are ready before heat begins.
Set up three zones: raw ingredients, cooked food, and packaging. Keep raw poultry and its cutting board away from ready-to-eat vegetables. Wash hands after handling raw meat, and sanitize surfaces with hot soapy water followed by an appropriate kitchen disinfectant.
Preheat the oven only after the menu and equipment are ready. Put a large pot, sheet pan, skillet, cutting board, knife, measuring cups, and thermometer within reach.
You will know it worked when: every ingredient has a destination and the five containers can be reached without moving dirty dishes.
Common mistake: chopping vegetables while chicken is already cooking. That timing increases the chance of overcooking protein or contaminating cooked food.
Step 3: Cook Components in Parallel
Cook long-duration ingredients first, then overlap tasks. Start rice, potatoes, beans, or oven-roasted vegetables before preparing the protein; while those cook, mix the sauce and portion cold components.
A practical 90-minute sequence looks like this:
- Heat the oven to 425°F and start 2 cups of dry rice or quinoa.
- Chop 8-10 cups of vegetables and toss them with 2-3 tablespoons of oil.
- Season 2.5-3.5 pounds of chicken, tofu, turkey, or fish.
- Roast vegetables for 20-30 minutes and cook protein to its safe internal temperature.
- Mix a sauce, wash greens, and prepare toppings while the hot components cook.
- Turn off heat, verify the thickest protein pieces with a thermometer, and begin portioning.
Chicken pieces, ground poultry, and leftovers require 165°F under USDA food-safety guidance. Whole cuts of beef, pork, and lamb have different minimum temperatures, so use the USDA chart for the specific food rather than applying one temperature to every protein.
You will know it worked when: the vegetables retain shape, the grain is tender but not wet, and the protein reaches its applicable safe temperature without excessive browning.
Common mistake: cooking all ingredients separately from start to finish. Parallel cooking usually saves 20-30 minutes and reduces the number of pans needed.
Step 4: Portion Food Without Creating Soggy Meals
Portion food into shallow containers soon after cooking, leaving space for air circulation and reheating. Contrary to common meal-prep advice, cooked food does not need to sit at room temperature for 15-20 minutes before refrigeration; USDA guidance favors prompt chilling, and shallow containers cool more quickly.
Use a scale when consistent nutrition matters. A practical five-container division might be 5 ounces cooked chicken, ¾ cup cooked rice, 1.5 cups roasted vegetables, and 1 tablespoon yogurt sauce per lunch. Add crunchy toppings, fresh herbs, avocado, and dressing only when the meal will be eaten.
Keep wet and dry components separated. Put sauce in a 1-ounce cup, place greens above dense ingredients in a jar, and use parchment or a divider between tortillas and moist fillings.
You will know it worked when: no container has standing liquid, each portion looks similar, and the lid closes without compressing vegetables.
Common mistake: sealing steaming food in a deep container. Steam condenses into water, softens grains and greens, and slows cooling.
Step 5: Label, Refrigerate, or Freeze
Label every container with the meal name and preparation date, then refrigerate lunches at 40°F or below. Eat the oldest refrigerated portion first, generally within 3-4 days; freeze later portions when the menu contains ingredients that tolerate freezing.
Divide hot food among shallow containers rather than placing one large, deep pot in the refrigerator. Leave the lid slightly ajar during the initial cooling period if your container design allows it, then seal fully once chilled. Do not leave perishable food out for more than 2 hours, or more than 1 hour above 90°F.
Freeze rice bowls, chili, soups, burrito fillings, cooked beans, and stews successfully. Avoid freezing lettuce, cucumber, mayonnaise-based salads, cream sauces, and high-water vegetables because thawing damages their texture.
You will know it worked when: every lunch has a date, the refrigerator has airflow around containers, and frozen meals are packed flat for rapid freezing.
Common mistake: assuming freezing makes poor packaging safe. Freezing slows microbial growth but does not reverse contamination or repair an unsafe cooling process.
Step 6: Reheat and Finish at Lunch
Reheat leftovers evenly, stirring dense foods halfway through, until the center reaches 165°F. Microwave food covered but vented at 50-70% power for 1-3 minutes, stir, and continue in 30-60-second intervals; high power often dries meat before the center is hot.
Add 1-2 teaspoons of water or broth to rice, pasta, and lean meat before reheating. Keep sauces, herbs, pickles, nuts, and fresh greens separate until serving. Those finishing ingredients provide contrast that batch-cooked food often lacks.
For office lunches, use a microwave-safe container without metal trim and carry food in an insulated bag with at least one frozen ice pack. The FDA recommends keeping cold foods at 40°F or below during transport; a desk drawer is not a substitute for refrigeration.
You will know it worked when: the center is steaming hot, the texture remains moist, and fresh toppings retain their crunch.
Common mistake: reheating a sealed container. Pressure can build inside the container, and an airtight lid can warp or burst.
Which Meal Prep Style Should You Choose?
The best lunch-prep style depends on microwave access, desired variety, freezer space, and how many days separate cooking from eating. Fully assembled meals maximize convenience, while modular prep and separated sauces usually produce better texture.
| Prep style | Typical prep time | Refrigerator life | Best foods | Main limitation |
|---|---|---|---|---|
| Fully assembled | 75-100 minutes for five | 3-4 days | Chili, curry, grain bowls | Repetition and soft textures |
| Modular components | 60-90 minutes | 3-5 days by component | Chicken, grains, vegetables | Assembly takes 3-5 minutes |
| Layered jar salad | 45-70 minutes | 3-4 days | Greens, beans, grains | Requires strict packing order |
| Freezer batch | 90-120 minutes | 2-3 months for quality | Soups, burritos, stews | Thawing and texture changes |
| Semi-prep | 20-40 minutes | 2-4 days | Rotisserie chicken, salad kits | Higher cost and less control |
Fully Assembled Meals
Fully assembled lunches suit commuters who need to grab one container and leave. Chili, lentil curry, turkey meatballs, and roasted chicken bowls retain quality because their components share similar moisture levels.
Fully assembled meals are not ideal for delicate greens, crispy toppings, or people who dislike repetition. Prepare three portions for the refrigerator and freeze two when possible.
Modular Components
Modular preparation separates protein, starch, vegetables, sauce, and toppings. One batch of chicken, quinoa, roasted peppers, hummus, and greens can become a bowl, wrap, salad, or stuffed pita across five lunches.
Modular prep requires a few minutes of assembly, but the extra decision is usually smaller than cooking from scratch. It also supports families with different calorie needs or dietary preferences.
Jar Salads and Cold Lunches
For a jar salad, pack dressing first, followed by hard vegetables, beans or grains, protein, and leafy greens last. Use a 1-quart wide-mouth jar or a 24-ounce container so the meal can be emptied onto a plate without compressing the greens.
Cold lunches work well when an office has no microwave. Good candidates include chickpea pasta salad, hummus wraps, Greek yogurt bowls, peanut soba noodles, and tuna-free bean salads.
Storage, Cost, and Portion Benchmarks
Typical U.S. home-grocery costs range from $2.50-$5 per prepared lunch, although regional prices, organic ingredients, meat choice, and convenience products can move the total substantially. A five-lunch batch therefore commonly costs $12.50-$25, excluding reusable containers and pantry staples.
| Lunch type | Typical cost per portion | Batch quantity | Typical prep time | Storage plan |
|---|---|---|---|---|
| Lentil chili | $2.00-$3.25 | 5 portions | 60-75 minutes | Refrigerate 3, freeze 2 |
| Chicken rice bowl | $3.25-$5.50 | 5 portions | 80-100 minutes | Refrigerate 3-4 |
| Tofu noodle bowl | $2.75-$4.25 | 5 portions | 65-85 minutes | Refrigerate 3 |
| Bean and egg burrito | $2.00-$3.75 | 5 portions | 60-80 minutes | Freeze individually |
| Salmon grain bowl | $5.50-$8.00 | 5 portions | 60-75 minutes | Refrigerate 2-3 |
Use a Sunday-Wednesday split when freshness matters more than minimizing cooking sessions. Cook three lunches on Sunday, then prepare two portions on Wednesday; this is especially useful for fish, leafy greens, cut fruit, and crisp vegetables.
Portion by Goal
Portion size should respond to appetite, activity, and medical guidance. For weight management, increasing non-starchy vegetables and controlling oil, cheese, nuts, and creamy dressings usually reduces calorie density without shrinking the physical volume of lunch.
For higher protein, use 5-7 ounces of cooked chicken, turkey, fish, tempeh, or tofu, or combine legumes with eggs, Greek yogurt, or cheese. People with kidney disease, diabetes, food allergies, or prescribed diets should follow a registered dietitian’s individualized plan rather than generic macro targets.
| Goal | Protein starting point | Produce target | Carbohydrate example | Control point |
|---|---|---|---|---|
| Lower-cost lunch | ¾-1 cup beans or lentils | 1.5-2 cups | ¾ cup rice | Use dried or canned legumes |
| Higher-protein lunch | 5-7 ounces cooked protein | 1-1.5 cups | ½-1 cup grain | Weigh cooked protein |
| Lower energy density | 4-5 ounces lean protein | 2 cups vegetables | ½ cup starch | Measure oil and dressing |
| Endurance-focused lunch | 4-6 ounces protein | 1-1.5 cups | 1-1.5 cups starch | Add fruit or yogurt |
| Vegetarian lunch | 1 cup tofu, beans, or lentils | 1.5 cups | ¾-1 cup grain | Combine complementary foods |
Common Problems and How to Fix Them
Why Do Meal-Prepped Salads Become Soggy?
Meal-prepped salads become soggy when dressing, cut vegetables, and greens share the same wet environment for several days. Keep dressing in a separate 1-2-ounce cup, dry washed greens thoroughly, and place tomatoes or cucumbers in a small compartment.
A paper towel can absorb surface moisture in a greens container, but it cannot rescue vegetables already submerged in dressing. Add delicate ingredients on the morning of eating.
Why Does Chicken Turn Dry?
Chicken turns dry because lean meat loses moisture during both initial cooking and reheating. Choose thighs, shredded chicken, sauced ground turkey, or tofu, cook only to the applicable safe temperature, and reheat covered at reduced microwave power.
Do not deliberately undercook chicken for the microwave. The safe approach is to cook poultry fully during batch preparation, then use moisture and gentler reheating to preserve texture.
Why Does Food Spoil Before Friday?
Food spoils before Friday when preparation occurs too early, cooling is slow, refrigerator temperature is high, or containers are repeatedly opened. Use a refrigerator thermometer, divide food into shallow containers, and freeze Thursday-Friday portions if cooking on Sunday.
The USDA’s “When in doubt, throw it out” rule is more economical than treating questionable food as a test of smell. Pathogenic bacteria may not change a meal’s odor or appearance.
Why Does Frozen Rice Become Hard?
Frozen rice becomes hard when it loses moisture during freezing or reheating. Freeze rice with a spoonful of sauce or broth, remove excess air, thaw overnight in the refrigerator, and reheat covered with 1-2 teaspoons of water.
Freeze portions flat when possible. Flat packages freeze and thaw faster than deep blocks.
What If You Have No Time to Cook?
Use semi-prep: combine a rotisserie chicken, microwaveable brown rice, frozen vegetables, bagged salad greens, and hummus into five lunches in 20-30 minutes. The trade-off is higher sodium, packaging waste, and cost, but the method is more sustainable than abandoning meal preparation after an unrealistic first attempt.
Variations for Different Situations
Beginners
Start with one complete meal for three portions, not five different recipes. A beginner-friendly combination is rotisserie chicken, microwaveable grains, frozen broccoli, salsa, and black beans. The method teaches portioning and storage without requiring raw-meat handling or complex timing.
Office Workers
Choose low-odor meals such as burrito bowls, lentil stew, sesame noodles, or chicken salad wraps. Carry lunch in an insulated bag with an ice pack, store it in a refrigerator on arrival, and use a vented microwave container.
Students and Budget-Focused Cooks
Build around beans, lentils, eggs, oats, rice, potatoes, cabbage, carrots, and frozen vegetables. A pot of lentil chili can provide five lunches for roughly $10-$16 in typical U.S. grocery conditions, depending on toppings and local prices.
Vegetarians
Use two protein sources when the meal needs more staying power, such as lentils with Greek yogurt, tofu with edamame, or black beans with eggs. Press tofu before roasting, keep dairy sauces cold, and freeze bean-based stews rather than raw salad vegetables.
People Without a Microwave
Prepare cold grain salads, hummus wraps, soba noodle bowls, yogurt parfaits, bean salads, and cheese or egg boxes. Use an insulated lunch bag and ice pack, because cold food remains safe through temperature control rather than through the recipe itself.
FAQ
How many lunches should I meal prep at once?
Most people should begin with three lunches and expand to five after testing the recipe’s texture and portion size. Three refrigerated portions fit comfortably within the usual 3-4-day leftover window, while the remaining two can be frozen or prepared during a Wednesday refresh.
Is meal prepping lunches good for weight loss?
Meal prepping can support weight loss by making portions visible, reducing restaurant meals, and limiting impulsive snacks, but it does not guarantee a calorie deficit. Measure calorie-dense ingredients such as oil, cheese, nuts, sauces, and dressings, then prioritize vegetables and a satisfying protein portion.
Can I meal prep sandwiches for the whole week?
Sandwiches can be prepared two to three days ahead when wet fillings are controlled. Keep tomatoes, pickles, sauces, and washed greens separate, toast or barrier-coat the bread when appropriate, and assemble later-week sandwiches the night before rather than on Sunday.
What is the best container size for lunch?
A 24-32-ounce container suits most adult lunches containing protein, vegetables, and a grain. Use 16-20-ounce containers for lighter meals, 32-ounce containers for large salads, and separate 1-2-ounce leak-resistant cups for sauces.
Should I freeze meal-prepped lunches?
Freeze lunches when they will be eaten more than four days after cooking or when the recipe freezes well. Soups, chili, cooked beans, burritos, and stews freeze effectively; lettuce, cucumber, avocado, and creamy sauces generally develop poor texture after thawing.
How often should I meal prep lunches?
Meal prep once weekly when your menu contains durable cooked foods, or twice weekly when it includes fish, leafy greens, fresh fruit, or crisp vegetables. A Sunday-Wednesday schedule balances labor with better freshness and reduces the need to freeze every later-week lunch.
The Bottom Line
How to meal prep lunches effectively is a question of workflow, food safety, and ingredient selection. Plan five portions, batch-cook compatible components, portion food into shallow containers, refrigerate within two hours, freeze meals that will wait beyond four days, and separate sauces or delicate toppings. A 75-100-minute session can produce affordable lunches that remain safe, varied, and practical throughout the work or school week.