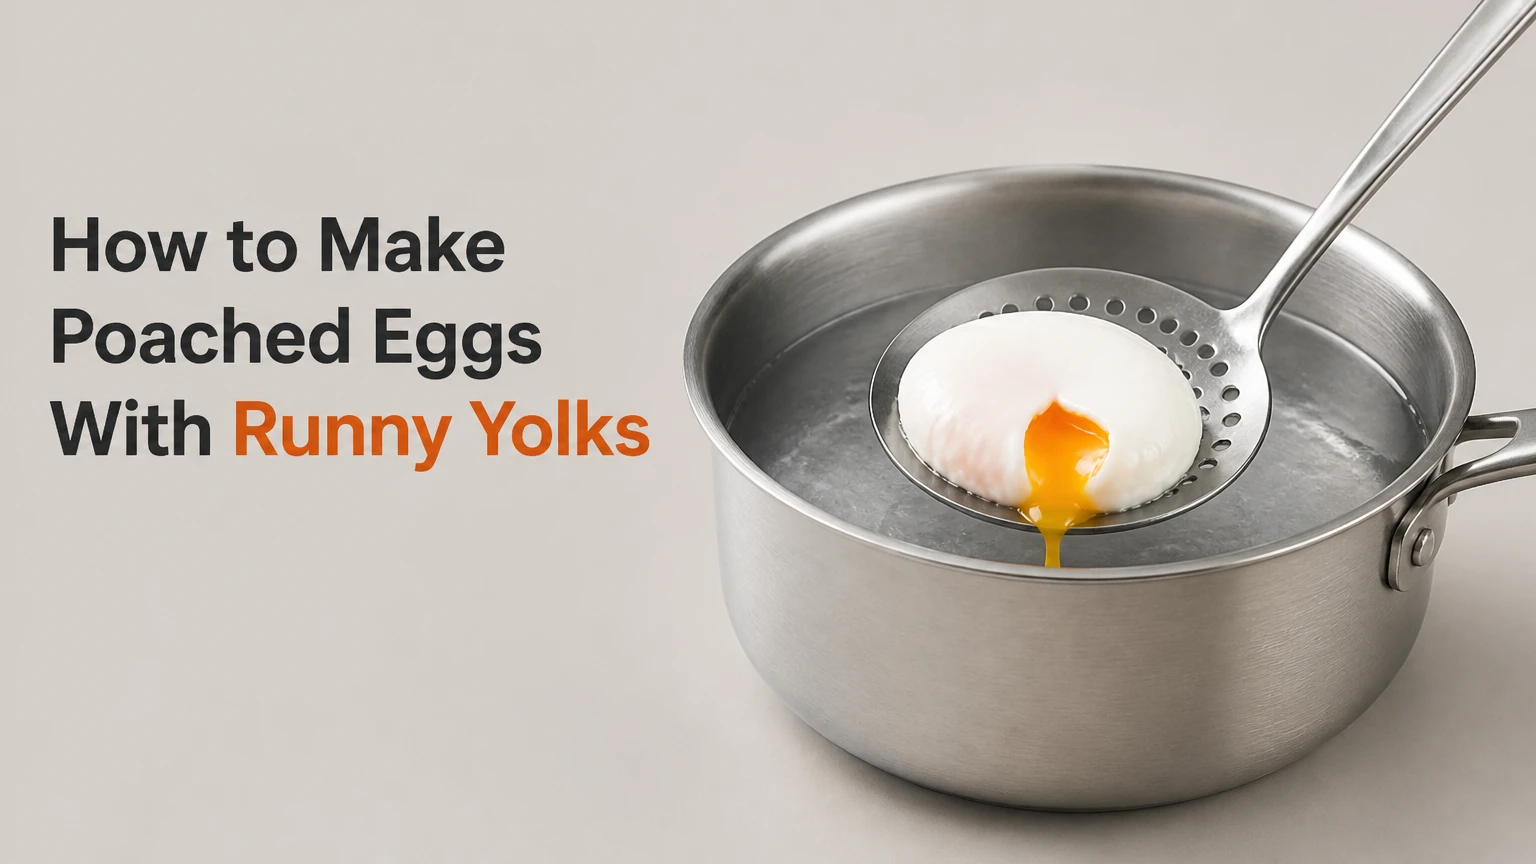
To make poached eggs, crack fresh eggs into barely simmering water, optionally acidified with vinegar, and cook them for 3-4 minutes. Straining loose white first and maintaining water at 77-82°C produces a compact, fully set white around a warm, runny yolk without the rubbery texture caused by boiling.
Key Facts at a Glance
- A poached egg cooks out of its shell in hot water below the boiling point.
- Water at 77-82°C, with only small bubbles and gentle steam, gives the best control.
- Three minutes usually produces a runny yolk; four minutes produces a thicker, custardy yolk.
- Fresh eggs hold their shape better because they contain more firm, thick albumen.
- A fine-mesh sieve removes watery outer white and reduces wispy strands.
- The FDA advises, “Cook eggs until both the yolk and white are firm”; runny poached eggs therefore carry more food-safety risk than fully cooked eggs.
What Is a Poached Egg?
A poached egg is an egg cooked gently out of its shell in water or another liquid held below a full boil. The cooking water sets the albumen into a tender white while the yolk remains liquid, semi-liquid, or firm depending on temperature and time.
Poaching differs from boiling because the shell is removed before cooking. It also differs from frying because the egg receives moist, indirect heat rather than direct contact with a hot pan and fat. The finished egg should have an oval shape, no raw translucent white, and a yolk texture selected by cooking time.
A standard large egg weighs about 50 grams without its shell. One large egg supplies roughly 6 grams of protein and 70-80 calories, although the poaching water adds no fat. Poached eggs work on toast, English muffins, grain bowls, salads, shakshuka, and dishes such as eggs Benedict.
Why Does Temperature Control Poached Egg Texture?
Egg proteins coagulate at different temperatures, so water that is hot enough to set the white can leave the yolk fluid. Egg white begins thickening around 60-65°C, while yolk proteins become substantially firmer around 65-70°C; water around 77-82°C transfers heat gradually without violently breaking the white.
Water does not need to match the egg’s internal temperature to cook it. The surrounding liquid provides a stable heat source, while the egg’s center remains cooler for several minutes. A rolling boil creates turbulent movement and rapid heat transfer, which can shred the white and overcook the yolk.
Vinegar helps because a lower pH makes the outer albumen coagulate faster. Use enough to assist the shape, not enough to flavor the egg. Freshness matters for a separate reason: older eggs have a more alkaline, watery white that spreads rapidly when cracked.
What should poaching water look like?
Poaching water should steam visibly and show tiny bubbles on the bottom or around the pan edge, but the surface should remain mostly calm. If large bubbles rise continuously, reduce the heat. If the water is motionless and no steam appears, increase the heat slightly.
A kitchen thermometer gives the most repeatable result, especially on induction cooktops. Without one, bring the water briefly to a simmer, then reduce heat until the surface calms before adding the egg.
Before You Start
| Requirement | Recommended specification | Typical amount or time |
|---|---|---|
| Water | Deep skillet or saucepan, 8-10 inches wide | 3-4 inches deep |
| Eggs | Fresh large eggs, preferably refrigerated | 1 egg per serving |
| Vinegar | White distilled vinegar, 5% acidity | 1 tablespoon per liter |
| Equipment | Fine-mesh sieve, ramekin, slotted spoon, timer | 1 of each |
| Cooking time | Runny to custardy yolk | 3-4 minutes |
| Total time | Heating, preparation, cooking, draining | 8-10 minutes |
| Typical cost | Large grocery-store egg | $0.25-$0.75 each |
The water depth matters because a shallow pan cannot wrap the egg evenly, while an excessively deep pot makes removal awkward. A wide skillet gives room for two to four eggs, but a small saucepan is easier for one egg and uses less water.
Do not add oil to the water. Oil does not tighten albumen and can leave a greasy film on the finished white.
How to Make Poached Eggs Step by Step
Step 1: Strain the Egg
Crack one fresh egg into a fine-mesh sieve positioned over a small bowl. Let the thin outer white drain for 10-20 seconds, then transfer the remaining egg to a ramekin without breaking the yolk.
The sieve separates loose albumen from the denser white attached to the yolk. This single preparation step often improves shape more than an aggressive whirlpool, particularly when the eggs are several days old.
You will know Step 1 worked when the drained white looks compact and the yolk remains centered in the sieve. The common mistake is swirling too forcefully, which can rupture the yolk or remove too much usable white.
For several eggs, strain each egg into its own ramekin. Individual containers prevent one broken yolk from contaminating the others and let you add eggs at consistent intervals.
Step 2: Heat the Water to a Bare Simmer
Fill a deep skillet or saucepan with 3-4 inches of water and add 1 tablespoon of white vinegar per liter, if desired. Heat until the water reaches 77-82°C, with steam and tiny bubbles but no rolling boil.
The vinegar quantity is a starting point, not a requirement. A teaspoon per liter gives mild assistance with little flavor, while 1 tablespoon per liter provides stronger white-setting action. Apple cider vinegar, rice vinegar, and malt vinegar can work, but each may leave a detectable taste.
You will know Step 2 worked when a thermometer stays between 77°C and 82°C for at least 20 seconds. Without a thermometer, the surface should move gently when the pan is nudged, not churn.
The common mistake is boiling the water before dropping the egg and leaving the heat high. Lower the burner before cooking, because turbulence is the main cause of shredded whites.
Step 3: Choose a Water Movement
For one egg, stir the water gently in one direction to create a shallow vortex. For two or more eggs, leave the water mostly still and place each egg into a separate calm area.
A vortex can wrap one egg’s white around its yolk, but it cannot reliably organize four eggs in the same center. Strong stirring also pulls the egg downward and can produce a thin, uneven white. A sieve is more dependable than a dramatic whirlpool.
You will know Step 3 worked when the center rotates slowly and the water does not form a deep funnel. The common mistake is stirring quickly enough to expose the bottom of the pan.
Step 4: Lower the Egg Into the Water
Hold the ramekin close to the water, tip it gradually, and slide the egg into the center of the gentle vortex or into a calm section of the pan. Keep the ramekin’s rim near the surface so the egg travels only a short distance.
A short drop protects the yolk and keeps the white from dispersing. Do not pour from high above the pan, because the impact can split the egg. Add multiple eggs 20-30 seconds apart so each egg has room to set before the next enters.
You will know Step 4 worked when the white begins turning opaque within 15-30 seconds and remains gathered around the yolk. The common mistake is pushing the egg underwater with a spoon, which can deform the white and rupture the yolk.
Step 5: Cook for the Desired Yolk Texture
Cook the egg for 3 minutes for a liquid yolk, 3 minutes 30 seconds for a thickly flowing yolk, or 4 minutes for a custardy center. Keep the water at 77-82°C and avoid stirring once the egg enters.
| Cooking time | White condition | Yolk condition | Best use |
|---|---|---|---|
| 2 minutes 30 seconds | Soft edges, possible translucent patches | Very liquid | Immediate serving only |
| 3 minutes | Mostly firm and tender | Fully runny | Toast and eggs Benedict |
| 3 minutes 30 seconds | Firm exterior | Thick, flowing center | Salads and grain bowls |
| 4 minutes | Fully set white | Custardy, partly set yolk | Meal preparation |
| 5 minutes | Firm white with less tenderness | Mostly firm | Diners avoiding liquid yolk |
Timing begins when the egg enters the water, not when the water returns to a simmer. Cold eggs may need approximately 15-30 additional seconds in a large pan, while extra-large eggs may need 30-45 seconds.
You will know Step 5 worked when the white resists gently under a slotted spoon but the center still yields to light pressure. The common mistake is leaving the egg in the hot water while preparing toast, which can change a runny yolk into a firm one.
Step 6: Lift, Drain, and Season
Remove the poached egg with a slotted spoon, hold it above the pan for 5-10 seconds, and blot the spoon’s underside on a paper towel. Season immediately with salt, pepper, paprika, chives, or a small amount of hot sauce.
The paper towel absorbs water trapped beneath the egg without pressing the tender white. A wet egg can dilute toast, hollandaise, or a salad dressing, so draining is part of the cooking process rather than a cosmetic step.
You will know Step 6 worked when no puddle forms beneath the egg on the plate. The common mistake is draining the egg directly on a towel for too long, which can make the white stick and tear.
Which Egg and Water Additions Work Best?
Fresh large eggs and a modest amount of white vinegar produce the most consistent stovetop result. Freshness is more important than whether the eggs are labeled free-range, organic, brown, or white, because shell color and production label do not determine albumen strength.
Place an egg in a bowl of water to estimate age. A very fresh egg lies flat, an older but usually usable egg stands more upright, and a floating egg is best discarded after checking for spoilage concerns. The water test indicates air-cell size, not guaranteed safety.
| Choice | Recommended value | Effect on poaching | Practical decision |
|---|---|---|---|
| Egg size | Large, about 50 g shelled | Predictable 3-4 minute timing | Best default |
| Egg freshness | Ideally within 1 week of purchase | Thicker white, tighter shape | Most useful upgrade |
| White vinegar | 1 teaspoon-1 tablespoon per liter | Faster outer-white setting | Use for older eggs |
| Salt in water | 0-1 teaspoon per liter | Minimal shaping benefit | Season after cooking |
| Lemon juice | 1-2 teaspoons per liter | Acidifies water, adds aroma | Use only with compatible dishes |
| Oil | 0 tablespoons | Does not tighten white | Avoid |
Salt is better added after poaching because salted water does not solve the main structural problem and can make the cooking liquid taste unpleasant. Vinegar cannot compensate for boiling water or an egg that has already lost most of its thick white.
Which Poaching Method Should You Choose?
Traditional stovetop poaching with a sieve is the best default for one to four eggs because it offers direct control over shape, yolk texture, and cooking time. Silicone cups are easier for beginners, while microwave and sous vide methods solve specific capacity or convenience problems but change the texture and risk profile.
| Method | Capacity | Typical time | Texture and shape | Main limitation |
|---|---|---|---|---|
| Sieve plus vortex | 1 egg | 3-4 minutes | Compact oval, runny yolk | Requires active timing |
| Calm-water pan | 2-4 eggs | 4-5 minutes | Natural oval, slightly wider white | Less precise shaping |
| Silicone pod | 2-6 pods | 5-8 minutes | Flat bottom, firm outer white | Egg contacts container |
| Microwave mug | 1 egg | 45-75 seconds | Variable, sometimes uneven | Explosion and overcooking risk |
| Sous vide in shell | 6-24 eggs | 45-60 minutes | Consistent soft egg | Specialized equipment |
Silicone pods are useful when presentation is secondary and several eggs must be cooked without a vortex. Microwave poaching is fastest, but the egg must be submerged in water, covered loosely, pierced only when appropriate for the device instructions, and checked in short intervals because microwave power varies.
Sous vide eggs are generally cooked in their shells at a controlled temperature, often around 63-75°C depending on the desired white and yolk texture. That result is closer to a precise soft-cooked egg than a classic free-form poached egg, so it is useful for batch consistency rather than traditional shape.
Can you poach eggs without vinegar?
Yes, poached eggs can be made without vinegar when the eggs are fresh and the water is calm. Vinegar improves the odds of a compact white, but it is optional; careful temperature control and straining are more important.
Without acid, use a sieve and avoid a hard vortex. If the finished egg has a faint vinegar taste, rinse it in warm plain water for 2-3 seconds, then drain it thoroughly.
How Do You Poach Several Eggs for a Crowd?
For a crowd, poach eggs for about 3 minutes, transfer them to ice water, refrigerate them submerged in fresh cold water, and reheat them in 77-82°C water for 30-60 seconds before serving. This method separates cooking from service and prevents last-minute timing errors.
Prepare eggs no more than one day ahead. Use a wide pan for the initial batch and avoid crowding, because eggs touching each other cook unevenly and are harder to remove intact.
| Batch size | Pan recommendation | Initial cooking | Reheat time |
|---|---|---|---|
| 1-2 eggs | 8-inch saucepan | 3-4 minutes | 30 seconds |
| 3-4 eggs | 10-inch skillet | 3-4 minutes | 30-45 seconds |
| 5-8 eggs | 12-inch skillet, two batches | 3 minutes | 45-60 seconds |
| 9-24 eggs | Commercial shallow pans | 3 minutes | 60 seconds |
Cool the eggs immediately after the initial cook. Ice water stops carryover cooking, but it does not sterilize the eggs. Keep them refrigerated at 4°C or below and discard eggs that have remained warm for extended periods.
The FDA’s stricter safety position is important here: “Cook eggs until both the yolk and white are firm.” A runny yolk is a deliberate texture choice, not a risk-free preparation. Pregnant people, young children, older adults, and anyone immunocompromised should follow medical and local food-safety guidance and generally choose fully set eggs.
Why Did My Poached Egg Fall Apart?
A poached egg usually falls apart because the water is boiling, the egg is old, or the egg was dropped from too high above the pan. Straining the loose white and lowering the water to a gentle simmer corrects most failures on the next attempt.
| Problem | Likely cause | Immediate fix | Prevention |
|---|---|---|---|
| Wispy white strands | Old egg or turbulent water | Scoop loose strands away | Use sieve and 77-82°C water |
| Yolk breaks | High drop or damaged yolk | Start again with a new egg | Slide from a low ramekin |
| Hard yolk | Excess time or heat | Use as a salad topping | Set a 3-4 minute timer |
| Raw white center | Water too cool or egg too large | Return for 30-60 seconds | Hold a steady simmer |
| Vinegar flavor | Excess acid or poor draining | Rinse in warm water | Use 1 teaspoon-1 tablespoon per liter |
| Flat, spreading egg | No vortex with weak albumen | Trim loose edges after cooking | Buy fresher eggs |
A watery white is not always a technique error. Egg whites weaken as eggs age, so an older egg can scatter even in correctly heated water. The sieve method removes the most problematic portion before it reaches the pan.
If the white is fully cooked but ragged, trim the loose edges with a spoon after lifting the egg. Do not try to repair the shape underwater, where additional handling can tear the set albumen.
What Changes for Cold Eggs, Altitude, and Induction?
Cold eggs can be poached directly from the refrigerator, but they may require 15-45 extra seconds depending on size and pan volume. High altitude changes the boiling point, while induction cooktops respond rapidly, so visual water control and a thermometer become more useful than fixed burner settings.
At higher elevations, water boils below 100°C, but poaching does not require boiling. Maintain the same 77-82°C target if possible and extend cooking only when the white remains translucent after four minutes.
Induction burners can overshoot when set too high, then cool rapidly when reduced. Preheat the water gently and select the lowest setting that maintains small bubbles. Gas burners usually provide slower but more forgiving changes.
Frozen or previously cracked eggs are poor candidates for classic poaching because the white structure changes and the egg cannot be transferred cleanly. If only older eggs are available, strain them, use a small amount of vinegar, and cook in calm water.
Is a Poached Egg Better Than Fried or Boiled?
A poached egg is preferable when you want a tender white and runny yolk without added cooking fat, while a fried egg is better for browned edges and a boiled egg is better for portability. Nutrition is broadly similar when the same egg is used, but preparation changes added fat and texture.
| Preparation | Typical cooking medium | Cooking time | Texture | Best use |
|---|---|---|---|---|
| Poached | Water, 77-82°C | 3-4 minutes | Tender white, runny yolk | Toast, Benedict |
| Fried | Oil or butter, medium pan | 3-5 minutes | Browned edges, soft yolk | Breakfast plates |
| Soft-boiled | Shell, simmering water | 6-7 minutes | Set outer white, liquid yolk | Soldiers, bowls |
| Hard-boiled | Shell, simmering water | 10-12 minutes | Firm white and yolk | Meal prep, salads |
Poaching removes the need for butter or oil, but hollandaise, bacon, cheese, and toast can add substantially more energy than the egg itself. The method is therefore useful for controlling added fat, not a guarantee that the entire dish will be light.
Expert Rules That Improve Results
Freshness improves shape more reliably than a stronger vortex. Many home cooks compensate for old eggs by stirring harder, but turbulence damages the white faster than it repairs the structure.
Timing should begin at immersion, not at the moment the water reaches temperature again. A cold egg temporarily lowers the pan temperature, yet its proteins continue receiving heat; waiting to start the timer can add 30-60 seconds unnoticed.
A slotted spoon should be used as a support, not a press. Pressing the egg against the pan or spoon forces water through the white and can rupture a yolk that was otherwise perfectly cooked.
For presentation, place the egg on a warm plate rather than directly onto wet toast. A dry base preserves the white’s shape and keeps the yolk from sliding before the dish reaches the table.
Frequently Asked Questions
How long can poached eggs stay in the refrigerator?
Properly cooled poached eggs can be refrigerated for up to one day for best texture. Store them submerged in a covered container of cold water at 4°C or below, then reheat them in hot, nonboiling water for 30-60 seconds. Discard eggs left at room temperature for more than two hours.
Can you poach an egg in broth instead of water?
Yes, broth can replace water, but its salt and fat may slightly change the surface texture and flavor. Use a clear, gently heated broth at 77-82°C, then remove the egg carefully because colored broth makes loose white strands harder to see.
Why are my poached eggs watery after cooking?
Poached eggs become watery when they are not drained long enough or when the white absorbs cooking liquid through loose edges. Hold the egg on a slotted spoon for 5-10 seconds and blot beneath it before plating. Straining the egg before cooking reduces excess water further.
Can you poach eggs in advance for eggs Benedict?
Yes, advance poaching is well suited to eggs Benedict. Cook the eggs for about 3 minutes, chill them immediately in ice water, refrigerate them for up to one day, and reheat them in 77-82°C water for 30-60 seconds while preparing the English muffins and hollandaise.
Are microwave-poached eggs safe?
Microwave-poached eggs require caution because steam can build pressure and uneven heating can leave cold or overcooked areas. Use a microwave-safe mug filled with water, cover it loosely, heat in short intervals, and let the egg stand briefly before removing it. Avoid sealed containers.
How do you make a poached egg fully cooked?
Cook the egg until both the white and yolk are firm, usually 5-7 minutes in gently simmering water depending on egg size and starting temperature. A food thermometer reading of 71°C in the center provides a practical safety target, although the yolk will no longer be runny.
The Bottom Line
To make poached eggs consistently, strain a fresh large egg, heat 3-4 inches of water to 77-82°C, add a small amount of vinegar if needed, and cook for 3-4 minutes. Use a gentle vortex for one egg, calm water for several eggs, and a timer from immersion to removal. For food safety, choose fully set yolks when serving vulnerable people.